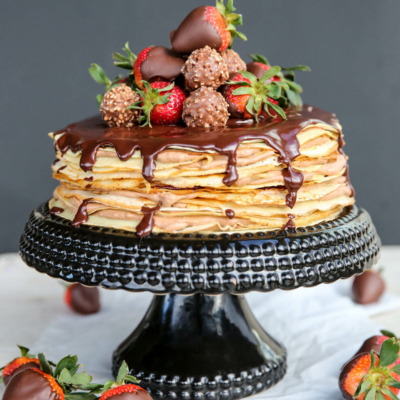
When it comes to holiday goodie-giving, you’ve got the go-to regulars, like fudge and sugar cookies, and you’ve got the last-minute, like store-bought chocolate bars, but sometimes you need something impressive. Something extra special. Something that says, I just ground my own hazelnuts for this stuff, yo. When I was flipping through a recent issue of Bon Appetite and came across something titled “Better-Than-Nutella” I was intrigued. Then I saw the ingredient list and I was sold. This Chocolate-Hazelnut Spread is crazy good, sinfully decadent, and perfectly perfect for gift giving this holiday season. Or for stashing in the back of your fridge for midnight snack binges. Your call.
Ingredients Needed
This is just a preview of ingredients and method, keep scrolling for full printable recipe.
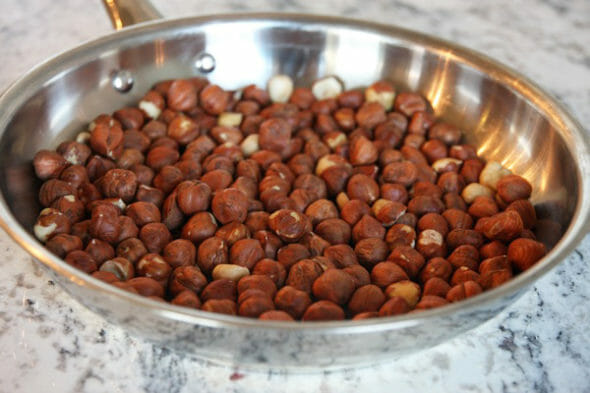
- Hazelnuts – If you can find hazelnuts without skins, buy them! I will not try to fool you by saying it’s no big deal to remove hazelnut skins. It’s actually one of the most annoying things ever. However, the finished product here is so crazy good that it’s worth the labor of love.
**EDIT: Some readers have noted this easy way of skinning the nuts. However, others who have tried it have found that boiling the nuts sometimes removes some of the natural oils and consequently the nuts don’t reach a creamy/buttery stage. So keep that in mind if you try it!
I recommend buying the nuts in a grocery store that sells bulk items- they shouldn’t be too expensive there. You only need 10 ounces and they were less than $5/lb at both stores I shop at. - Powdered sugar – The original recipe calls for granulated sugar, but I found in some of my batches the sugar left a grainy consistency, so I used powdered sugar instead and it was perfect.
- Semisweet chocolate – Chopped chocolate or chocolate chips.
- Butter
- Heavy cream
How to Make Chocolate-Hazelnut Spread
Step 1: Prepare the Hazelnut Butter
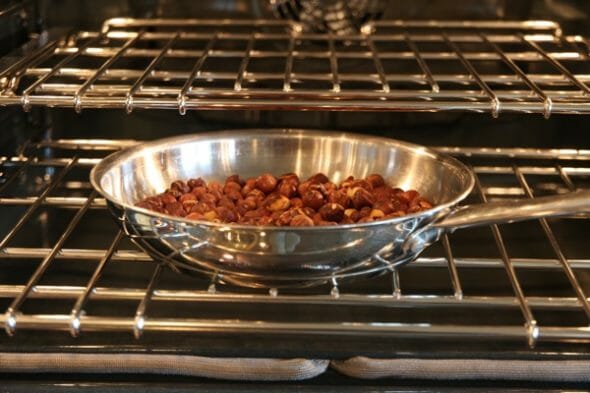
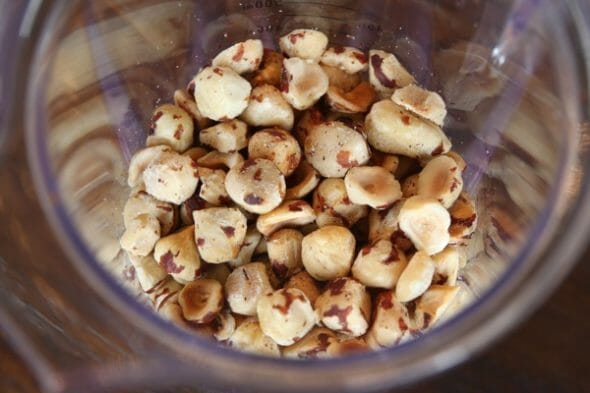
- First thing we’ll do is toast the nuts. Toasting brings out the oils and adds flavor and depth. Place the nuts (skins and all) in a dry skillet or baking pan and bake at 350°F for about 15 minutes. Even if your nuts have skins on them you should be able to see some of the light colored nut so you can tell when they turn toasty brown. After they come out of the oven, let them cool completely.
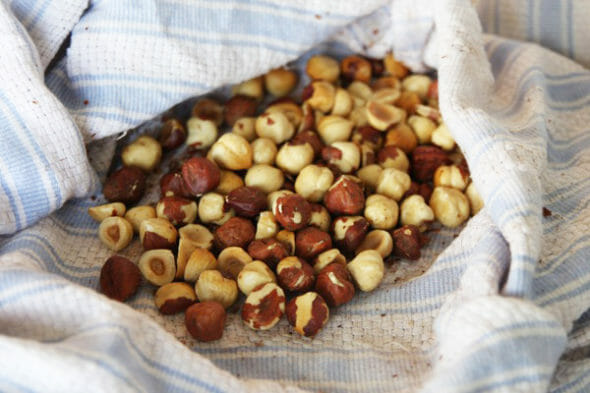
- If your nuts have skins on them like mine, you’ll need to remove as much of them as you can. Put about half at a time in a dish towl and rub them around vigorously. You can kind of make a little pouch out of the town and rub the bundle between your hands. When you open it up you can pick out the ones where the skins fell off easily and rub away at the rest. You might have to do this several times and you may find yourself muttering naughty words under your breath. Keep your eye on the prize, people. (And if you missed the edit above, check out these tips for easier skin removal!)
- Once those are cool, pop them in a food processor, or high-powered blender (like a Blendtec or Vitamix). I used the new twister jar Blendtec has and it worked like a charm. You’ll notice I didn’t remove EVERY last spec of skin from my nuts- that’s nearly impossible. Just get off as much as you can.
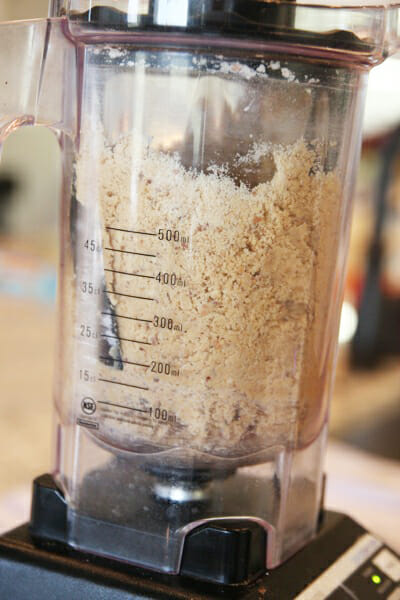
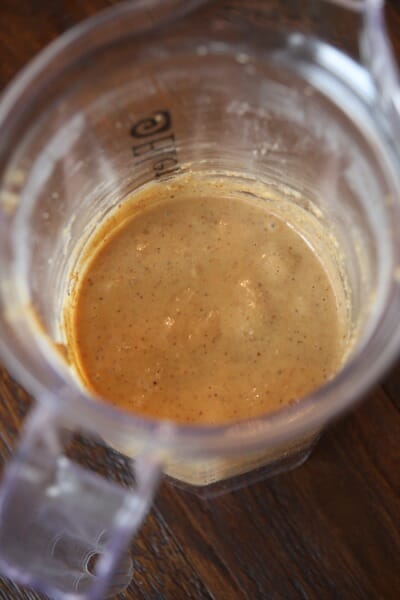
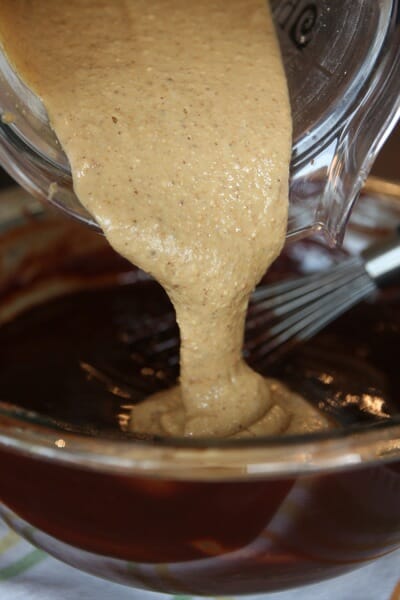
- Blend those nuts up with a little sugar. At first you’ll get a crumbly mixture And the more you blend you’ll get a nice nut-butter consistency. Once you blend that up, set it aside while you melt your chocolate.
Step 2: Make the Chocolate Base
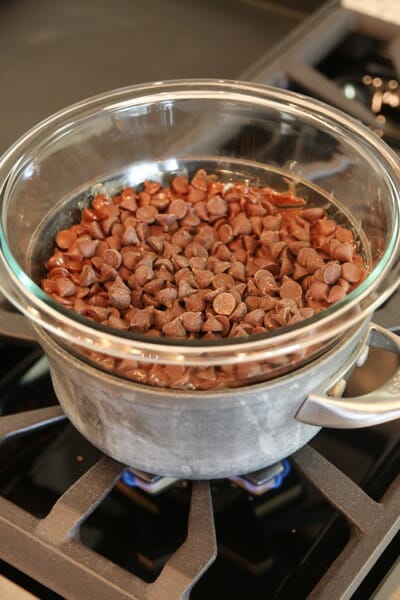
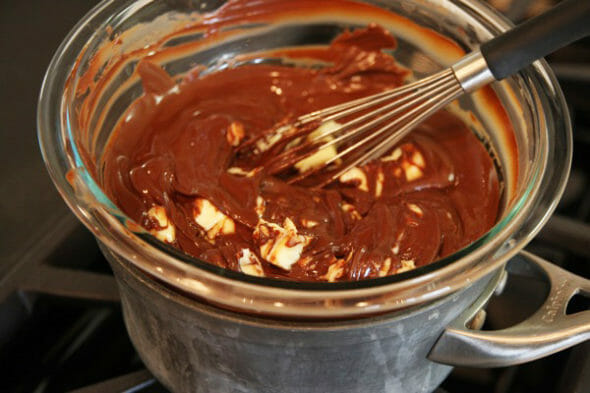
- Place a metal or glass bowl over a pot of simmering water to gently melt the chocolate. If you’re careful, you could melt it in a glass bowl in the microwave as well.
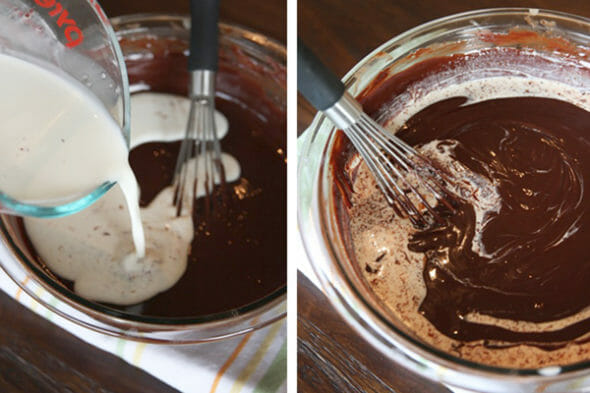
- Remove the pan from heat and whisk in some room temperature butter. If you use unsalted butter you’ll want to add 3/4 teaspoons kosher salt as well. I just use regular salted butter and add no additional salt. Once the butter is whisked and incorporated, you’ll add in a cup of heavy cream.
Step 3: Mix and Bottle For Storage
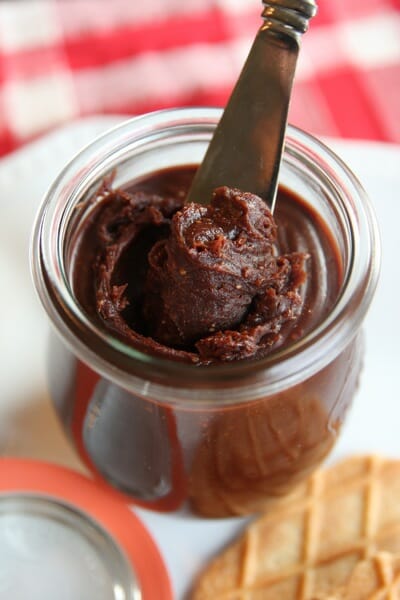
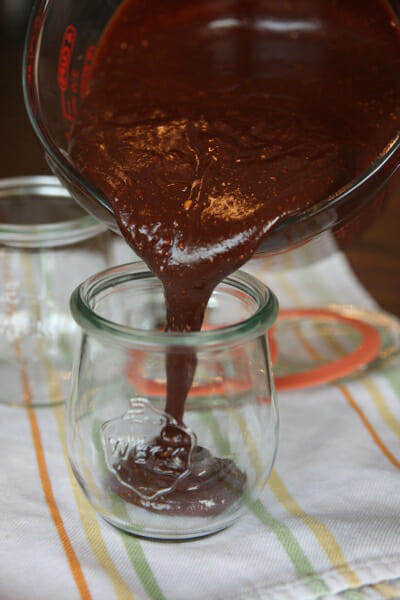
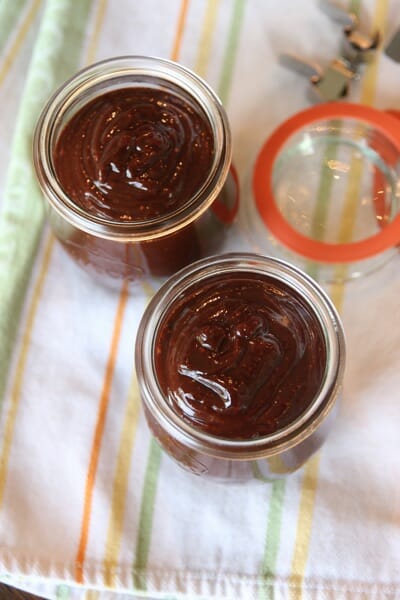
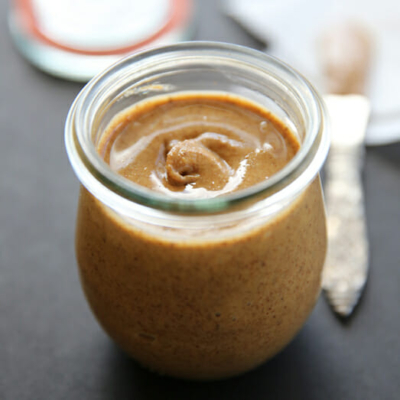
- Add in your nut butter and that’s it. While it’s warm it will be a pourable consistency; pour into jars. This makes about 4 cups, so you can get four 8-oz jars, or 8 4-oz jars. I love Weck Jars and was happy to see them sold at World Market recently.
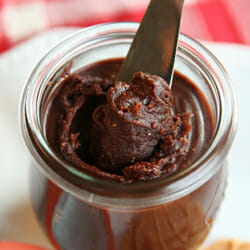
- Once the mixture comes to room temperature it will thicken and have the consistency of peanut butter (or Nutella). This is to be served at room temperature since it will be too hard to spread once it’s chilled. It can stay at room temp for 4 days, but I keep it in the fridge and then bring it to room temp before serving (or warm in microwave very briefly, like 5 seconds). The chocolate is creamy and smooth, but there are small bits from the nuts in there adding awesome texture.
Storing and Other Tips
- Store finished Chocolate-Hazelnut Spread in an airtight container at room temperature and enjoy within 4 days for best results.
- If you’d like to refrigerate your spread, it will likely be good for several weeks, although you will have to warm it briefly in the microwave in order to spread.
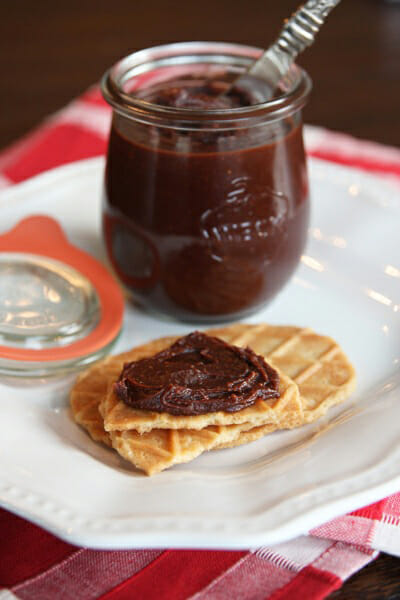
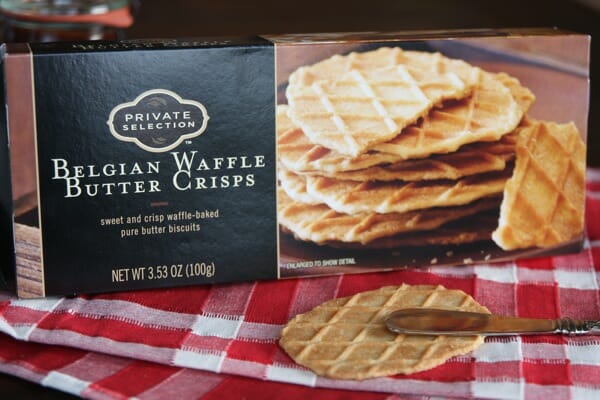
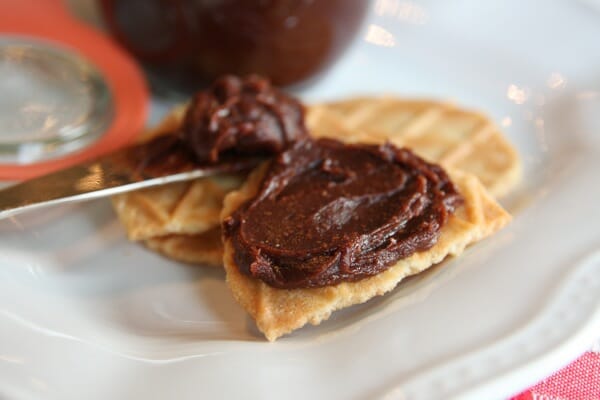
- This is a gloriously decadent and impressive holiday gift. It’s yummy on toast or with dippers like pretzels or graham crackers. If you have a Fred Meyer store (or I believe Kroger sells this label) these little buttery cookies are amaaaazing with this stuff.
Frequently Asked Questions
Absolutely. Because different nut varieties vary in their protein and oil content, the finished product may be more loose or firm than the hazelnut version.
Roasting is definitely recommended. It deepens the flavor and helps the nuts release their natural oils, making the spread smoother.
Yes, it freezes well if used within 3 months. Thaw completely in the refrigerator and then microwave very briefly when ready to use, just enough to stir and restore the texture.
Chocolate-Hazelnut Spread {Homemade Better-Than-Nutella}
Ingredients
- 2 cups heaping hazelnuts, preferably skinned (about 10 ounces)
- ¼ cup powdered sugar
- 1 pound semisweet chocolate coarsely chopped (abt 2 ½ cups chips)
- ½ cup butter cut into 1-inch pieces, room temperature
- 1 cup heavy cream
- jars or containers will fill 4 8-ounce jars
Instructions
- Preheat oven to 350℉. Spread out nuts on a rimmed baking sheet or in an ovenproof skillet. Roast, shaking sheet once for even toasting, until golden brown, 13-15 minutes. Let cool completely. (If nuts have skins, rub them in a kitchen towel to remove, see photos in post for tips.)
- Grind hazelnuts and sugar in a food processor until a fairly smooth, buttery paste forms, about 1 minute. You can use granulated sugar, or I prefer powdered sugar for a creamier consistency.
- Place chocolate in a medium metal or glass bowl. Set bowl over a large saucepan of simmering water; stir often until chocolate is melted and smooth.
- Remove bowl from over saucepan; add butter and whisk until completely incorporated. Whisk in cream, then hazelnut paste.
- Pour mixture into jars, dividing equally. Let cool (you can pop it in the fridge to speed up cooling). Mixture will thicken and become soft and peanut butter-like as it cools. Screw on lids.
Notes
- This can be made up to 4 weeks ahead; keep chilled. Let stand at room temperature for 4 hours to soften. Can stand at room temperature up to 4 days.
- Store finished Chocolate-Hazelnut Spread in an airtight container at room temperature and enjoy within 4 days for best results.
- If you’d like to refrigerate your spread, it will be good for several weeks, although you will have to warm it briefly in the microwave in order to spread.
- This is a gloriously decadent and impressive holiday gift. It’s yummy on toast or with dippers like pretzels or graham crackers.


Questions & Reviews
ohh yummy!How long does it take to make?
Oh my! You make this seems dangerously easy… YUM!
Can you make this sugar free and if you can HOW?
no, ma’am 🙂
Is it better than the real thing?? Just saying. That’s hard to top.
I was skeptical April, but I’m going to say all of my taste-testers agreed it really is better than the real thing. It’s a little different, but it’s straight up butter, cream, chocolate and hazelnuts- it’s hard to go wrong there!
I made this for parents and they loved it 😀 hihi. By the way, just like everyone else, I love those jars too !! too adorable 😀
Yum. That is all.
Oh My Word Yum!!!!! I want some right now!! 🙂
First of all, totally amazing. Definitely making this.
Second of all, would this work with the Nutella Sandwich Cookies y’all posted a couple weeks ago, or do you think the texture might not make it come out quite right? Mmm…
I had a feeling someone would ask that! Honestly, I’m not sure- you never know how things like this would change the outcome in baking. I have a feeling the actual baked cookies might have issues, but what would be awesome is making the dough with a jar of nutella and filling them with this homemade stuff. THAT would be amazing. But let me know if you experiment with it!
I can’t wait to try this – Nutella is one of my faves! This would make great gifts to give to friends 🙂 Love the jars
Really wanting to know where you get those kind of jars from. Do share 🙂
It’s linked in the post! They’re Weck Jars and I bought them at my local World Market store.