We have quite a few out-of-the-box egg decorating ideas here at Our Best Bites: we have these dinosaur eggs and these egg ornaments and, of course, these eggs that are literally dyed in men’s silk ties and kind of took the Internet by storm.
Today I’m sharing a few really quick ideas for Easy Egg Decorating that are simple enough for anyone to tackle!
Ingredients and Supplies Needed
This is just a preview of ingredients and method, keep scrolling for full printable recipe.
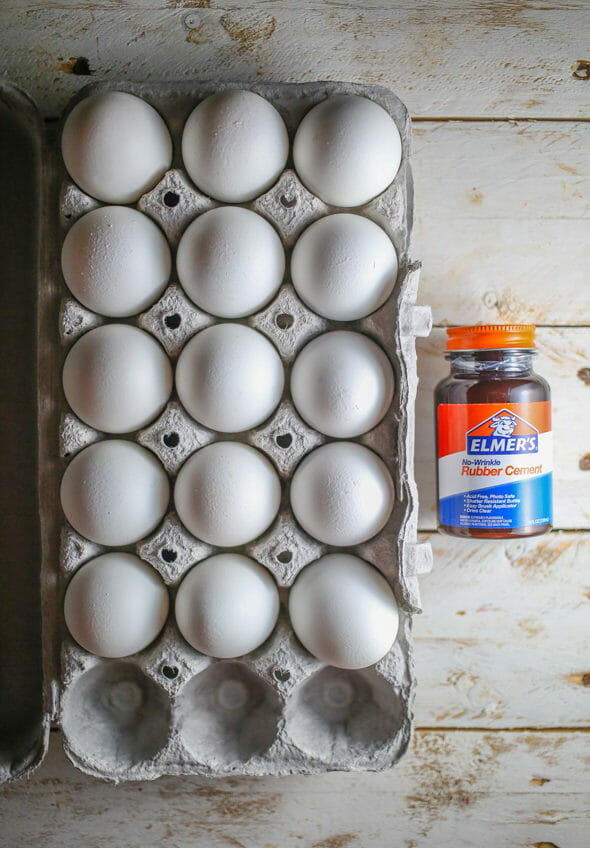
- Hard boiled eggs – I should note that because eggs are porous and because both Sharpies and rubber cement are a little heavy on the fumes, it’s probably not the best idea to eat either of these eggs. Save a few good ol’ fashioned eggs from the toxic chemicals for your edible eggy needs. You could always do this with raw eggs and blow them out as outlined in this Blown Egg Ornament post.
- Rubber cement
- Sharpies – I used metallic ones.
- Egg dyes – Just grab an egg dyeing kit.
How to Do It
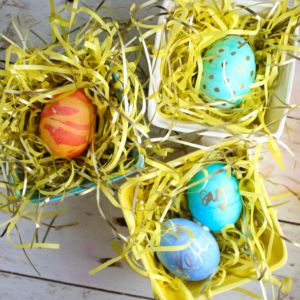
Sharpie Decorated Eggs
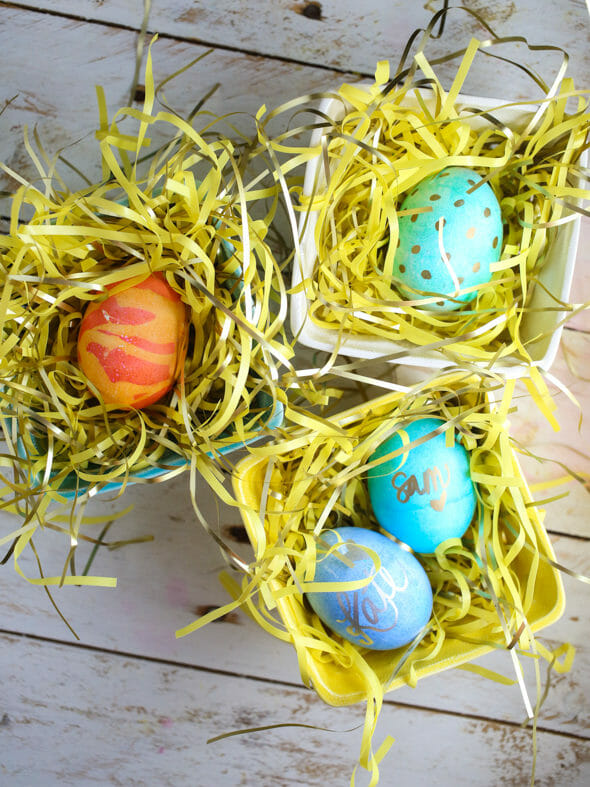
- Now. Simplest ones first. Dye your eggs however you want and then, after they have dried, doodle on your eggs with a metallic Sharpie. I drew dots on this one–thank goodness the whole irregular, hand-drawn thing is super in right now.
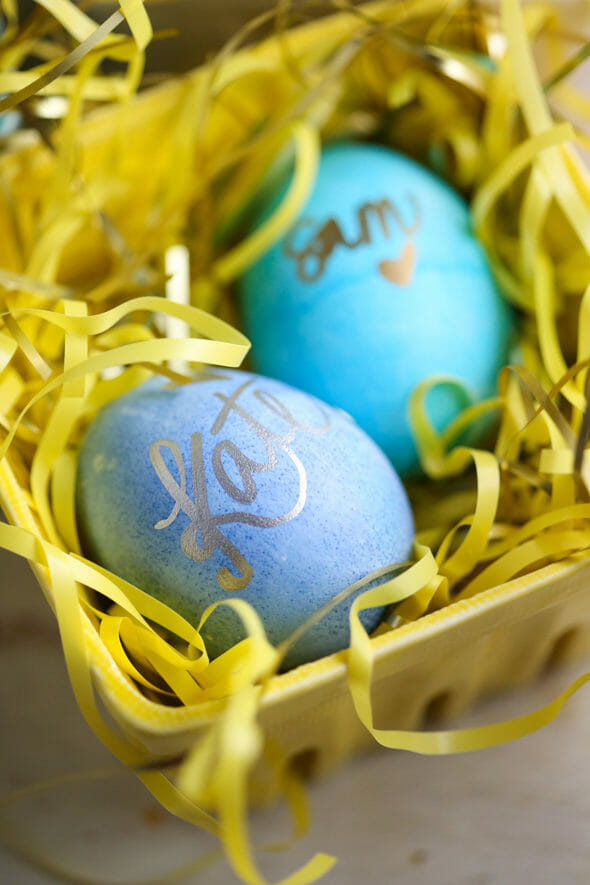
- You can also write names on the eggs, either just for fun or you could even use them as placeholders at Easter dinner.

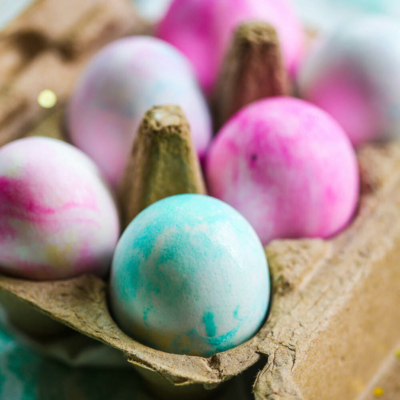
Funky Two-Tone Eggs
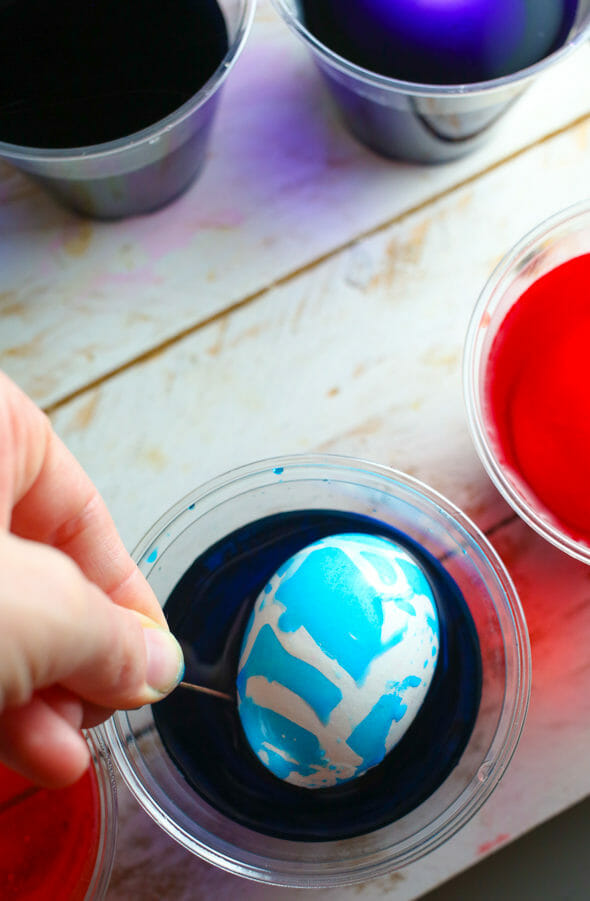
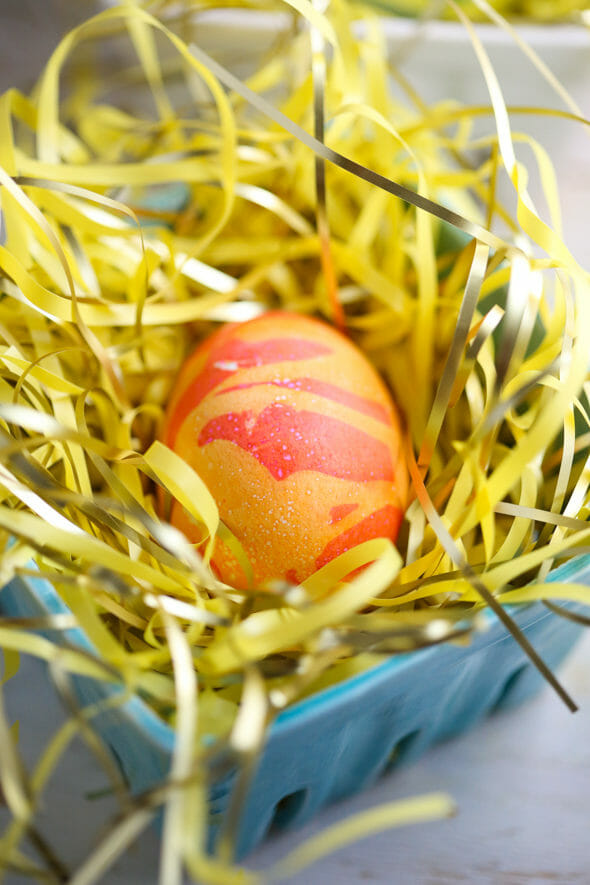
- Now. To make these funky semi-psychedelic eggs (again, be careful with the glue so things don’t get too psychedelic), take your hard-boiled egg and some rubber cement.
- Drizzle the rubber cement over the egg. You can leave one side or end glue-less–it will just look like you planned it that way. I had much better luck, both in terms of aesthetics and in terms of getting the glue off the egg later, when it was drizzled on pretty thick instead of brushed on. Let your eggs chill out for a few minutes, until the glue is pretty dry (if you’re using cold eggs, that will help.)
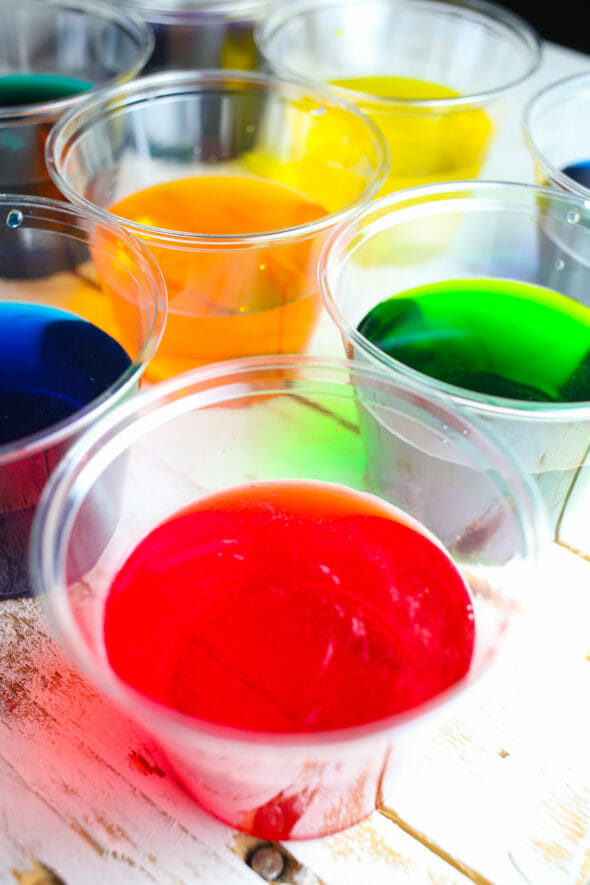
- Choose two coordinating or complementary colors and dunk the egg in the lighter color first. Let it sit there until the desired shade is reached.
- Allow the egg to dry, then peel off the glue (side note–my 5th- and 3rd-graders seem to do a lot more actual school than I did when I was their age because they knew nothing about spreading Elmer’s white glue over their hands and then peeling it off after it dried. Children truly are the future, guys.) Then pop the egg in the darker color for just a few minutes. They’re so cool!

Easy Egg Decorating
A couple of super easy ideas for quick Easter egg decoration.
Equipment
- rubber cement
- egg dye
- sharpies – I used metallic
Ingredients
- hard boiled eggs
Instructions
Sharpie Decorated Eggs
- Now. Simplest ones first. Dye your eggs however you want and then, after they have dried, doodle on your eggs with a metallic Sharpie. I drew dots on this one–thank goodness the whole irregular, hand-drawn thing is super in right now.
- You can also write names on the eggs, either just for fun or you could even use them as placeholders at Easter dinner.
Funky Two-Tone Eggs
- Now. To make these funky semi-psychedelic eggs (again, be careful with the glue so things don’t get too psychedelic), take your hard-boiled egg and some rubber cement.
- Drizzle the rubber cement over the egg. You can leave one side or end glue-less–it will just look like you planned it that way. I had much better luck, both in terms of aesthetics and in terms of getting the glue off the egg later, when it was drizzled on pretty thick instead of brushed on. Let your eggs chill out for a few minutes, until the glue is pretty dry (if you’re using cold eggs, that will help.)
- Choose two coordinating or complementary colors and dunk the egg in the lighter color first. Let it sit there until the desired shade is reached.
- Allow the egg to dry, then peel off the glue (side note–my 5th- and 3rd-graders seem to do a lot more actual school than I did when I was their age because they knew nothing about spreading Elmer’s white glue over their hands and then peeling it off after it dried. Children truly are the future, guys.) Then pop the egg in the darker color for just a few minutes. They’re so cool!
Notes
- If you’d like to, you can decorate raw eggs, and then blow the insides out as outlined in this Blown Egg Ornament post.
- Since the methods here involve Sharpie and glue directly on the porous shell, I don’t recommend eating these hard boiled eggs.
Did You Make This Recipe?Snap a picture, and hashtag it #ourbestbites. We love to see your creations on our Instagram @ourbestbites!


Questions & Reviews
My mom always added a drop of mineral oil to the egg dye. It creates a swirly look similar to the rubber cement eggs, but no peeling or chemicals.
I’m so not crafty in the same way as you! Cute eggs! Thanks for the ideas!
HAHA!! I loved reading this post. I’m still laughing about “getting carded” and not letting things get too psychedelic. After a few years, this is still our favorite site for all things fun!
That makes me so happy!
I also lack the skills (and patience) to turn wood pallets into high-end furniture for my hipster infant, but these are adorable and do-able! 🙂
Hmmm… that comment makes it sound like my infant is indeed a hipster. He is not. He is just a regular infant. Probably bc of my lacking craft skillz.
Literally laughing out loud… 🙂
I have eaten velveta a few times in my life. The chemicals from sharpies pale in comparison. Call me wild, but i’ll eat the sharpie eggs. 🙂
These eggs are so pretty! I’m obsessed!
Paige
When you use multiple colors on one egg, you actually need to dye lightest color to darkest. (Expertise level: someone who did that Ukrainian egg dying thing once)
I can assure you that children still know the “peel the glue off your hand” trick – I caught multiple kiddos doing it last time we had glue out in my classroom!
I have done the silk eggs before and they are gorgeous, but with Easter and report cards coinciding I think these ones are more my speed this year!
There’s a good tutorial in this month’s Food Network Magazine about dyeing eggs with food coloring. Between this post, that article and a snow day, I might actually do some of these this afternoon!
This is so cool! How smart of you to use the glue. I want to go colour some eggs now… 🙂