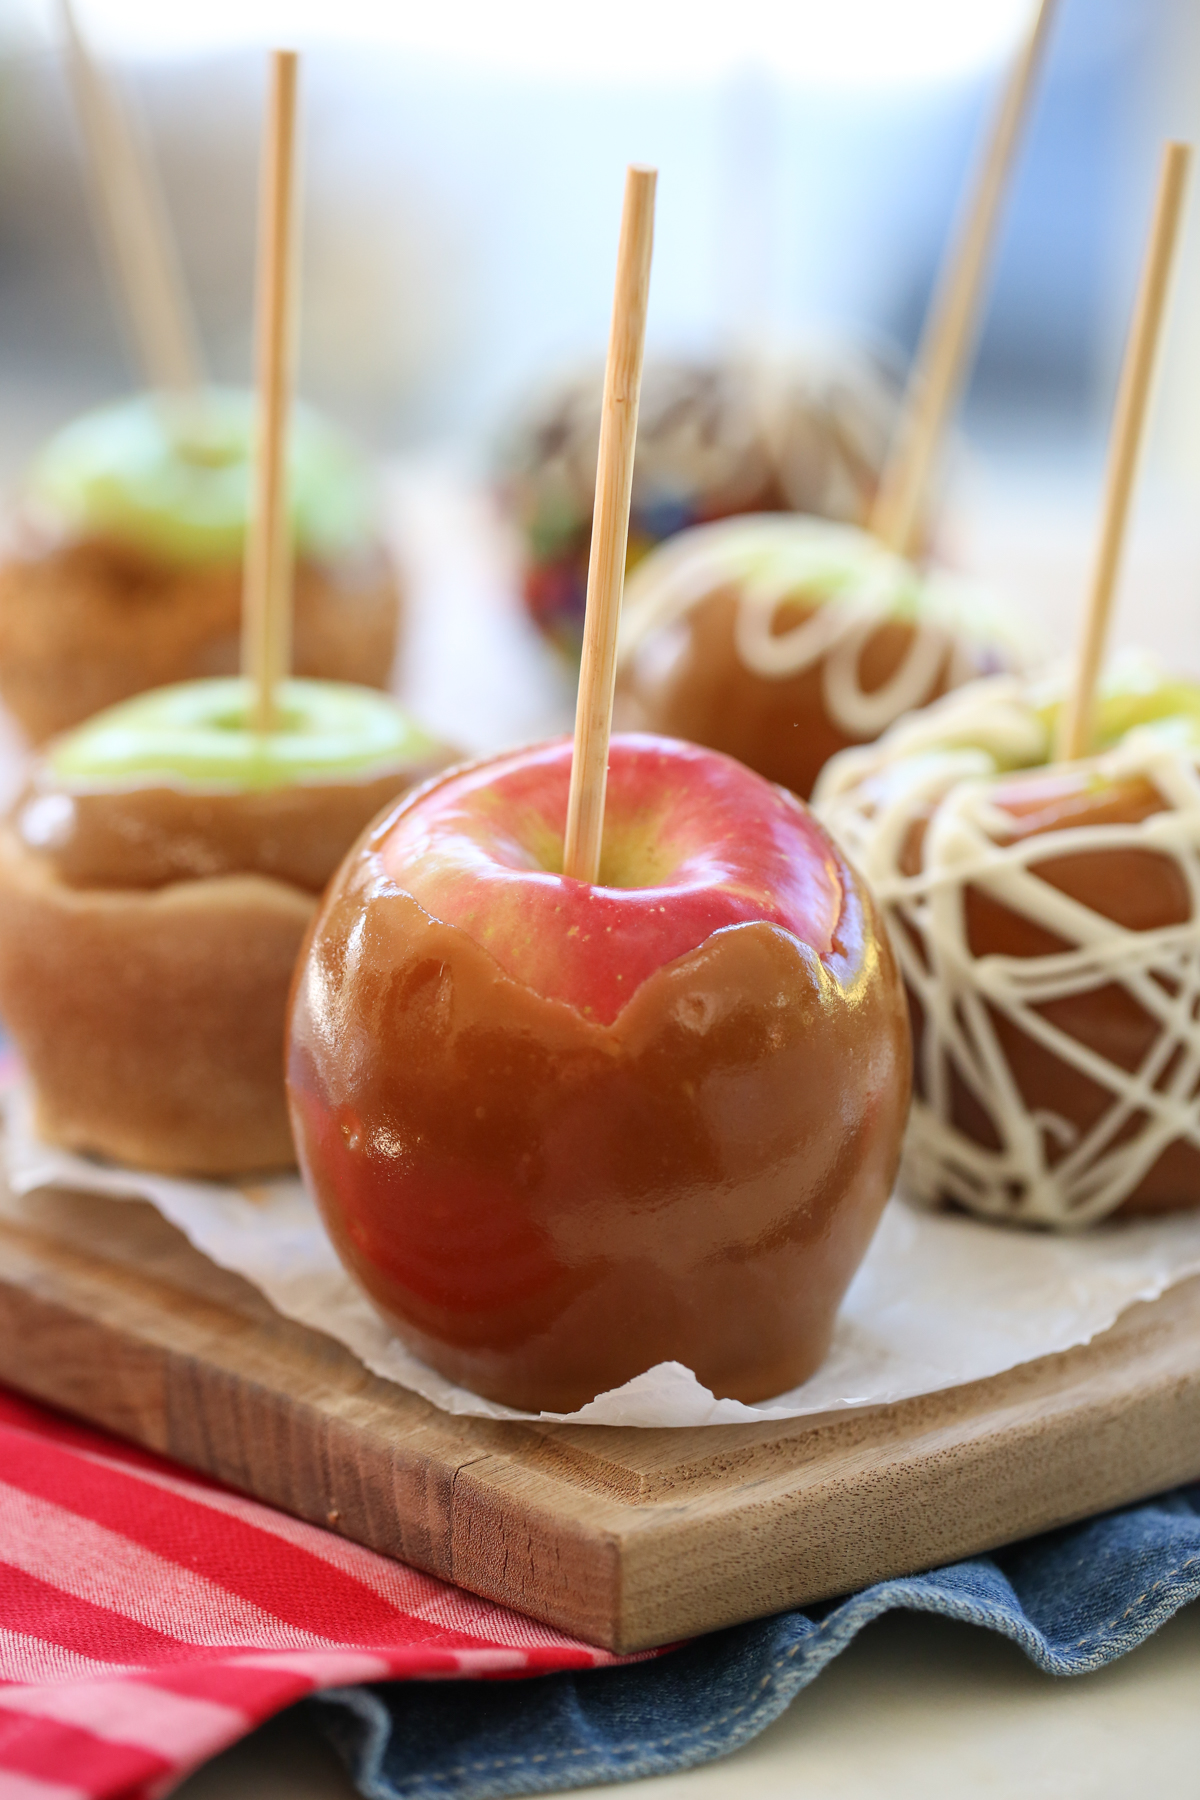
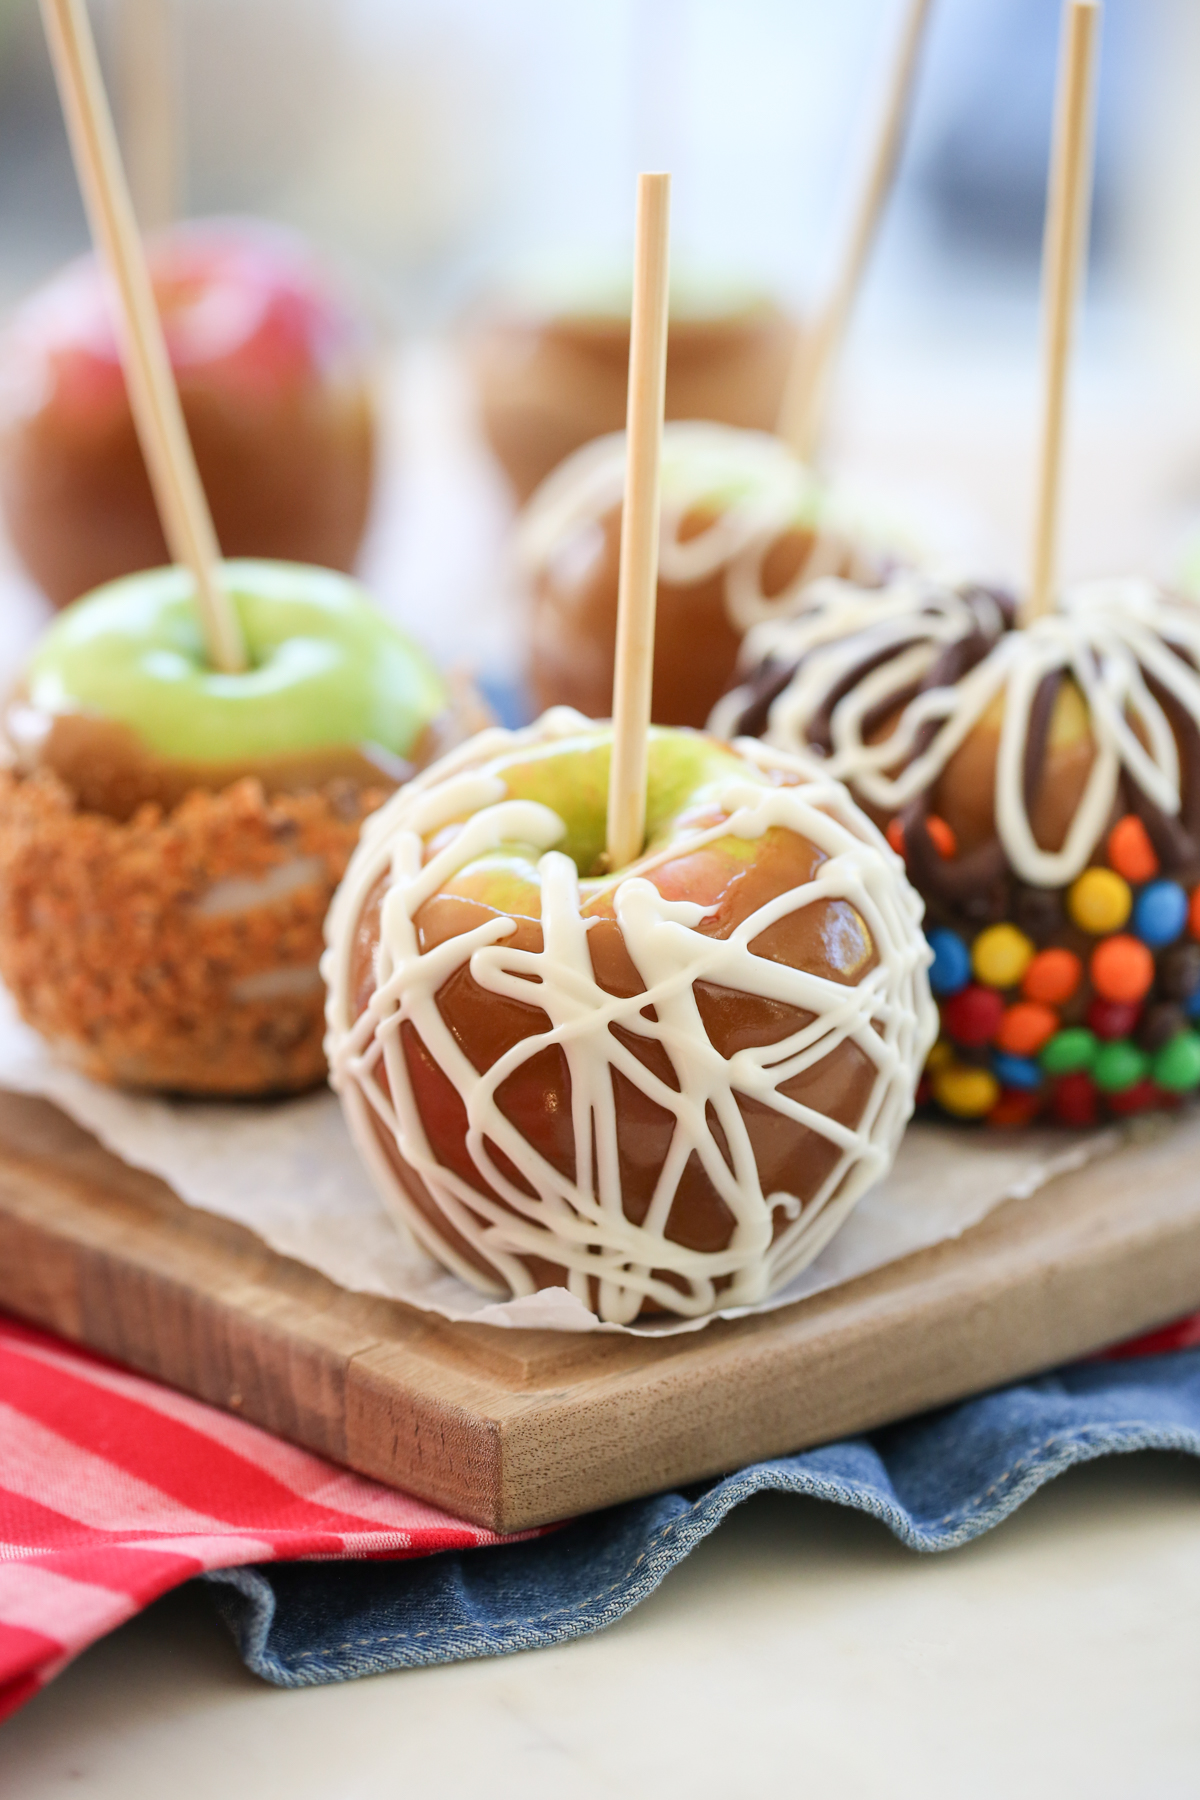
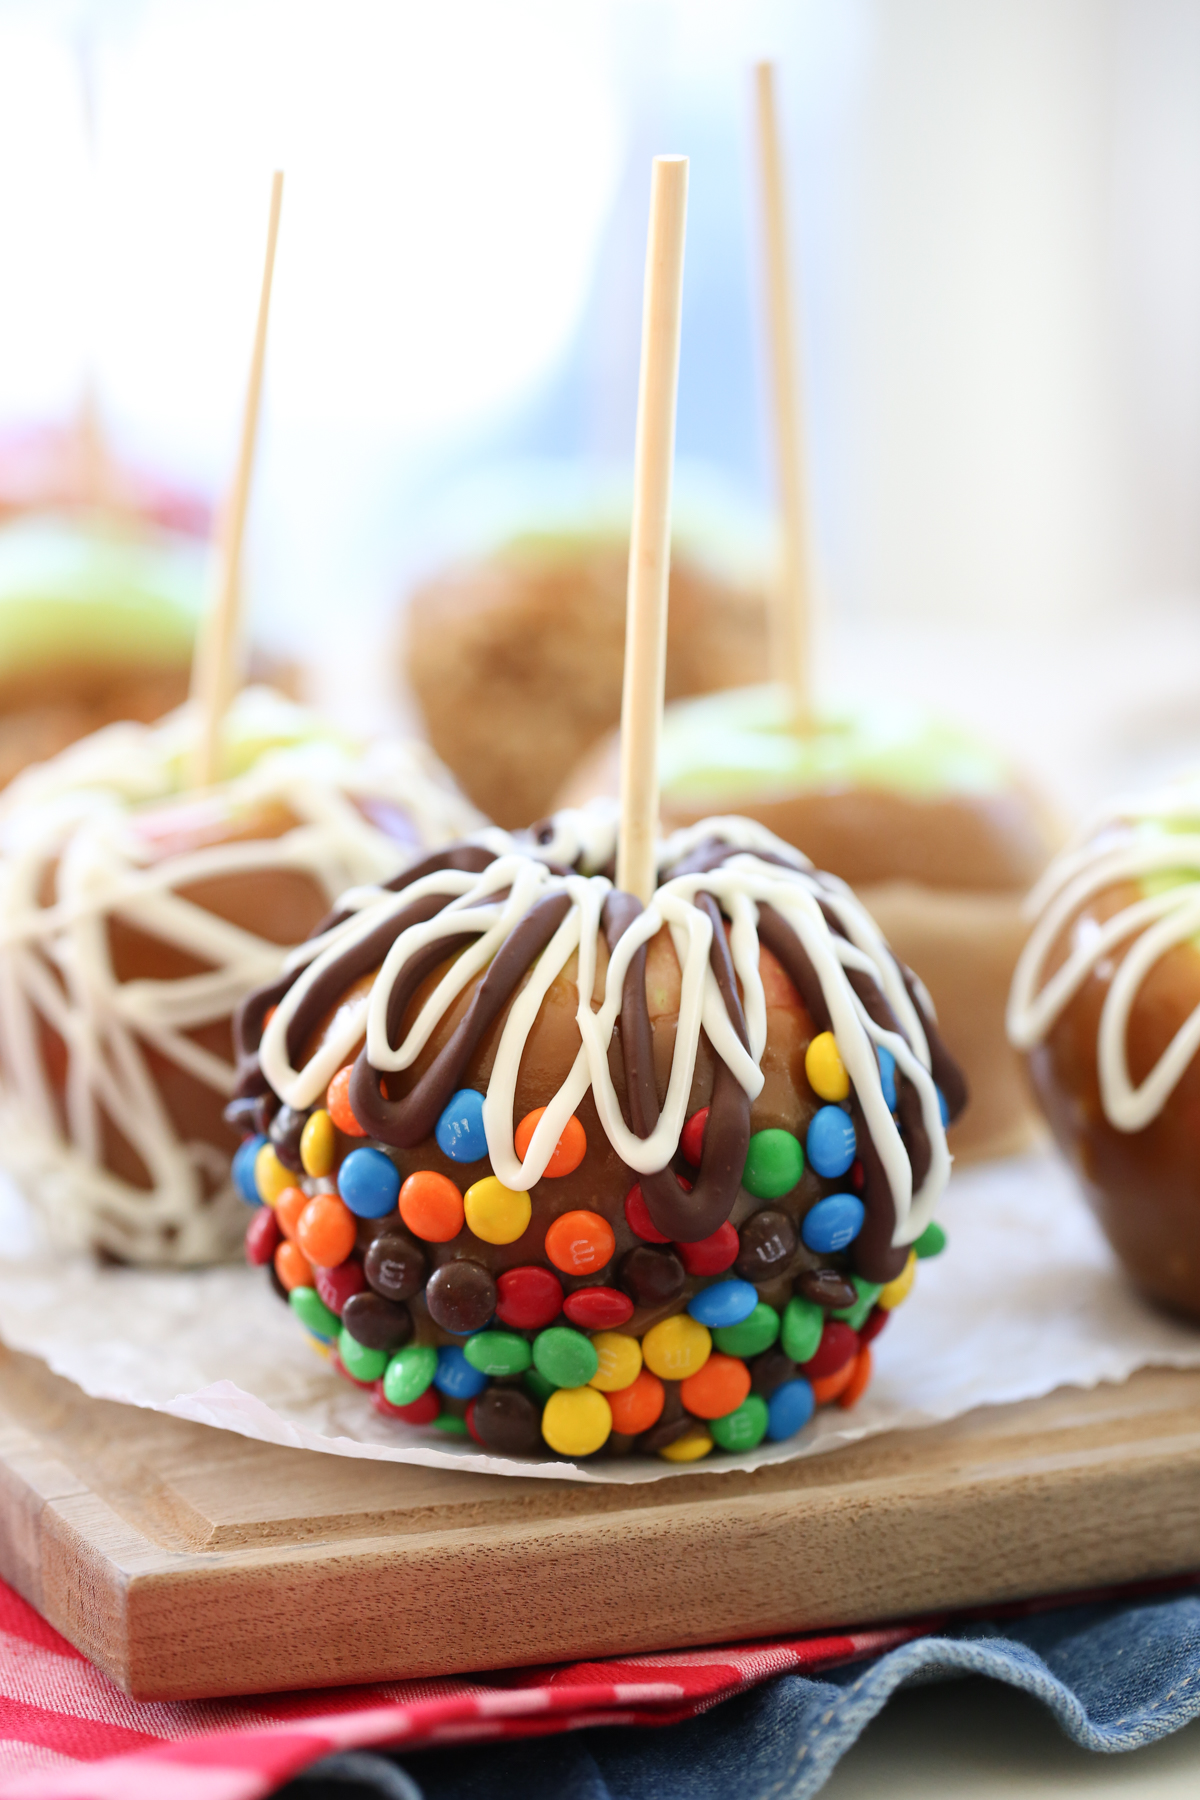
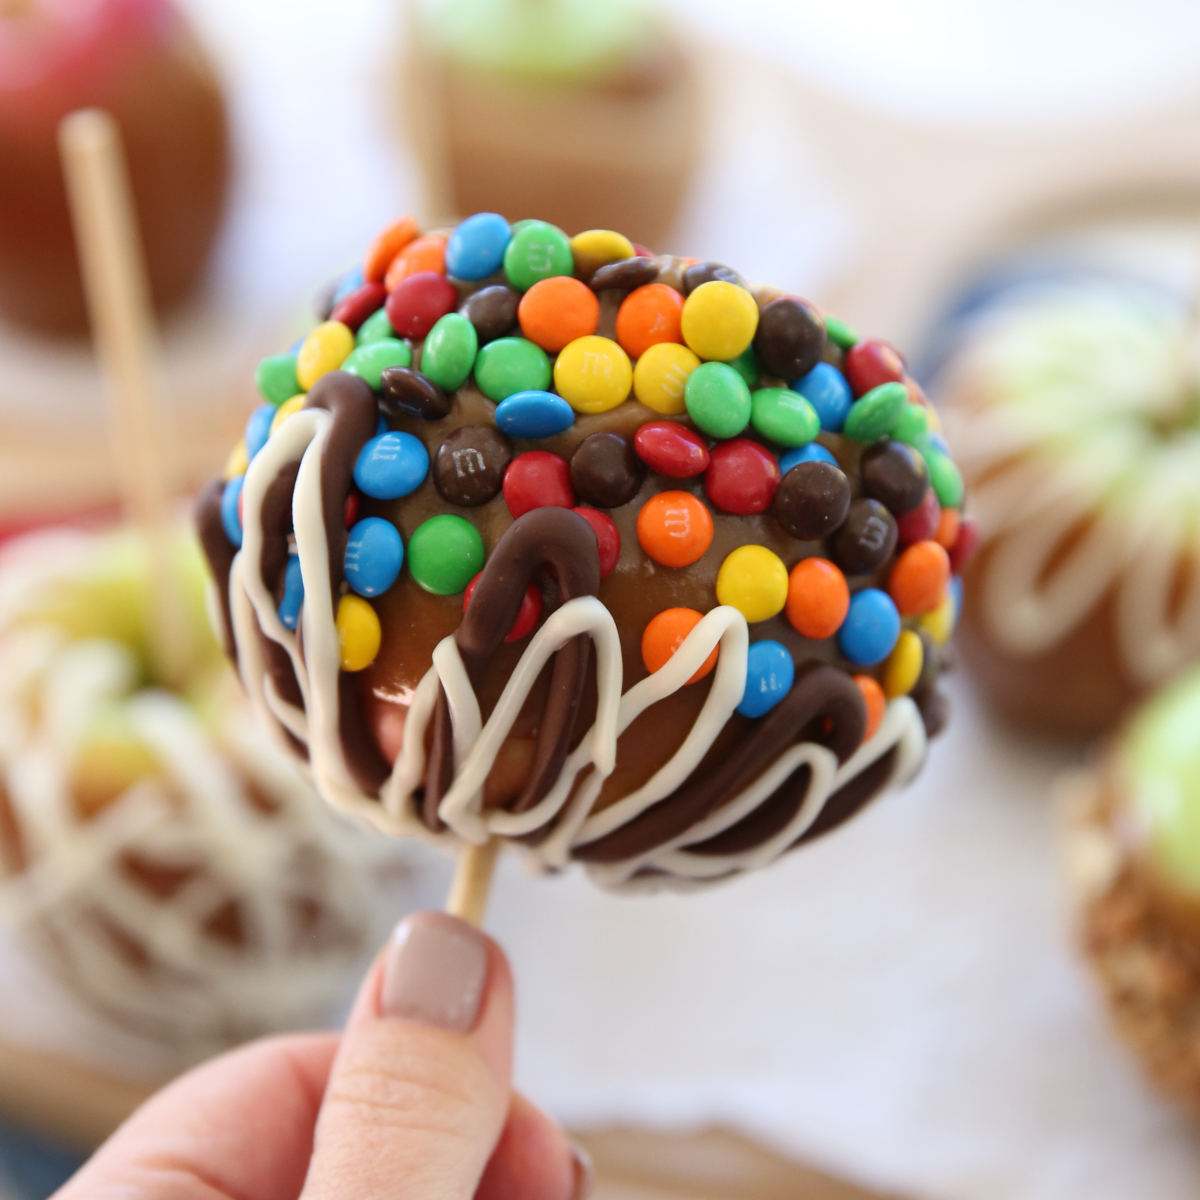
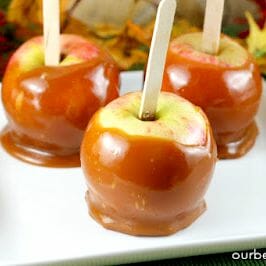
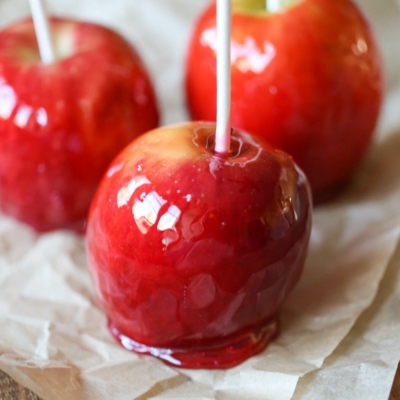
These Gourmet Style Dipped Apples are drenched in homemade caramel that knocks the socks off of those little plastic-wrapped caramels you find on the baking aisle. If you want amazing, impressive, gourmet style apples- the kind you can bust your wallet buying in a fancy little boutique store, this is it!
Ingredients and Supplies Needed
This is just a preview of ingredients and method, keep scrolling for full printable recipe.
Ingredients
- Apples – Any variety will work here, so choose your favorite. This recipe will make more than enough caramel for at least 12 medium sized apples.
- Dark brown sugar – Can you make this with light brown sugar? Sure. But dark brown sugar will give you a deeper flavor.
- Butter – Always use real butter if you can. That’s what this recipe was designed for, so I can’t guarantee the outcome if you substitute something else.
- Sweetened condensed milk
- Dark corn syrup – Find dark corn syrup near the maple syrup on the baking aisle. It provides a deep, warm flavor to the caramel.
- Pure maple syrup – Yes, it’s worth it to get the good stuff!
- Vanilla extract
- Molasses
- Salt
- Assorted toppings for dipping – Toffee bits, chopped nuts, coconut, crushed cookies or cand bars, etc.
- Chocolate – Optional, for melting and drizzling.
Supplies
- Popsicle sticks or chop sticks
- Zip-top bags – To drizzle melted chocolate, if desired.
- Candy thermometer – Don’t be intimidated by the fact that this caramel requires a thermometer; it’s seriously easy caramel and really simple to work with. Definitely don’t skip the thermometer though. It provides much needed information on when the caramel is cooked and when it’s ready to dip.
Tips and Tricks Before You Start
Making dipped apples isn’t complicated, but I can tell you it is so, so much easier with a few tricks, so I’m going to give you all of the ones I’ve got!
- First of all, you’ll want to wash your apples well (I usually use a tiny bit of soap to remove any waxy film) and then dry them completely.
- I’ve found it helps to chill the apples because when they’re cold, the caramel sticks and sets quicker. So after the sticks are all in, place them in the fridge to chill while you do everything else.
- It also helps to get all of your toppings ready before you even start. When working with candy, you want to be ready to go as soon as it reaches a certain temperature, so start with a clean kitchen, open sink space, and get your toppings and work space prepared first.
- If you have a non-stick pot I suggest using it; caramel and sweetened condensed milk can burn fairly easily in stainless steel.
- When you’re choosing a bowl to put your cooked caramel in, choose the smallest bowl possible that will fit all of the caramel; that will make dipping easier. And a tall, narrower bowl is better than a wide, shallow one. I also like to just dip right in the pot on the stove top- this way you adjust the heat to keep it at a good dipping temperature.
- Don’t dip your apples right away. Use your candy thermometer and dip when your caramel reaches about 200°F. This temperature is warm enough for easy dipping and cool enough to cling to the apples.
- If you dip your apples in toppings right after the caramel, the toppings will slide right off and you’ll be stuck with a big gloppy ugly mess. So just be patient and keep dipping the apples in caramel and let them set slightly before you dip in toppings. This takes a bit of trial and error and testing depending on what toppings you are using.
How to Make Gourmet Style Dipped Apples with Homemade Caramel
Step 1: Prep Apples and Toppings
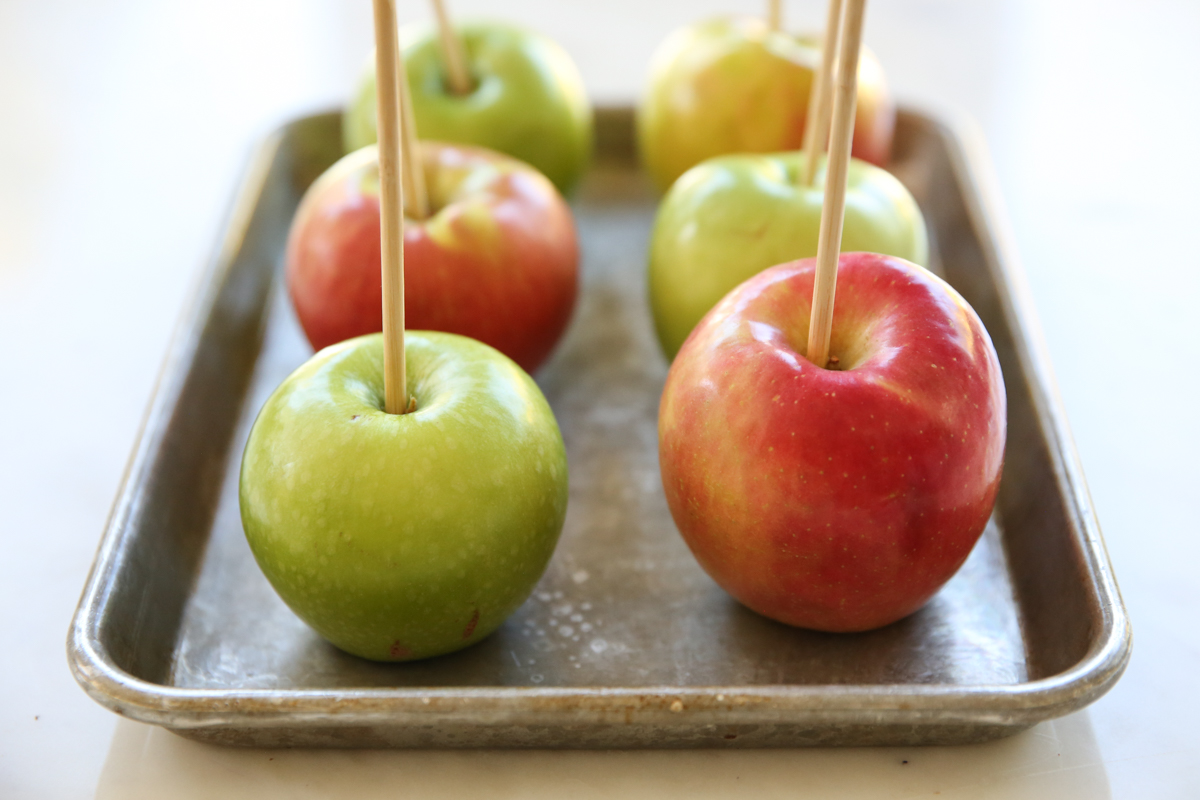
- Wash and dry your apples. Insert popsicle sticks or skewers right into the space the stem grows and pop them in the fridge.
- Make sure your toppings are ready to go. Have a pan with a silicone mat or buttered foil ready for your freshly dipped apples.
Step 2: Make the Caramel
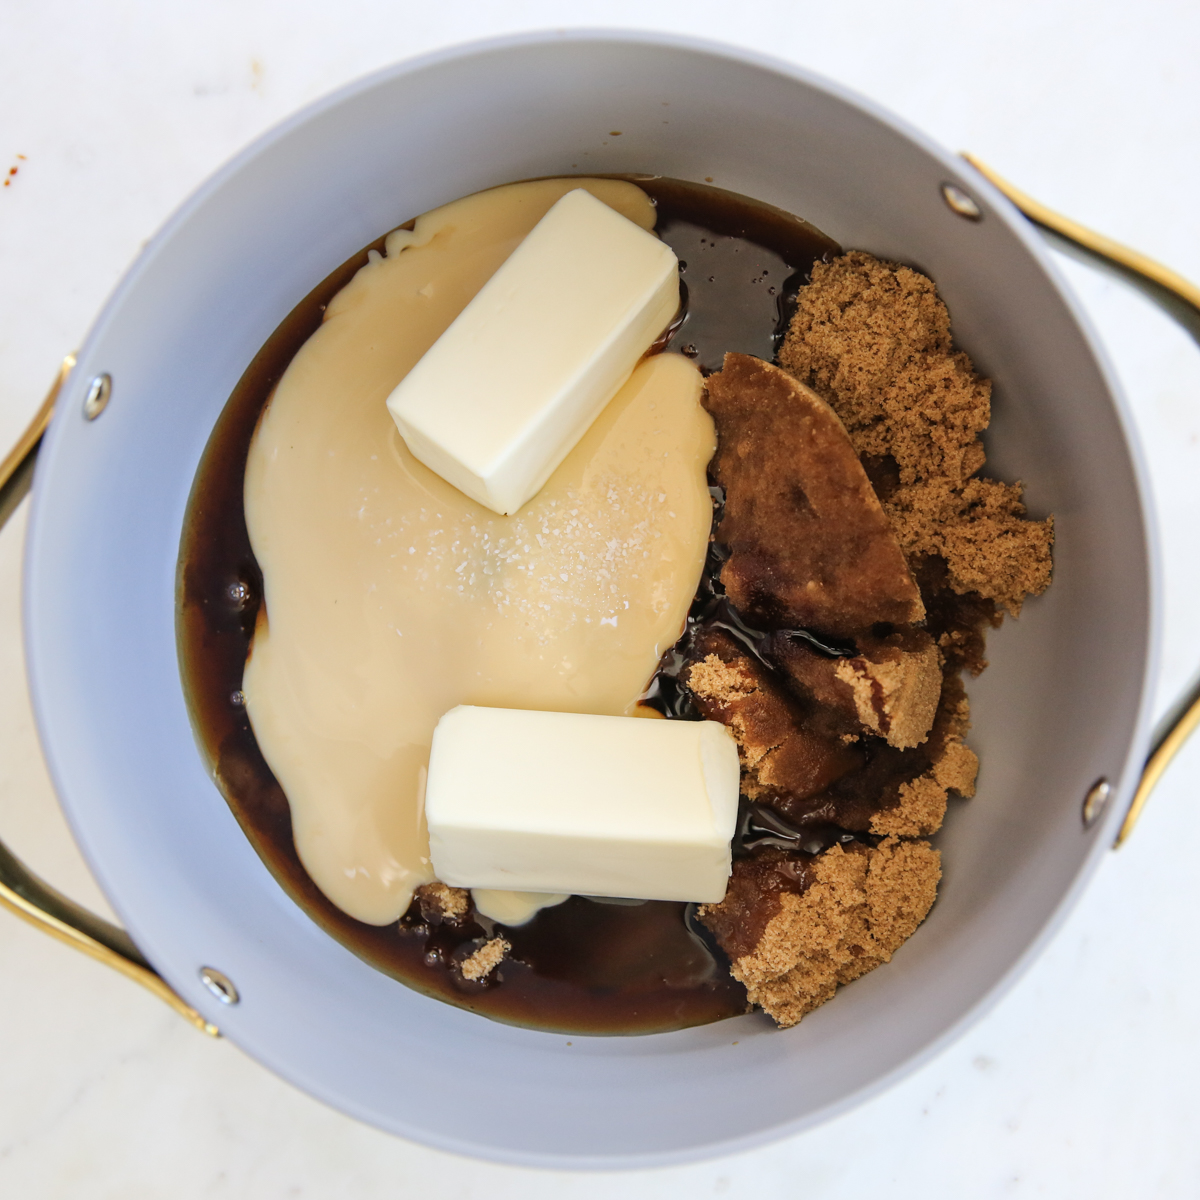
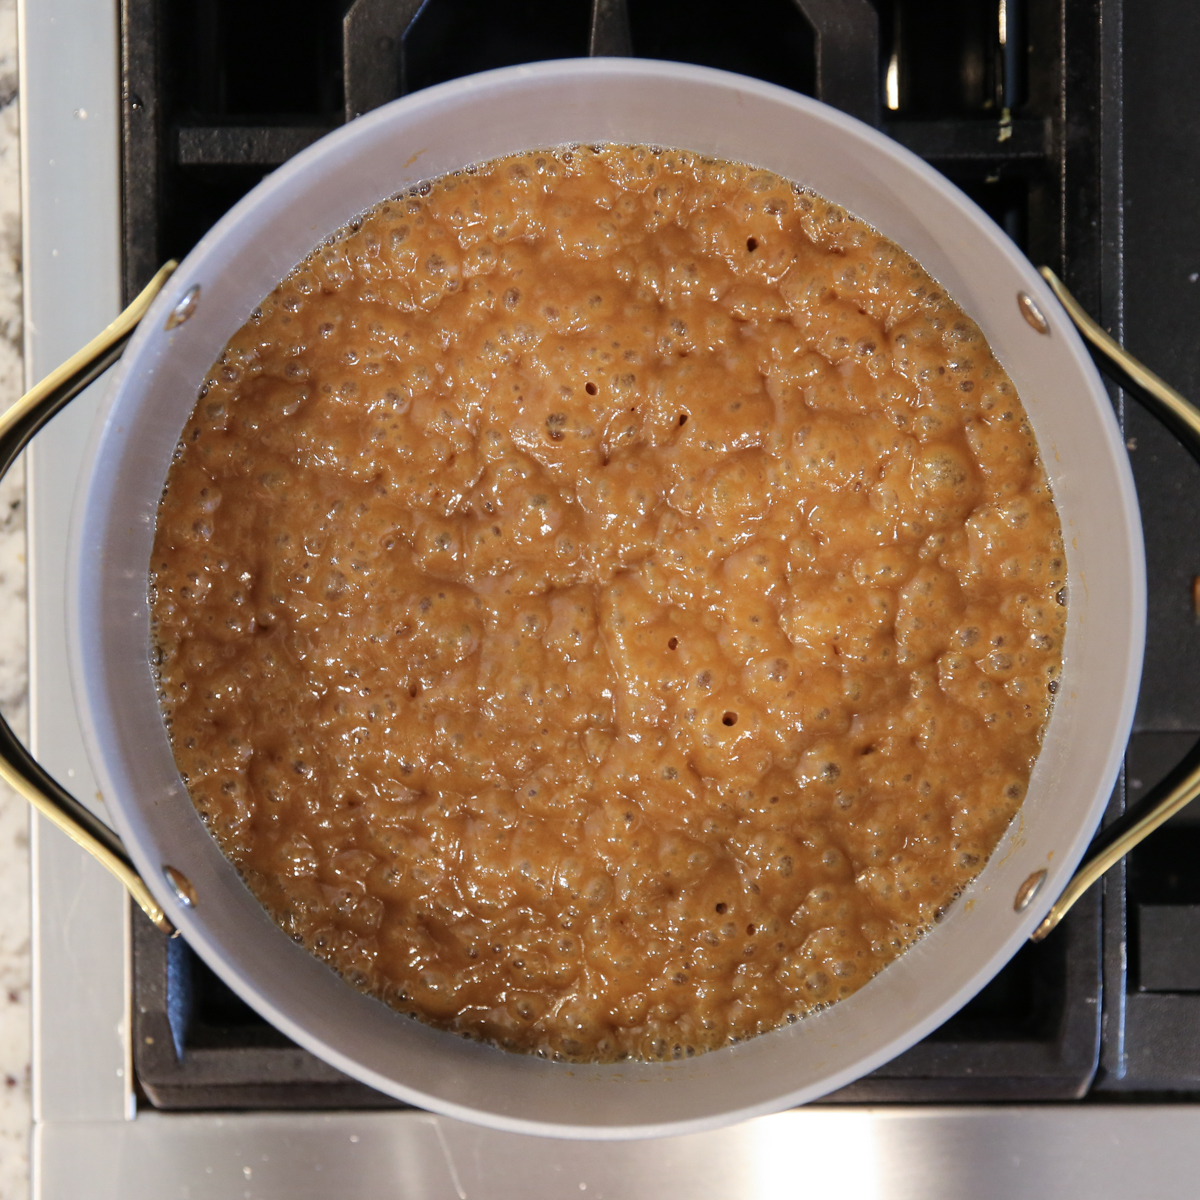
- All you have to do for the caramel is dump all of the ingredients in a big pot: dark brown sugar, unsalted butter, sweetened condensed milk, dark corn syrup, pure maple syrup, vanilla extract, molasses, and salt. Stir it until everything is melted and dissolved. Then turn up the heat and boil it until it reaches temperature.
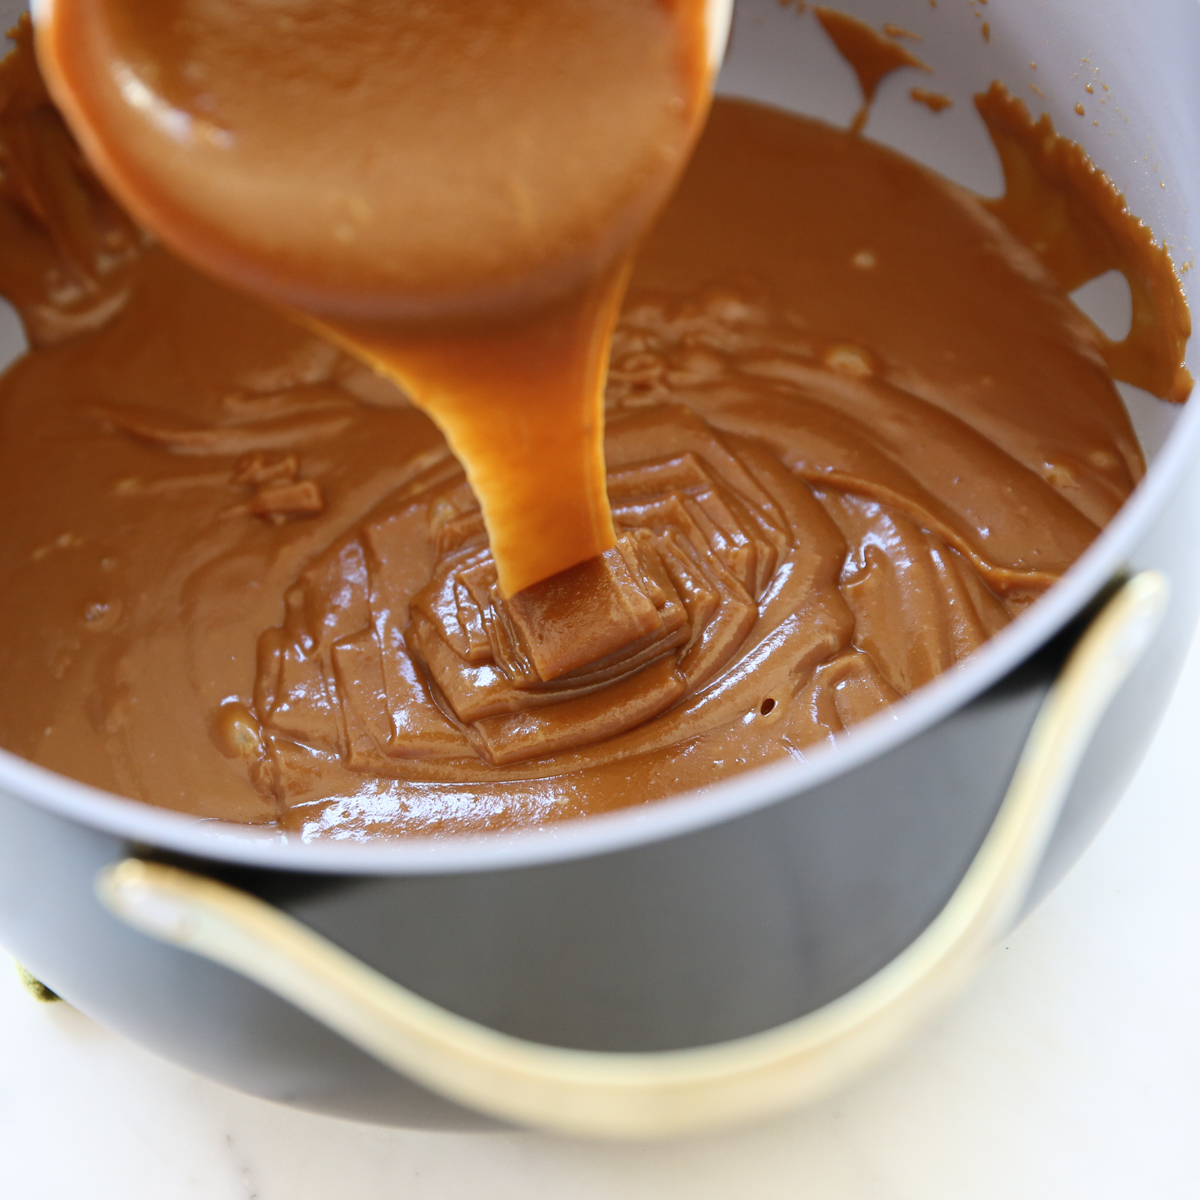
- It works best to cool your caramel down a bit to the perfect temperature for dipping (all the details are in the recipe). I like keeping it on the stove top because I can control the temperature.

Step 3: Dip and Decorate Your Apples
- Once your caramel has cooled to around 200°F, grab your refrigerated apples and plunge them in, one at a time, allowing the excess to run off into the bowl.
- Flip the apples upside-down for a few seconds and then twirl them around. Before I place them on my baking sheet, I use a spoon to just gently scrape excess off the bottom so you don’t end up with a huge pool of caramel.
- By the time you finish dipping all the apples, the first ones should be ready for toppings. Pull them off your sheet and don’t worry if some of the caramel sticks to the sheet, or pulls off the bottom of the apple. Use your hands to gently press the pooled caramel around the bottom of the apple. This caramel is great; it’s soft enough to mold and handle, but not so soft that it’s sticky and messy.
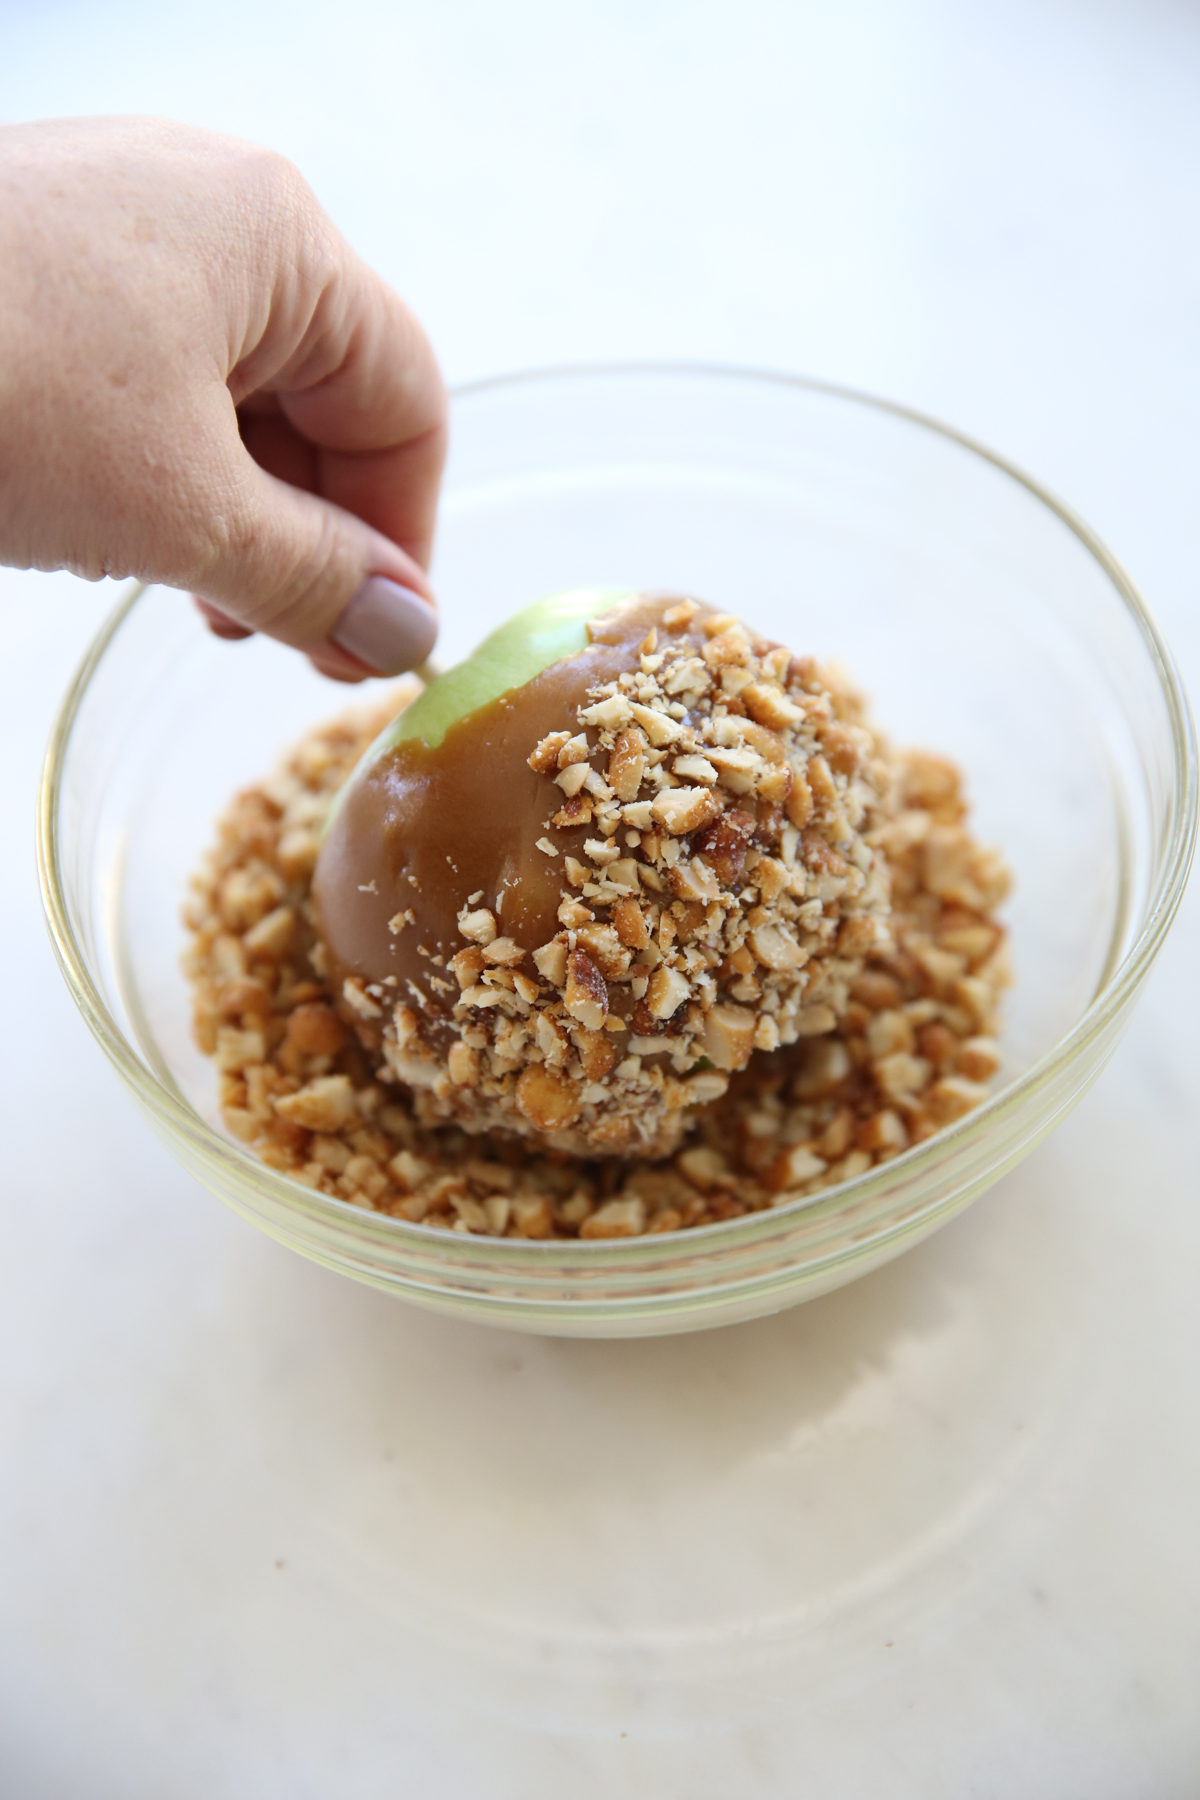
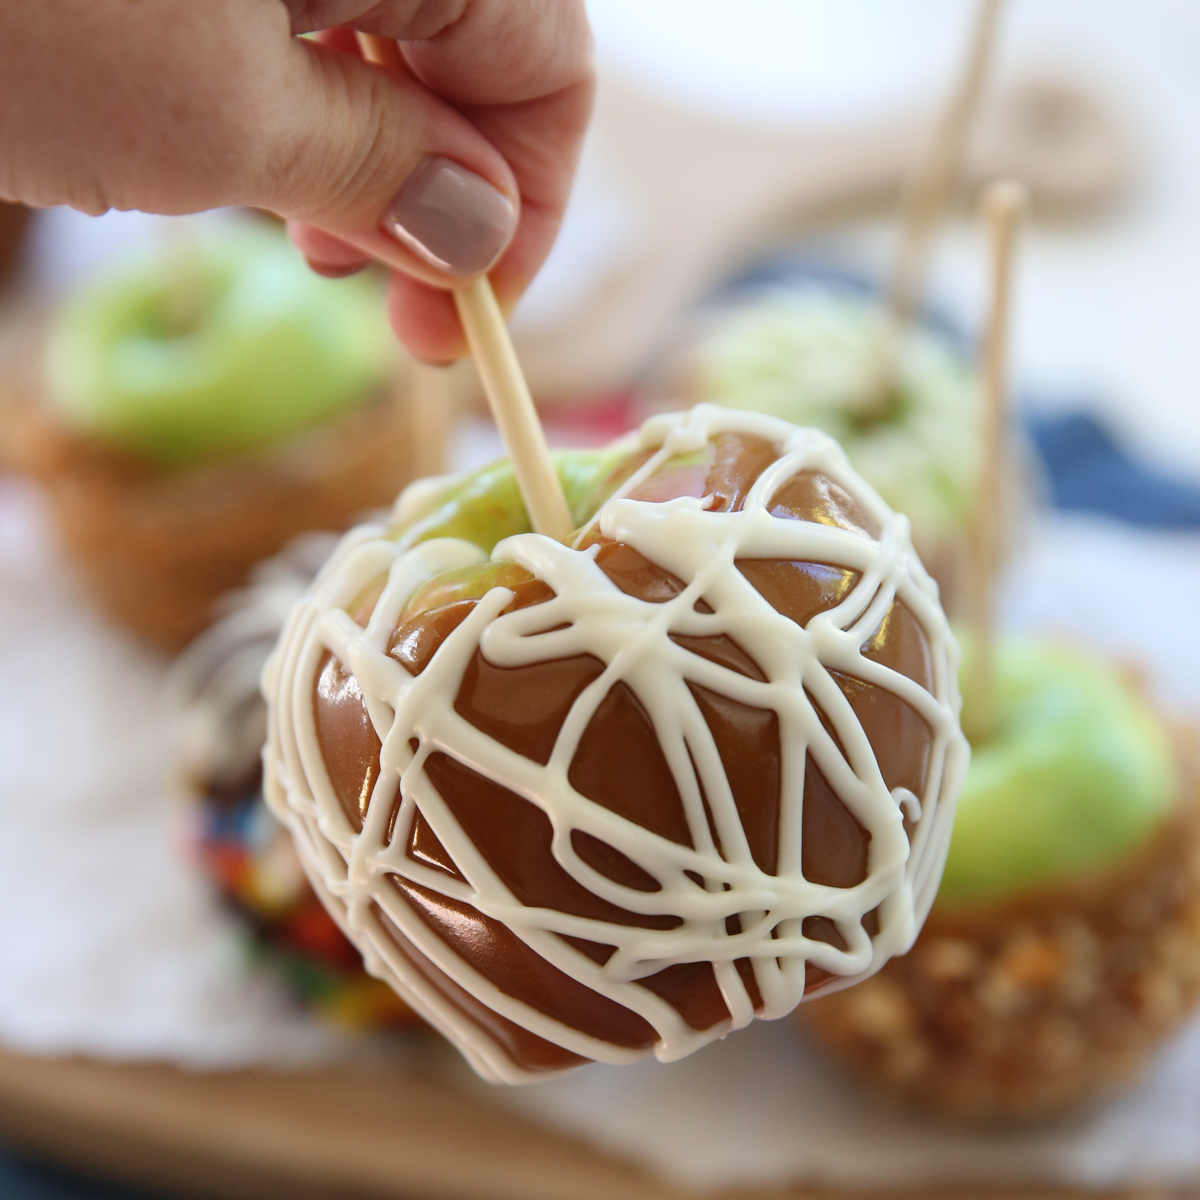
- Then you can go crazy with the decorations. Depending on what you’re using, you can either roll your apple in the topping, or use your hands to gently press them into the caramel. If you want, have some melted chocolate ready and you can dip right over the caramel. Chocolate tends to be a little thicker, so dip it less than you want the final apple to be dipped, and use a knife to scrape off excess chocolate on the bottom. When you then dip in something else, like chopped peanuts for example, the nuts will sort of push the chocolate further up the apple.
- Once they’re all dipped, you can decorate with more chocolate. Place some melted chocolate in a heavy duty zip-top bag and cut the end off. (You can actually melt chocolate chips right in the bag in the microwave and just smash them around until melted and smooth) and then drizzle away.
- Chill for at least an hour to allow toppings to set, then gift or enjoy!
Topping Ideas
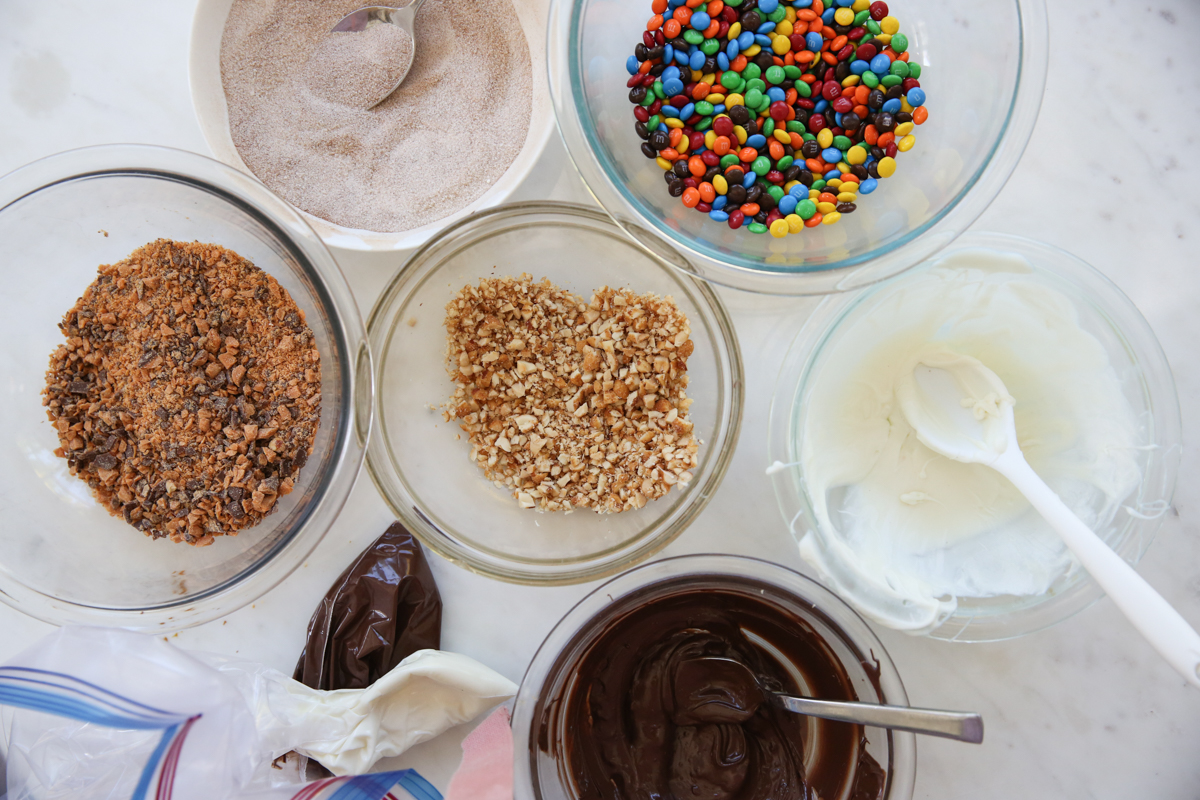
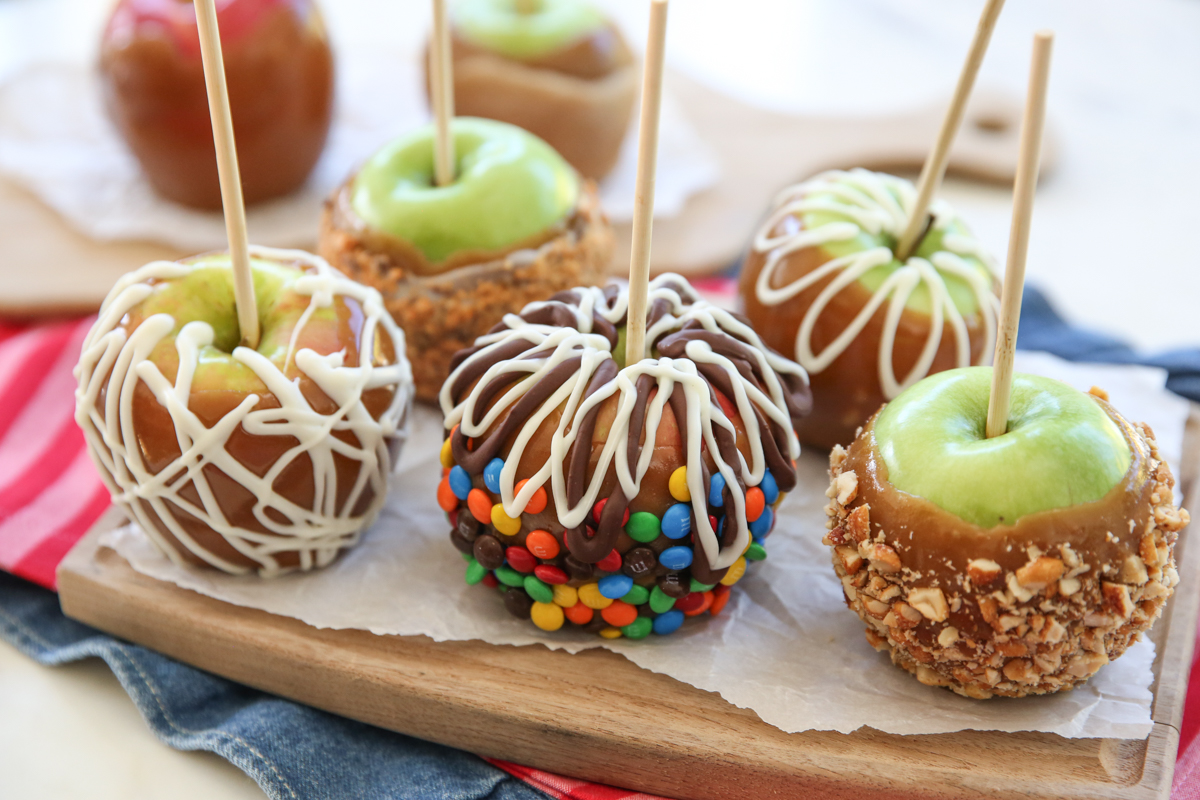
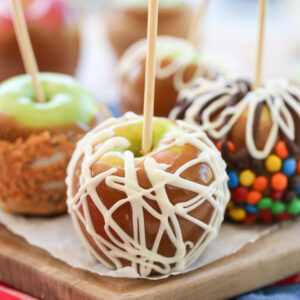
Be creative and have fun! Some of the things I love to use are: crushed cookies or candy bars, graham cracker crumbs, chopped nuts, toffee bits, and toasted coconut. It’s fun coming up with new combinations and finding things that look as pretty as they are delicious! Here are some of my favorites from this round:
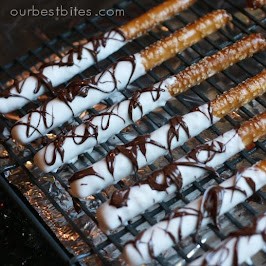
- S’mores Apple: Carmel dipped and rolled in crushed graham crackers. Marshmallows pressed in by hand and drizzled in chocolate.
- Caramel +crushed butterfingers
- Caramel dipped and rolled in toasted almonds, and toasted coconut with dried sweet cherries (just pressed in by hand) and white chocolate.
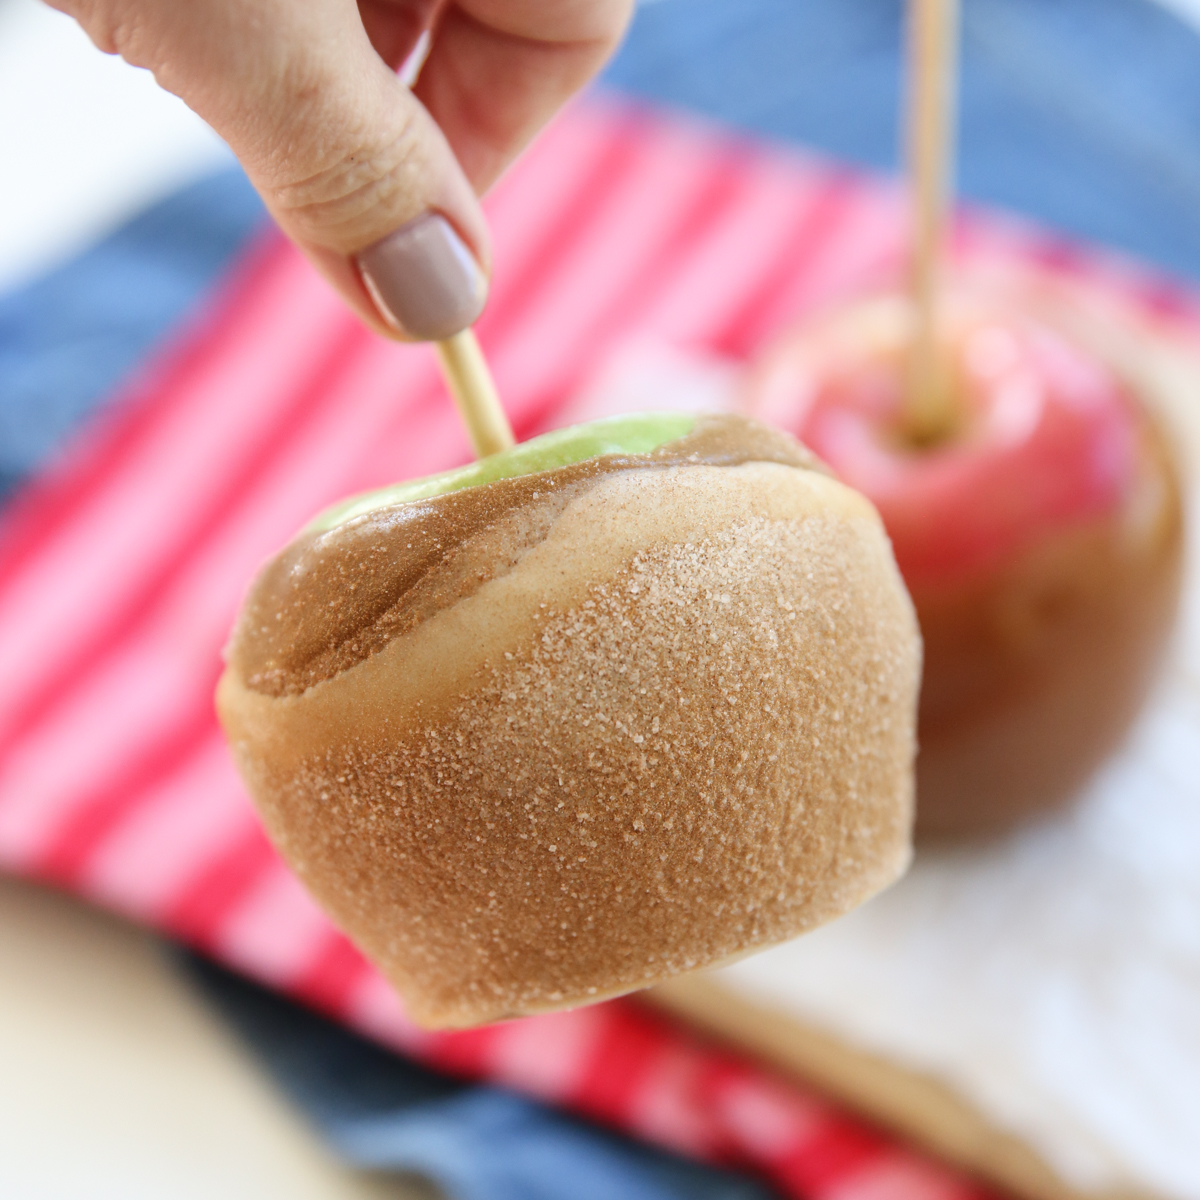
- Caramel dipped in white chocolate (I suggest white candy melts or almond bark as it’s more fool proof than white chocolate) and then rolled in cinnamon sugar. Tip: You’ll want to let your white chocolate layer set a bit before you roll in cinnamon sugar.
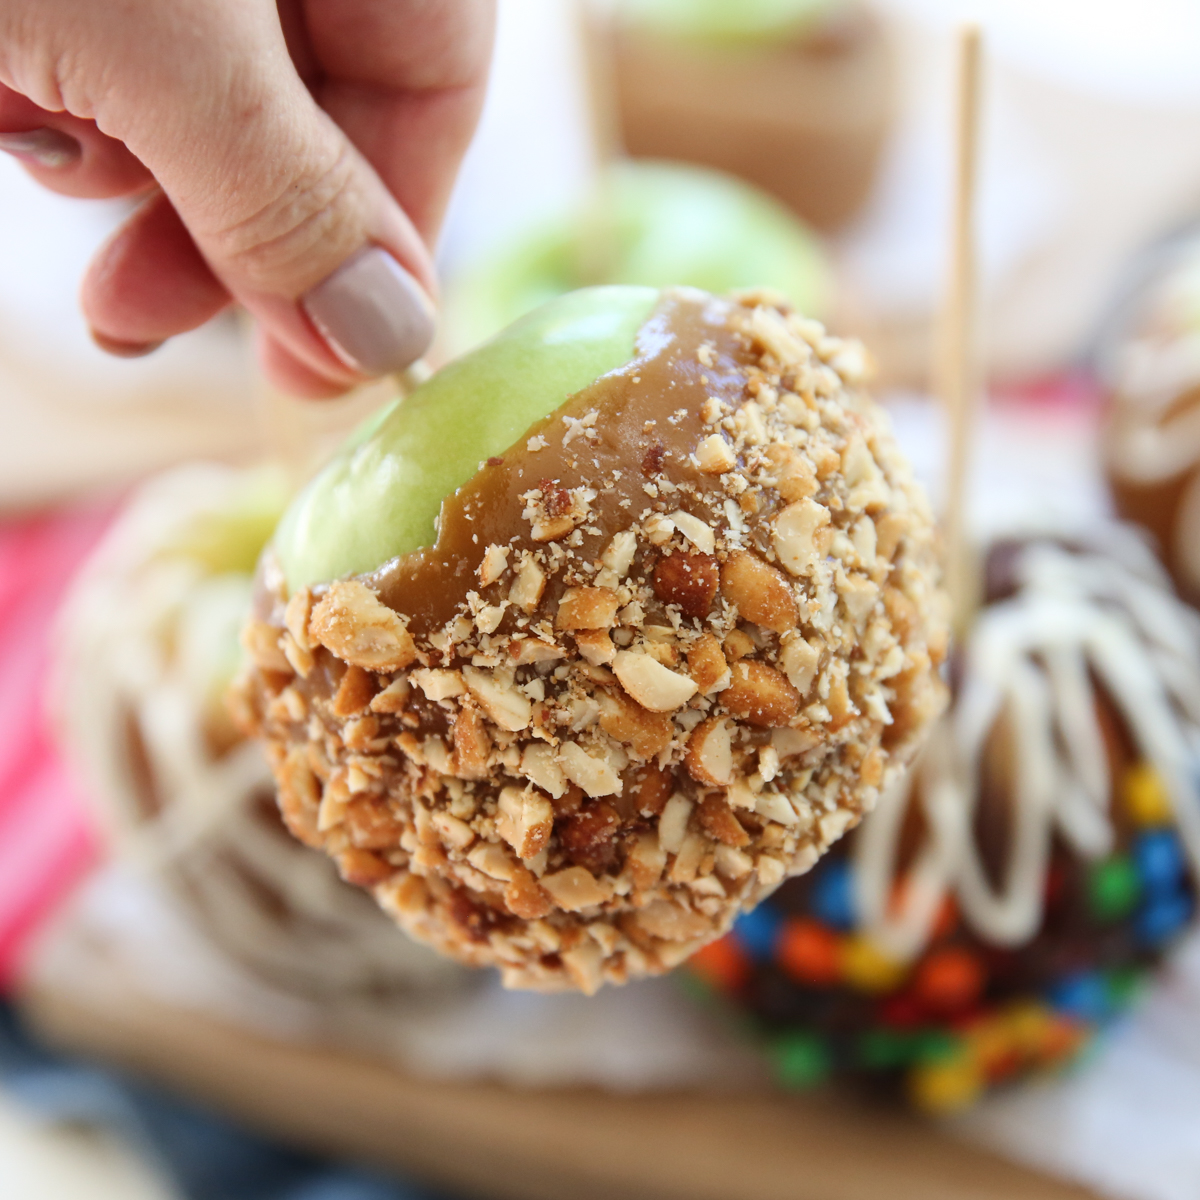
- Caramel dipped in honey roasted peanuts.
Frequently Asked Questions
Yep, as long as you watch your thermometer and follow the instructions for cooking times, this should double just fine.
I’ve experimented with this, but I found it works best fresh. The more times you reheat it, it will produce crystallization and not be quite as smooth.
I prefer to keep this on the stove top where I can more carefully monitor the temperature .
Storing and Other Tips
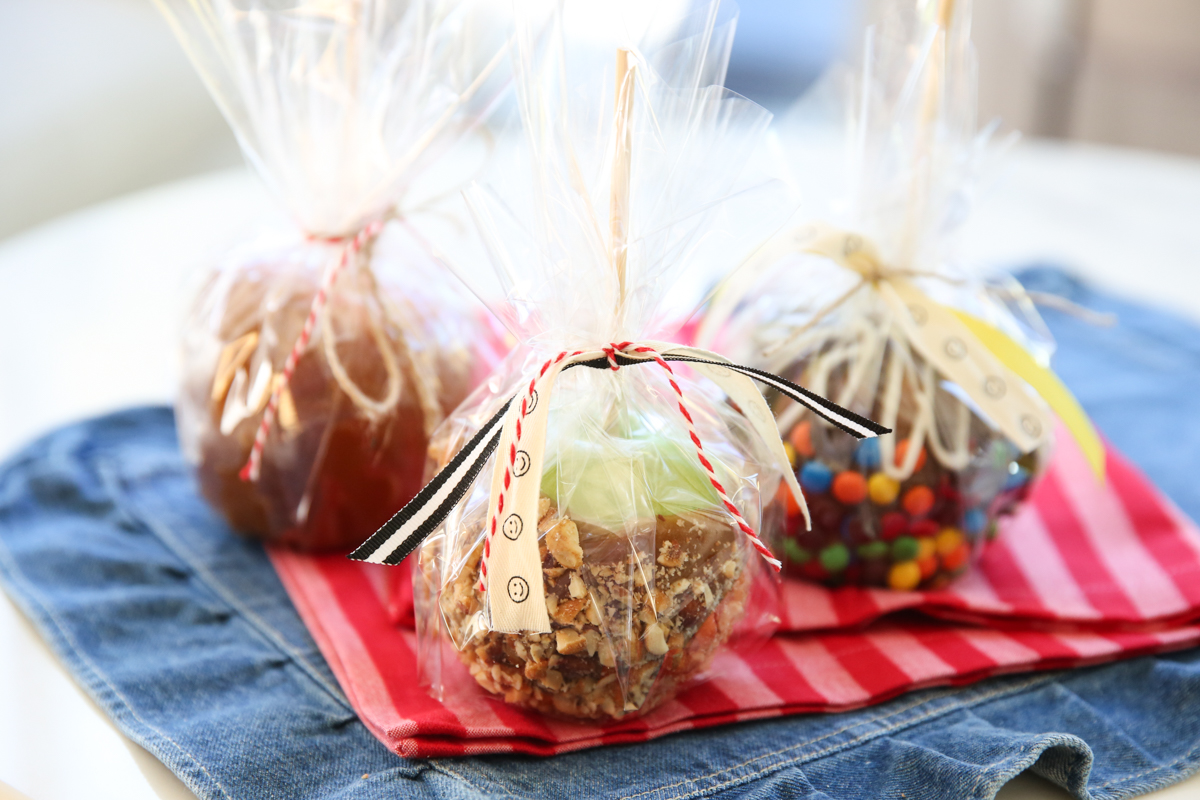
- Wrap finished, cooled caramel apples in cellophane and gift or store in the refrigerator for up to one week.
- Caramel Apple Fondue: I also wanted to mention that you can easily turn something like this into a fun party food. Just put the warm caramel into bowls, or a fondue pot and put all of your toppings in little bowls. Slice a bunch of apples and just let people dip the apples into the caramel and then into a topping. We did this as a family last night and my kids LOVED it. It’s so fun and so easy. It would make a great dessert buffet for a party!
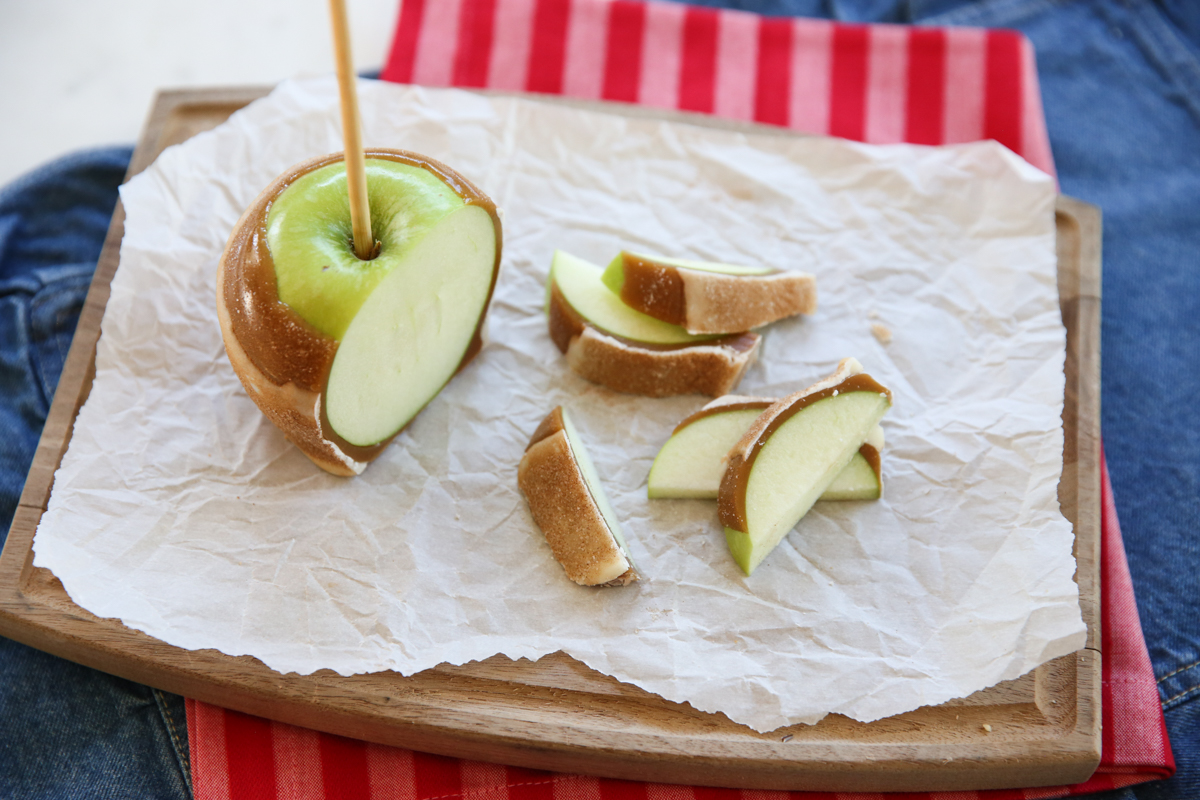
- To cut: Caramel apples can be a pain to just bite into, so just take a sharp knife and slice both sides off the apple, on either side of the stick. Then slice off the remaining two sides, and slice the halves into slices.

Homemade Caramel for Apple Dipping
Equipment
Ingredients
Caramel
- 1 pound dark brown sugar about 2 cups packed brown sugar
- 1 cup unsalted butter
- 1 14- ounce can sweetened condensed milk
- ⅔ cup dark corn syrup
- ⅓ cup pure maple syrup
- 1 ½ teaspoons vanilla extract
- 1 teaspoon molasses
- ¼ teaspoon salt
Caramel Apples
- 12 medium sized apples that’s a pretty conservative measurement, this makes a lot of caramel
- popsicle sticks or chopsticks
- assorted toppings for dipping toffee bits, chopped nuts, coconut, crushed cookies or candy bars, etc.
- Optional: melted chocolate in zip-top bags
Instructions
Prep Apples
- Wash and dry apples; place sticks in cores and place on a baking sheet in the fridge to chill. Prepare all toppings in bowls and have them ready to go.
Prepare Caramel
- Combine first 8 ingredients in heavy 2 ½-quart nonstick saucepan (about 3-4 inches deep, at least). Stir with wooden or silicone spatula over medium-low heat until sugar dissolves (no crystals are felt when caramel is rubbed between fingers), occasionally brushing down sides of pan with wet pastry brush or scraping with spatula, about 15 minutes.
- Attach a clip-on candy thermometer to side of pan. Increase heat to medium-high; cook caramel at rolling boil until thermometer registers 236°F, stirring constantly but slowly with clean spatula and occasionally brushing/scraping down sides of pan, about 12 minutes.
- Pour caramel into a bowl. Submerge thermometer bulb in caramel. Cool to 200°F, about 20 minutes. If it cools too much just heat it up a little.
- While caramel cools, line 1-2 baking sheets with silicone baking mats or buttered foil. Set up decorations and melted chocolates.
Dip and Decorate
- Holding stick, dip 1 apple into 200°F caramel, submerging all but very top of apple. Lift apple out, allowing excess caramel to drip back into bowl. Tip: it helps to have a silicone spatula or spoon. You can use this to kind of pour caramel over your apple as well. Turn apple caramel side up and hold for several seconds to help set caramel around apple. If needed, gently scrape the bottom of the apple to remove excess caramel. Place coated apple on prepared baking sheet. Repeat with remaining apples and caramel, spacing apples apart (caramel will pool a bit). If caramel becomes too thick to dip into, gently heat on stove top or in microwave, or add 1 to 2 tablespoons whipping cream and briefly whisk caramel in bowl over low heat to thin.
- By the time you have dipped all the apples, the first ones should be ready partially set enough to add toppings. If not, chill in fridge for a few minutes. Lift 1 apple from foil. Using hand, press pooled caramel around apple. Then firmly press decorations into the caramel and return to baking sheet.
- If desired dip caramel-coated apples into melted chocolate, allowing excess to drip off, then roll in nuts or candy. Or drizzle melted chocolate over caramel-coated apples and sprinkle with decorations. Chill until decorations are set, about 1 hour. Cover; chill up to 1 week or wrap in cellophane bags for gift giving.
Notes
- Wrap finished, cooled caramel apples in cellophane and gift or store in the refrigerator for up to one week.
- Nutrition information is approximate. It was calculated using 1 average-sized apple and 1/12 of the caramel recipe (which is likely more than will actually stick to the apple). It does not include any additional toppings.
Nutrition


Questions & Reviews
I tried to look through all the comments to clarify this, but nobody seemed to say anything that I could see! Your butter sticks look very short–can you clarify exactly how much you used? In some states I have lived the sticks really ARE shorter and 1/4 C–but here they are 1/2 C sticks. I made these tonight, and they were yummy, but I only used 1/2 C butter just in case (because I figured it was better to err on the side of too little rather than too much). Just want to clarify for future making! 😉 Thanks!
The best caramel apples EVER!!!!
These apples turned out absolutely delicious!!!!! I have an old family recipe that I always use, but the temp has to be brought up to a certain degree 3x and it is such a long process to make. So I looked for a new one on the internet and found this one…
These were very fast and easy for homemade caramel apples!!! And the caramel was just perfect. The only thing I changed was I dipped my apples into my nuts right away.. I don’t think they stick as well when you wait. I also used my copper candy pot and kept the caramel in it for dipping with the stove temp on warm. The caramel stayed soft till the last apple, but had to go on with a spatula to clean out the bottom of the pot and still formed nicely to the apple. GREAT RECIPE!!!! FLAVOR IS AWESOME!!!
I made these today with some friends and they were DELICIOUS! I drizzled them in white and regular chocolate…mmm My mom says we will never buy caramels for caramel apples again! We had lots of extra caramel so I poured it on buttered wax paper and refrigerated it. Makes delicious caramels, too!
Can you make these in a crock pot? I am doing these for a charitable cause and need to make the caramel for up to 50 people.
If so, how?
-Brittannie
You can’t cook this in a crock pot, but you could probably keep it warm in one. You’d have to experiment 🙂
These were FANTASTIC!!! I will NEVER look for a new caramel recipe again. There will never be a need! My kids about passed out on the floor when they saw the apples. They just picked themselves up and started decorating!
What I am wondering, though, is could I use this recipe for a dip or ice cream topping? Is it as easy as not cooking it as long? Or should I use a completely different recipe? I love this one and would rather convert it but I hate to waste the fine ingredients in experimentation. Your thoughts?
Incidentally, I had forgotten to buy the dark Karo syrup (I know, gasp!) so I had to substitute agave nectar…worked like a charm and I probably saved 2 points on the glycemic index–for what’s it worth. 🙂
Thanks for sharing…you hit the jackpot on this one!
Hi, Sara! I have been making this recipe since you first posted it and have become well known for my caramel apples in the fall which led a group of women from church in asking me to make an activity of it. I was wondering if its possible to make more than one batch at a time, or if that will screw it up? I know candy can be finicky. Also, it seems that every time I make these the caramel never hardens quite enough. It works but still seems a bit too soft. I have tried cooking it to a higher temp without any noticeable difference. Any ideas? Thanks so much!
Yeah, I think you could make more than one batch at a time. Just make sure to use a pretty large pot! As for the hardness, I’m really not sure. My suggestion was going to be to cook it to a slightly higher temperature- and definitely chill them immediately after, that hardens them right up.
I’ve got a question. I haven’t made caramel apples in years, and I’m trying to figure out how long they take to set up. I’d like the kids to make them for our class party, but they need to set up in about 15-20 minutes in order for them to take them home. (They’ll have other treats to eat.) Anyone know? We have access to a fridge to chill things if we need.)
Yeah, if you have a fridge, I think you’d be okay. Just make sure to have plastic or baggies or something to wrap them up just in case!
Oh my gosh, you’re awesome. My favorite caramel apple is dipped in white chocolate, rolled in cinnamon and sugar. YUM! I’m also so tempted to make the smores ones, and the white chocolate craisin ones. drool….
I LOVED LOVED LOVED these when I made them last year, got all ready to remake and realized I only have margarine…really dont want to go back to the store. Can I sub margarine for butter or will it make it not stick? Any thoughts?? You are awesome!
Personally, when I’m putting in the effort for something like homemade caramel, I’d spring for butter! But totally up to you. I’ve never made it with margarine so I’m not sure how it would turn out.