Okay. If it feels like we’ve looked at alternative hard boiled egg methods before, we have. We’ve hard-boiled eggs in water. We’ve done ’em in the oven. But I wanted to add one more trick to your arsenal, because not only is it the fastest, but I really think it gives you your best hardboiled eggs: steaming them up in your pressure cooker.
I’d heard this was a possibility when I bought my InstantPot and all the click-baity social media stories I kept reading were all like, “You won’t BELIEVE what she was able to make in 5 minutes!” Let’s get a few things straight. 1) Clickbait is the worst. 2) You’re not gonna be getting hard-boiled eggs in 5 minutes. 3) It’s still a heck of a lot faster than any other method I’ve tried. I even made all three at the same time and timed them all because I love you guys.
As far as the Instant Pot goes, I tried this many times to get it just right for my pot and elevation. You may have to experiment to find your own sweet spot, but the basic method and timing should be good for most people!

Ingredients and Equipment Needed
This is just a preview of ingredients and method, keep scrolling for full printable recipe.
Ingredients
- Eggs – I have tested this with up to 6 eggs at a time. Other sources I have found say the only limit on number of eggs is what fits in your pot, and that the timing and method do not change.
- Water
Equipment
- Electric pressure cooker – Like and Instant Pot.
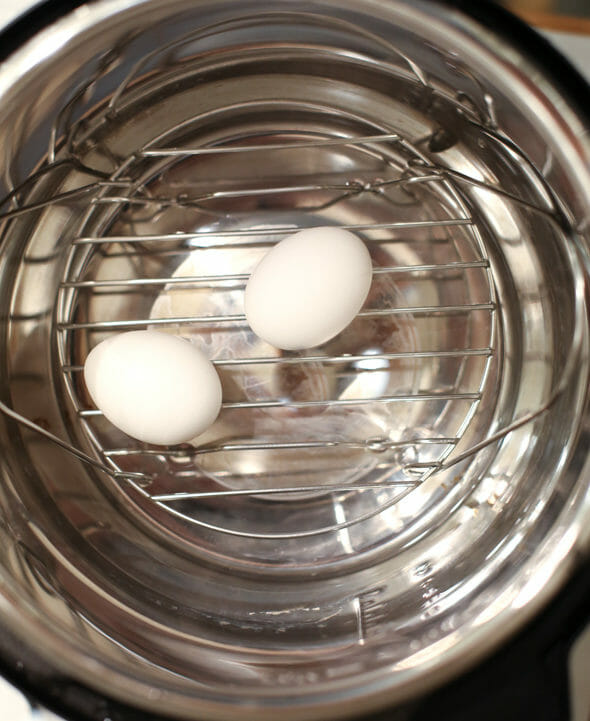
- Steamer rack/basket – The eggs are being steamed here, so we need something to keep them from touching the water below.

How to Make Hard Boiled Eggs in an Electric Pressure Cooker
- Place your steamer basket in the bottom of your Instant Pot and add 1/2 cup water. ITo avoid cracks, I always just place as many eggs as I can fit without them touching (I can get 6 if I’m very careful), but others have reported you can really just pile as many in as you like! Close and seal the pot, and use the manual setting to cook for 5 minutes.
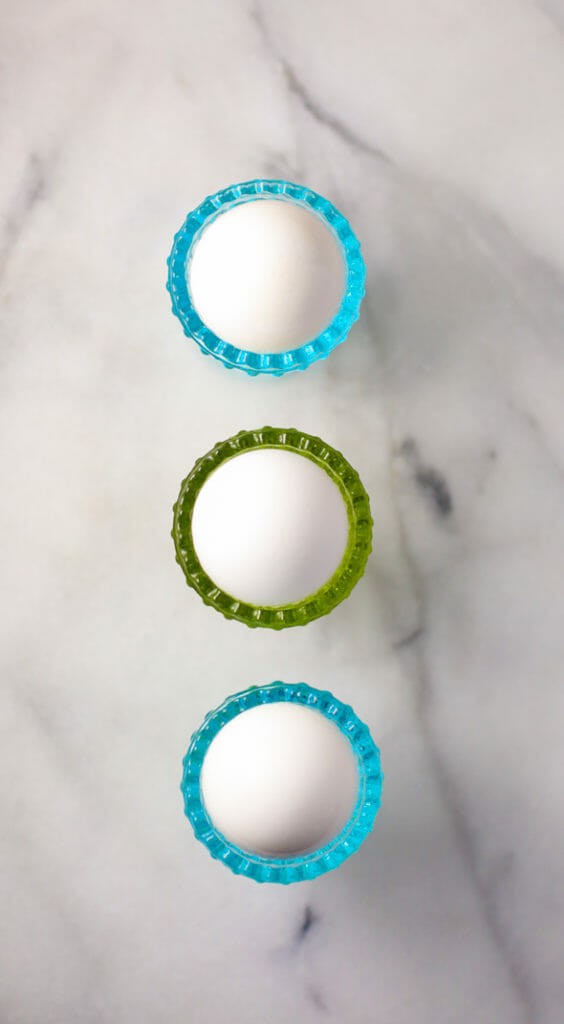
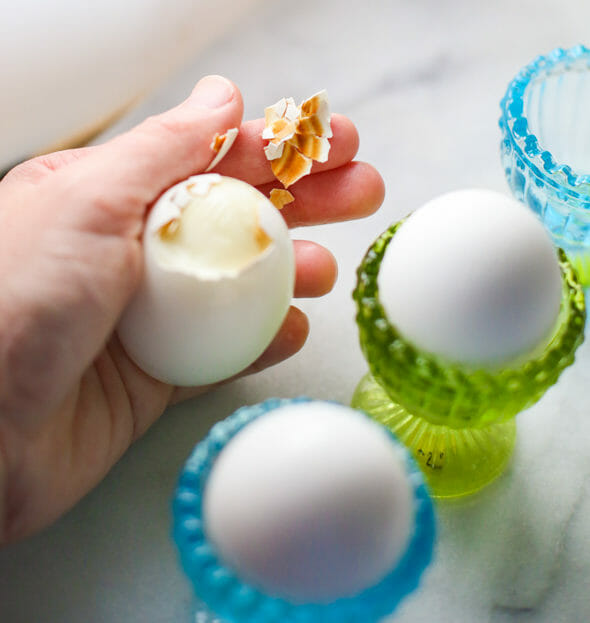
- When the timer goes off, do a quick release of the pressure and then let the eggs hang out in the closed pot for 4 minutes (set a timer.) Fill a bowl with ice water and when you finally open the pot, transfer them to the ice water. Let the eggs cool for 10-15 minutes then enjoy or store in the refrigerator for later use.
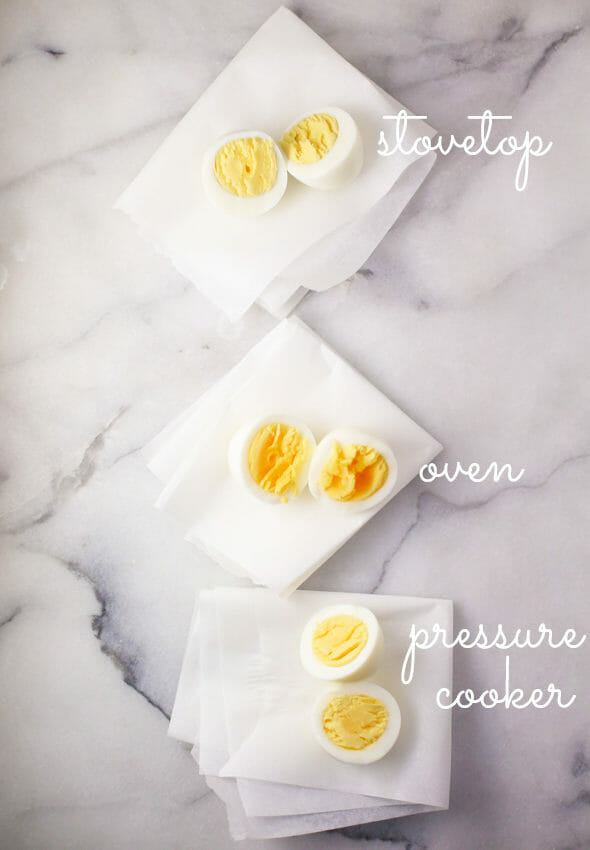
How They Stacked Up: Stovetop, Oven, & Pressure Cooker
Timing
I set a timer as soon as I started making them–filling the pot, heating the oven, etc.–and stopped when they hit the ice water. This is how they stack up time-wise:
Instant Pot: 14 minutes (eggs perfectly done)
Oven: 39 minutes (slightly underdone; my oven is a fickle jerk)
Stovetop: 36 minutes (slightly overdone)
So no, you’re not going to get 5 minute eggs with the Instant Pot, but they’re still done in more than half the time of the next shortest method. Not too shabby.
Overall
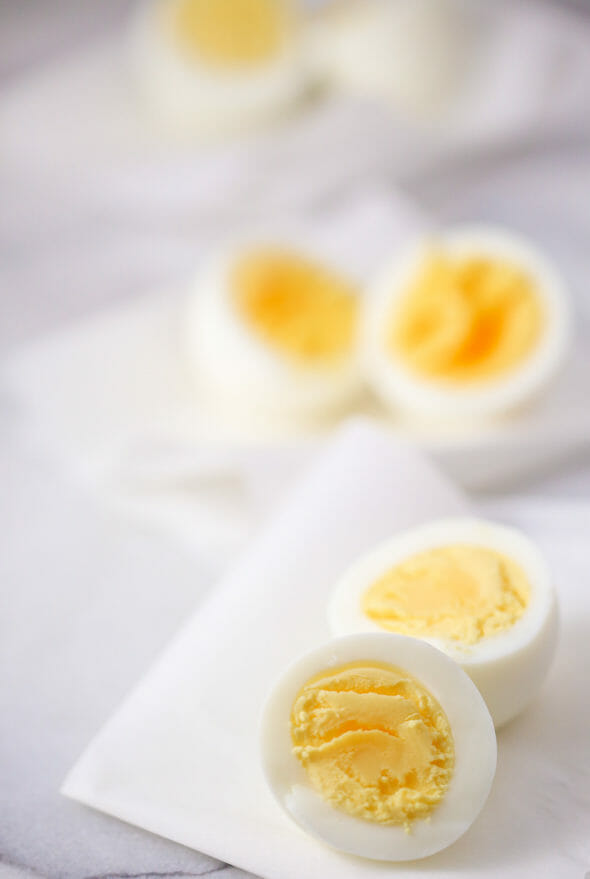
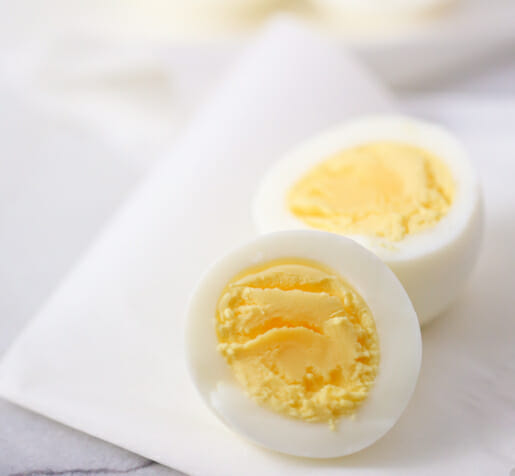
- Instant Pot: There was a small amount of cold water in the shell when I peeled them, but otherwise, these eggs were perfect. I had a small hairline crack in one shell.
- Oven: These peel like a dream, but the shell and a little bit of the white has unattractive brown marks on the inside (see photo below). There is also quite a bit of water in the shell when you peel it. In the past, I’ve had good yolks using this method, but I needed to cook these for slightly longer than 20 minutes (which is what I did this time). One very large crack in one shell.
- Stove top: These are difficult to peel, but there isn’t any water in the shell. Also, for my elevation, I need to cook them for slightly less time–it’s hard to see, but there’s a very thin grey ring around the yolk, which will likely get gray-er with time. No cracks in the shells, but this is unusual for me–I usually have the most cracks using the stovetop method.
Storing and Other Tips
- Store cooked, cooled, unpeeled eggs in an airtight container in the refrigerator and enjoy within 7 days. For best flavor and texture, enjoy within 3-5 days.
- Did you know older eggs are better for boiling? Over time, air enters the porous shell which raises the egg’s pH and loosens the bond between the whites and the shell membrane. If you wait at least 7 days after purchasing your eggs to hard boil them, you’ll find them much easier to peel!
- I’ve found the key to perfect eggs is 5 minutes of pressure cooking, plus hanging out for a few minutes in the pot after you release the pressure. If you’re adjusting for higher elevation, I would still cook them for 5 minutes, I just might add a minute or two to what I have (4 minutes) after you’ve released the pressure.
Frequently Asked Questions
You can definitely use a stove top pressure cooker to cook eggs this way, however this particular post was tested and written specifically with the electric pressure cooker, so the timing and method may not translate exactly. For best results, I would recommend looking up a recipe that’s been specifically tested with a traditional stove top pressure cooker.
The eggs will keep cooking as heat moves inward, even after they’ve been removed from the pot. Placing them in an ice bath slows that process down so they don’t end up overcooked. As a bonus, it also speeds up the time it takes for them to be cool enough to handle, peel, and enjoy.


How to Hard Boil Eggs in a Pressure Cooker
Equipment
- Electric Pressure Cooker
- Steamer Basket
Ingredients
- Up to 6 eggs Or up to as many as your pot can hold. *See Notes section below for more info.
- ½ cup water
Instructions
- Place the steamer basket in the base of your Instant Pot. Add 1/2 cup water. Carefully place up to 6 eggs on the basket, making sure they're not touching (*see Notes below). Seal the pot and cook on the manual setting for 5 minutes.
- Quick release the pressure and allow the eggs to stand in the pot for 4 more minutes (you may need to add more resting time, experimenting with adding 1 minute at a time, at higher elevations).
- While the eggs are resting, fill a bowl with ice water. After 4 minutes, transfer the eggs to the ice water. Allow to rest for 10-15 minutes in the ice bath and then enjoy or store for later.
Notes
- Store cooked, cooled, unpeeled eggs in an airtight container in the refrigerator and enjoy within 7 days. For best flavor and texture, enjoy within 3-5 days.
- Did you know older eggs are better for boiling? Over time, air enters the porous shell which raises the egg’s pH and loosens the bond between the whites and the shell membrane. If you wait at least 7 days after purchasing your eggs to hard boil them, you’ll find them much easier to peel!
- I’ve found the key to perfect eggs is 5 minutes of pressure cooking, plus hanging out for a few minutes in the pot after you release the pressure. If you’re adjusting for higher elevation, I would still cook them for 5 minutes, I just might add a minute or two to what I have (4 minutes) after you’ve released the pressure.
- Number of eggs: I have always limited my eggs to 6 because that’s how many I can fit without them touching, which in my mind means they won’t bump and crack). But I’ve read lots of places, and readers have reported in the comments, most people have great luck piling in as many eggs as they want!


Questions & Reviews
Just got an Instant Pot and tried this recipe and it worked perfectly! My eggs peeled so well. Thanks a bunch!
Will you please tell me why the eggs need to not touch?
Love your blog 🙂
I know this is a super old post, but if anyone is reading it (like me!), just a heads-up that they can certainly touch… pile ‘em in!
I would guess that there’s a thought that the boiling water could jostle them into each other if violent enough, possibly resulting in cracking.
If the eggs are above the violence on a rack, should be fine to touch.
My own thought is that eggs can have flaws that develop into visible cracks when they are boil’t.
A friend shared with me that she crumples up some foil at the bottom of her Instant Pot and creates a little cradle for each egg. That way they won’t accidentally roll or move and you can prevent any cracks. I tried it and did a double layer of eggs and they were perfect!
I just tried this in a different brand of pressure cooker (Power Pressure Cooker XL) got it randomly at Costco. I followed the same instructions except I cooked it for 6 minutes and let it set for 2 min after pressure release. It worked great even with a dozen eggs. I am at high altitude (Utah) as well. Thanks for the idea!
I just wanted to thank you for mentioning that you were testing this at sea level. I live at almost 5,000 feet elevation, so I need to adjust cooking times when the original times were tested at sea level. But it seems that most blog posts about pressure cooker recipes do not mention what elevation the recipes were created and tested at, which leaves me at a loss as to if/how I need to adjust.
No reason to stop at only 6 eggs using this method – I’ve done 18 at a time in my Instant Pot. It is amazing!
Good to know!! Thanks for sharing!
When doing the stove top method for eggs, add a tbs of salt to the water to keep the shells from sticking. It works like a charm! My Dad, who was a cook in the Navy shared that trick with me and I haven’t had a shell stick since. Also to avoid the gray/green ring I boil for 12 min after they come to a boil then straight to the ice water. The longer they over cook the more gray/green they become.
Thanks for the tips! I made these today and they were perfect and so easy. I’m dieting and am looking to have healthy snacks in the fridge. This was perfect. Please more instant pot recipes!
I just made two batches of these, and they worked perfectly! Thanks for more Instant Pot recipes. I’m addicted to mine!
YES!! I’m so happy to hear that!!
Stove top hard boiled eggs don’t need to be hard to peel! There’s a trick to it. And it even works with eggs as fresh as a few days old.
Simply bring water to a rolling boil and then carefully set eggs in so they don’t crack. Boil for 13 to 15 minutes (depending on how done you like the yolks) and then remove the eggs to ice water to cool. They should peel quite easily.
As for the grey surrounding the yolk there are several factors but the fresher the (raw) egg, the less likely it’ll be grey is what I’ve discovered from many experiments on this particular topic.