 So I do remember that it’s January and we’re posting healthy recipes and that this is lip gloss and not food and whatever. But I’m posting this recipe now for a couple of reasons. 1) Valentine’s Day is creeping up on us and this is a fun and easy little potential Valentine that is easy to make in large batches, but you might need to order or track down some semi-unusual supplies, so I wanted to give you plenty of time, 2) You can make all sorts of delicious flavors with 0 calories, and 3) part of being healthy is taking care of yourself. Not only are these lip glosses fun and adorable, but the base is all natural and, if you use essential oils to flavor them, they’re completely natural and perfect for making your lips soft and gorgeous even in the winteriest winters.
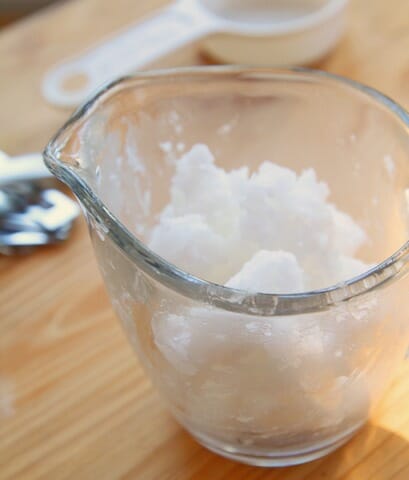
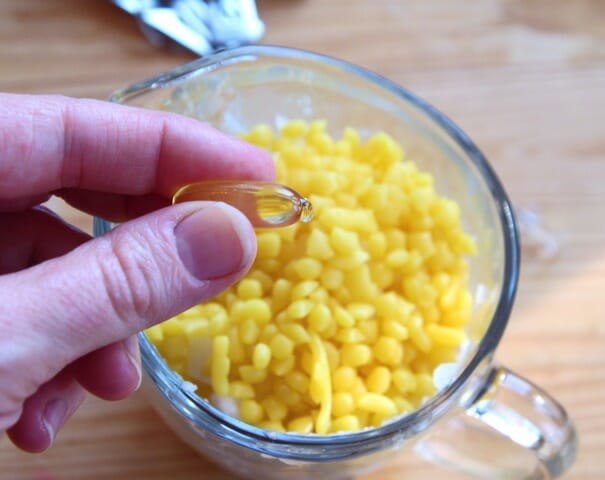
For the base of your lip gloss, you’re going to need coconut oil, beeswax, and Vitamin E (I just got the capsules).
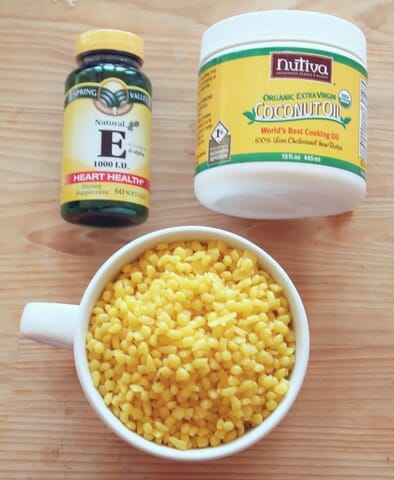 Coconut oil. There are LOTS of different coconut oils on the markets these days, so take your pick. I tried out every brand I could find and from my (somewhat limited) research, this brand (Nutiva Extra Virgin Coconut Oil) was the only one that had a coconut scent/flavor. Even some of the other organic coconut oils were essentially scentless and flavorless. Now, which kind you use is definitely personal preference–you might want that coconut flavor in your lip gloss if you’re making strawberry coconut, but you might not want it if you’re making cherry cola (guess who grew up on Lip Smackers and had lots of fun playing with different flavors?).
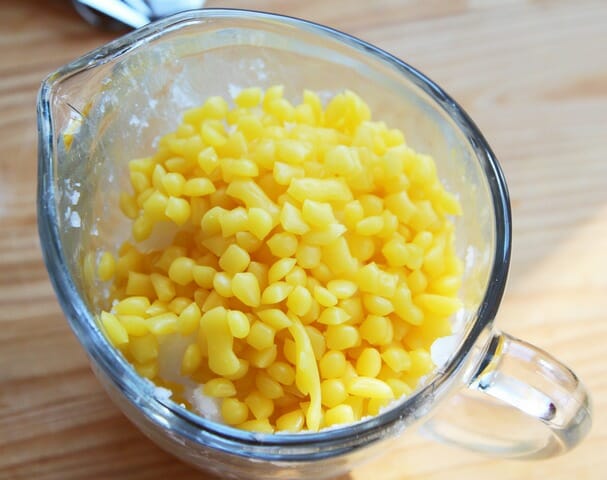
Beeswax. You can get it at craft stores like Hobby Lobby or Michael’s, but it’s generally sold in chunks, which will need to be grated. You can also get pellets like these ones which will make your life easier.
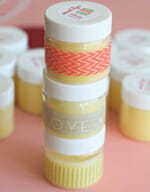
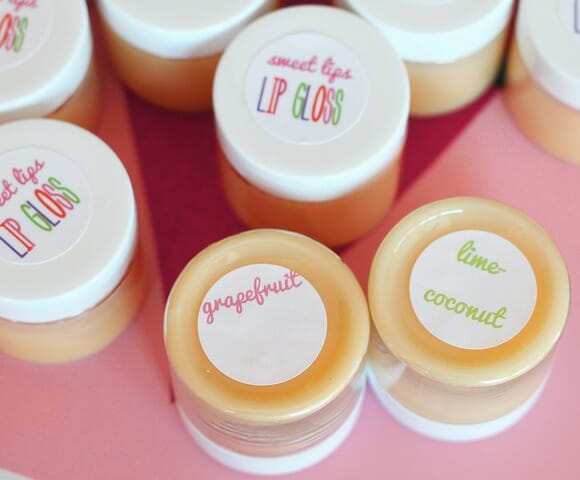
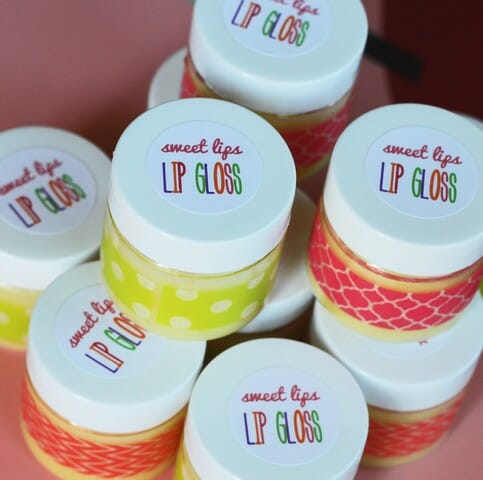
You’ll also need some kind of container and, if you want, labels. I used 1″ round Avery labels and these 1-ounce plastic jars, 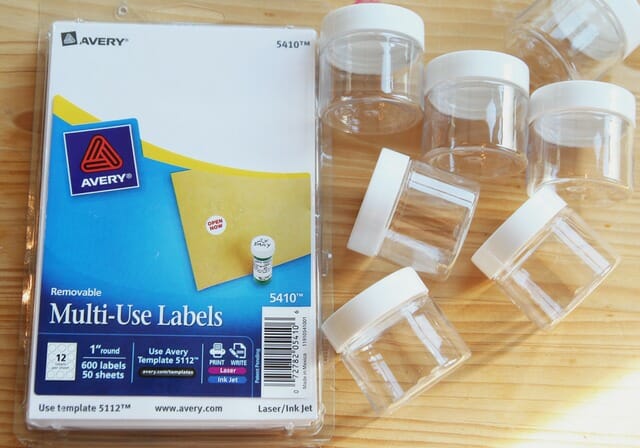
but this site has a ton of fun lip balm containers and they’re not sold in lots of 10 million, which is always a bonus for those of us who don’t need 10 million empty lip balm containers. I wouldn’t recommend going any larger than 1 ounce–that’s a lot of lip gloss.
You’ll also need something to flavor your lip gloss with. I used candy flavor oils like these ones from Orson Gygi. They have SO many yummy flavors to choose from: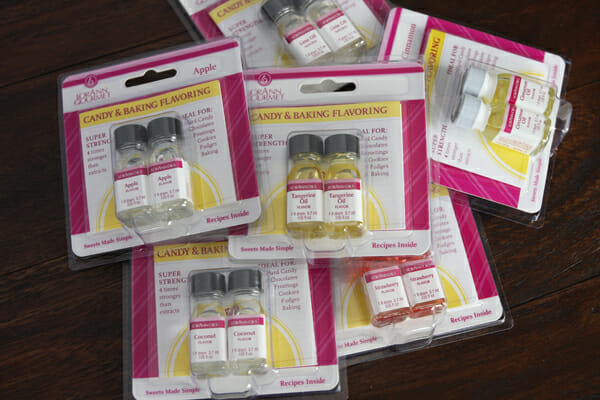
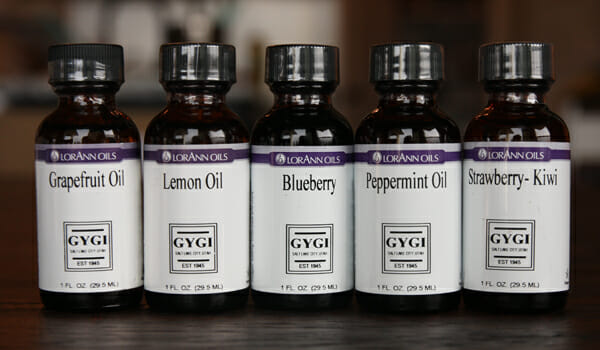
and also used different essential oils.
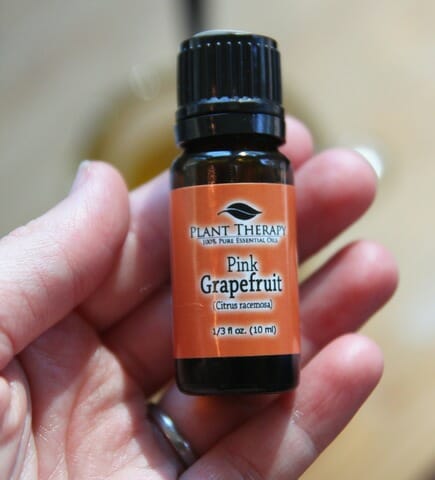
One of the funnest things was playing around with different flavors. I made coconut-lime because (shocker) that is my all-time favorite (and because when the late January doldrums set in, that’s my go-to smell to get me out of them) and grapefruit. Not with the coconut-lime, just by itself. Fun Kate fact: I hate grapefruit and grapefruit juice, but I love all things grapefruit-flavored. But seriously, the sky’s the limit when it comes to combinations.
Place the coconut oil in a 1-cup glass measuring cup (you can get one for, like, $2 at Target or Walmart that you use only for lip gloss making)
and then add the beeswax
and prick a Vitamin E capsule with a push pin and squeeze the oil into the measuring cup.
Heat the measuring cup for 30 seconds at a time, stirring well after each heating (I just used a plastic straw so I could throw it away when I was done) until everything is completely melted (in my microwave, it took about 90 seconds-2 minutes). Now…if you want to make a couple of different flavors from this batch, you could pour some of it into another couple of spouted heat-safe cups and add the oils separately, or you could just flavor the whole batch. For me and my oils and flavors, I ended up needing about 40 drops of grapefruit oil and 17 drops of coconut along with 8 drops of lime flavor. Keep the following things in mind:
- Some flavors are stronger than others–you might need to adjust how much oil you end up using.
- Flavors like vanilla, coconut, etc. are going to be milder than flavors like citrus, cinnamon, and mint, so keep things balanced.
- Dab a little of the liquid mixture onto your lips, but keep in mind that the flavors will get stronger after the lip gloss solidifies.
After you’ve mixed your flavors, pour them into your empty containers
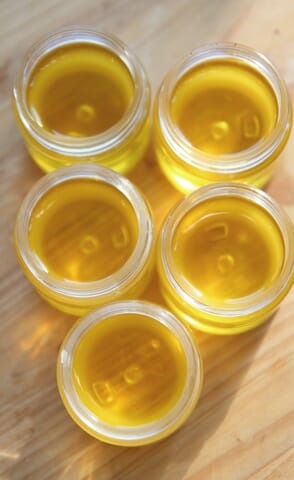
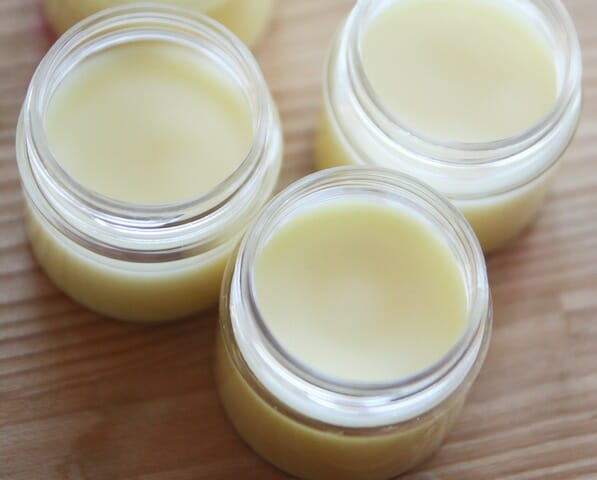
and let them cool to solidify (about 15-20 minutes).
I made these labels to go on top:
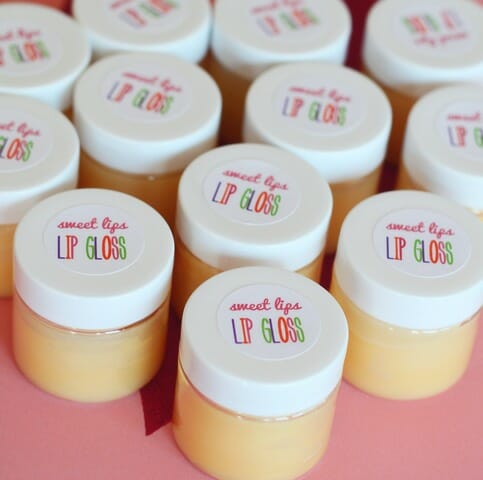
Now…you totally could be using a different-sized container, but if you do use a container that has a lid that’s 1″ or bigger (square or round) and want to use these labels, click HERE and then use a 1″ Avery label, square or round, that’s on a 4×6″ sheet (my labels were Avery 5410); just set the paper size on your printer properties for 4×6″ paper.
For the bottoms, you could either print out the flavor or hand-write it and stick it on the bottom.
You could give them away like this or you could dress them up a little more with some cute washi tape:
This “recipe” makes 8 1-ounce containers or more smaller containers (you’ll have to do your own math there…)
Homemade Natural Lip Gloss
By Our Best Bites
Ingredients:
3/4 cup + 1 tablespoon coconut oil*
3 tablespoons grated beeswax or beeswax pellets*
1 1000 I.U. capsule of Vitamin E
25 drops of flavor oils or 40 drops of essential oils (add more or less if necessary)
*If making this lip gloss in tubes, use 3/4 cup coconut oil and 1/4 cup beeswax.
You’ll also need…
Dropper (like this)
1-ounce or smaller jars, tubes, or tins
Labels (optional)
Washi tape (optional)
Instructions:
In a microwave-safe glass container with a spout, combine the coconut oil and beeswax. Heat on high for 30 seconds at a time, stirring after each heating, until the beeswax completely melts. You can either flavor all the lip gloss one flavor or pour the mixture into a few smaller containers and mix up smaller batches of different flavors. After you’ve added the desired flavors, pour the mixture into jars, tubes, or tins and allow to cool completely. Decorate as desired.


Questions & Reviews
thanks this helped out tons with my science project on lip-gloss 🙂
thank you for posting this because me and my friend tina are doing this for school. 6th grade.
we are all into spa stuff. it’s really cool and fun to do
If doing the pellets, how many pellets do you need
Do you also have to add the vitamin e capsule into the mixture, if not added, will it affect the lip balm
Nope! 🙂
Hey…I was just wondering, what were the measurements for the containers you used and the washi paper.
This looks so cool, me and my friends are gonna try it for our class project
Thanks
I believe the containers were 1 ounce and the washi tape was about 1/2″ wide. Hope that helps!
My husband made his first batch of soap the other day and is going to make a few more batches. I personally can’t wait to make some lip balm! My plan is to make a few tubes and jars of plain, then also lime, vanilla, peppermint, and vanilla-peppermint. At Christmas we’re going to give out handmade soap and lip balm 🙂 Can’t believe how simple this recipe is, especially when you consider all the weird stuff in the lip balm you buy at the store.
I ordered the coconut oil from your link but it is not solid. Will the liquid also work? Thanks so much.
Hi Suzanne! Just in case Sara or Kate doesn’t see your question: I would go with coconut oil that’s solid at room temperature. If you use liquid coconut oil, I’d think the lip balm would be very greasy and loose since you use it at room temperature. Good luck, this seems like such a fun little project!
Thanks Cheese with noodles!
Loving this site. Thank you. To ammend the above answer – coconut oil is solid below 78°. Which, in my home, from may to sept it is liquid.
It looks like it is awesome! Hope to try it sometime.
That is awesome!
I was wondering if there was an alternative for coconut oil?
I’m allergic. =(
I’m sure there is- I would google and see what others use!
Hi kate! Great idea for the lip balm! If I want to add color what should I use for color and shimmer tint?
You can buy colors and shimmers meant for beauty products at craft stores or on-line; I would start there!