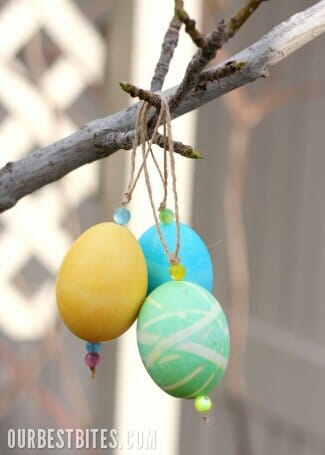
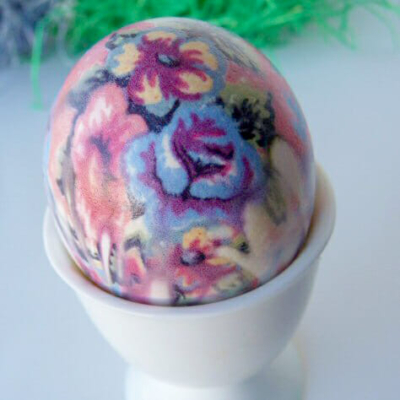
One of our most popular holiday posts is our tutorial on dying Easter eggs with pieces of silk. It’s a unique process that creates amazingly beautiful eggs and it’s always a shame when it’s time to toss them! Many readers have asked if it was possible to use the same process on a blown-out egg so they could be kept indefinitely. The problem that arises is that hollow eggs float, so they’re difficult to boil. But thanks to one resourceful reader, we’ve solved that problem. So today I thought I’d do a little tutorial about how to make blown eggs and then create charming little ornaments from them- including silk-dyed ones!
Supplies Needed
This is just a preview of supplies and method; keep scrolling for full printable instructions.
- Raw eggs – If you’re going to save the inside of the egg for cooking, then make sure to wash the outside of your egg and make sure that all of the tools you are using are clean and sanitized.
- Bowl of warm water – Warming the eggs for a few minutes makes the insides more loose, making them easier to remove.
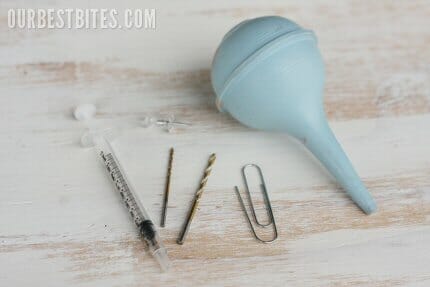
- Infant bulb syringe – You know, the bulb shaped “baby snot sucker.” This is to force air into the egg and create pressure that blows the insides out the other end. You could also try a medical syringe. Personally I think the bulb syringe works better.
- Push pin – This is used to poke holes in each one of your eggs.
- Very small drill bit – I used this to widen the holes poked in the eggs after creating them with the pin.
- Paper clip – This is used to scramble the insides, making them easier to blow out.
- Decorating supplies – As needed. Sharpies, egg dyes, acrylic paints or paint pens, supplies for silk-dyed eggs, ribbons and an extra long crafting needle to thread them), beads, etc.
How to Make Blown Egg Ornaments
Step 1: Blow Out Your Eggs
- Place your eggs in a bowl of warm water for about 10 minutes before starting.
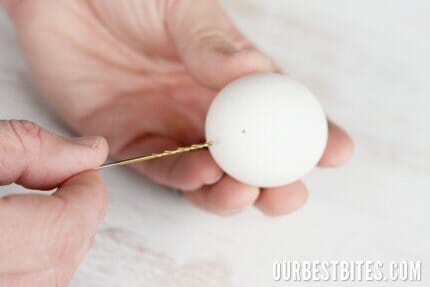
- Hold an egg firmly (you know, as firmly as you can hold an egg) and use your pin to gently pierce a hole in one end. It helps to gently twist the pin back and forth first to sort of screw it in before you actually push it through. Repeat on the other end of the egg.
- Once you have a teeny tiny pin hole, it helps to have a teeny tiny drill bit (seriously, the smallest one in the set). Gently “drill” through your pin hole to enlarge it.
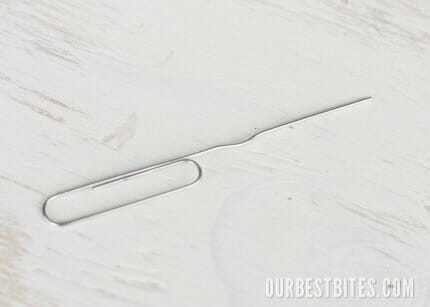
- Now grab that paper clip and unfold it. Stick the paper clip inside the egg and swirl it all over the place. The object here is to scramble that yolk up which will help it all come out easily.
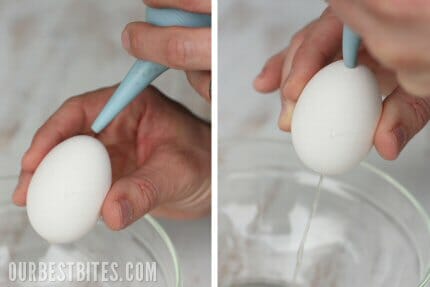
- Now grab that bulb syringe and place it directly over one of the holes and squeeze over a bowl. The egg will come right out the other end. If you meet any resistance, don’t keep blowing air or your egg might explode. Give it a shake, or stick the paper clip in again, or increase the size of your hole.
- Once everything is blown out, you might want to fill your syringe with warm water and blow it into the egg. Shake it up and then blow it out to get the inside clean.

Step 2: Decorate
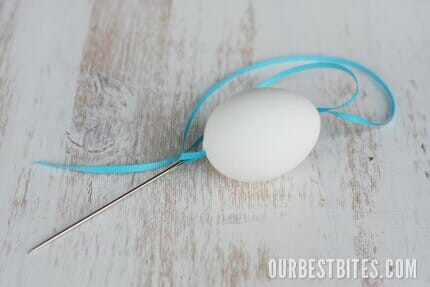
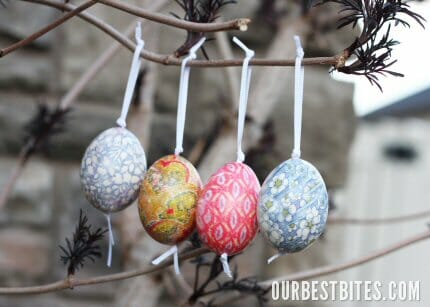
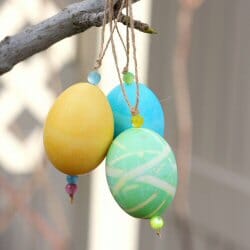
- Once you’ve got your hollowed out egg you can do all sorts of crafty things with it. To make an ornament, thread ribbon, string, or twine through the holes. Using a extra long crafting needle really helps. If you need to enlarge your holes to fit the ribbon, use your pin to gently pick away at it. Just tie a knot at the bottom end and a loop at the top end.
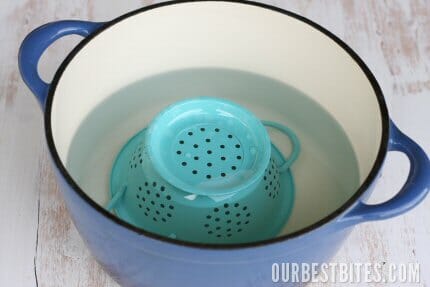
- To make Silk Dyed eggs,follow the instructions in this tutorial. When it comes to the step where you boil the eggs in the pot, use a strainer turned upside-down to keep the eggs under the water. OR, if you can fill your eggs with water it will weigh them down as well. After they come out they will be filled with boiling water. Make sure to let them cool first, and then blow out the water. After they’re dry, thread ribbons through so you can display them!
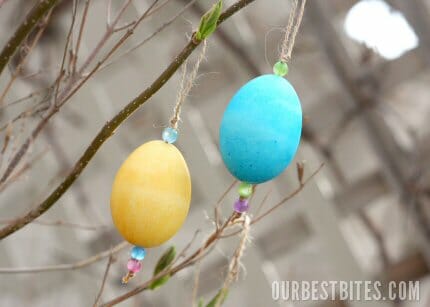
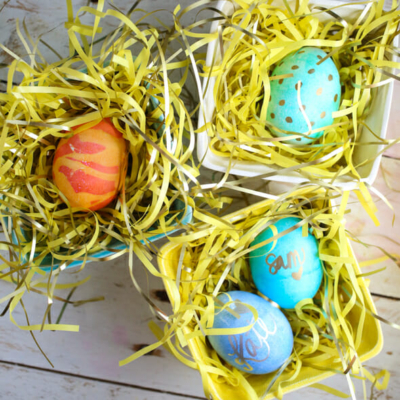
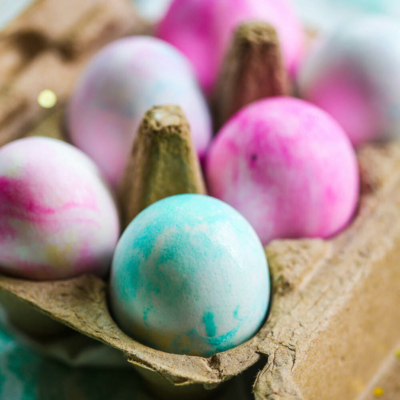
- If you want to dye your eggs with normal colored dye, then dye uncooked eggs before you blow them out. Try adding beads to your string. It not only looks pretty, but it covers up messy holes! I love plain, solid color eggs- and they look really pretty with colored beads. These would be really cute with monograms drawn on- or cut out of vinyl.
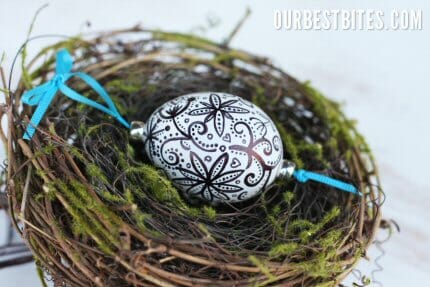
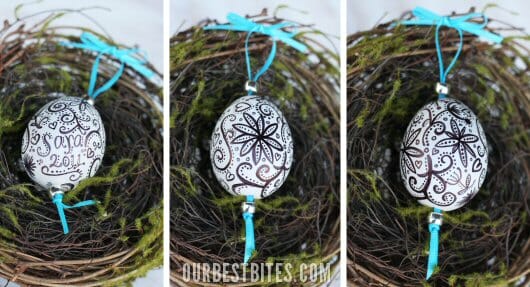
- I’ve always wanted to learn Ukrainian egg painting, aka: Pysanka, but apparently I have too many hobbies already. So I settled for a Sharpie. Turns out all of those years of mindless doodling in school was actually useful. Way more useful than algebra at least.
Frequently Asked Questions
I recommend packing them lightly in tissue paper inside a larger, sturdy box.

How to Make Blown Egg Ornaments
Equipment
- Bowl of warm water – Warming the eggs for a few minutes makes the insides more loose, making them easier to remove.
- Infant bulb syringe – You know, the bulb shaped “baby snot sucker.” This is to force air into the egg and create pressure that blows the insides out the other end. You could also try a medical syringe. Personally I think the bulb syringe works better.
- Push pin – This is used to poke holes in each one of your eggs.
- Very small drill bit – I used this to widen the holes poked in the eggs after creating them with the pin.
- Paper clip – This is used to scramble the insides, making them easier to blow out.
- Decorating supplies – As needed. Sharpies, egg dyes, acrylic paints or paint pens, supplies for silk-dyed eggs, ribbons and an extra long crafting needle to thread them), beads, etc.
Ingredients
- Raw eggs If you’re going to save the inside of the egg for cooking then make sure to wash the outside of your egg and make sure that all of the tools you are using are clean and sanitized.
Instructions
- Place your eggs in a bowl of warm water for about 10 minutes before starting.
- Hold an egg firmly (you know, as firmly as you can hold an egg) and use your pin to gently pierce a hole in one end. It helps to gently twist the pin back and forth first to sort of screw it in before you actually push it through. Repeat on the other end of the egg.
- Once you have a teeny tiny pin hole, it helps to have a teeny tiny drill bit (seriously, the smallest one in the set). Gently “drill” through your pin hole to enlarge it.
- Now grab that paper clip and unfold it. Stick the paper clip inside the egg and swirl it all over the place. The object here is to scramble that yolk up which will help it all come out easily.
- Now grab that bulb syringe and place it directly over one of the holes and squeeze over a bowl. The egg will come right out the other end. If you meet any resistance, don’t keep blowing air or your egg might explode. Give it a shake, or stick the paper clip in again, or increase the size of your hole.
- Once everything is blown out, you might want to fill your syringe with warm water and blow it into the egg. Shake it up and then blow it out to get the inside clean.
- Allow eggs to dry and decorate as desired. To add ribbon, use an extra long crafting needle to thread it through the holes in the eggs. Add beads to help cover the holes in the egg.
Notes
Decorating Notes
- If you want to dye these eggs in a traditional manner, I recommend dyeing them before blowing them out.
- Click here for instructions on Silk-Dyed Eggs. Use a strainer (with a small pot on top of needed) to hold the blown eggs under the water while boiling.


Questions & Reviews
Question: (and it has nothing to do with egg ornaments 🙂
Can you use a store bought grahamn cracker crust when making the Chocolate chip cookie pie!? Please say it would work!
Love your eggs, you are very talented.
If you want to see truly insane devotion to egg decorating, check out the folks at Evil Mad Science LLC.They developed the Egg-bot, a specialized plotter that prints on eggs.
They’re here: egg-bot.com
ARE YOU KIDDING ME??? You did that with a Sharpie?!?!?
Gee whiz. you go, girl. *turning green*
I just raved about your eggs on my blog!
It’s not just about the cool cool eggs, but the way you have things set up. Thank you!
These could not be any more beautiful or fun, but I am the world’s worst crafter (SERIOUSLY… I even failed a knitting class!), so I will just partake of their beauty vicariously through you! Thanks for the beautiful post!
Made these with my grandmother while growing up. We used wax to cover the parts we didnt want colored/ dyed , and then a candle(fire) to melt the wax off the parts we died. SOme of my favorite easter Memories.
Your eggs are beautiful!
Snot-Sucker is definitely the technical term for any mom…at least at our house it is! These all turned out great!
My husband and kids have been blowing eggs for the last month so we can dye them with all his old ties. But they have been blowing them with their mouth and a bulb syringe seems a lot less gross, as long as it’s clean. We’ll have to give it a try. Also, I love the idea of putting beads on the ribbon to cover the holes. Thanks for all the tips!
Pysanky are not difficult at all. You should give them a try.
Wow! These look so neat! And I love how you did the designs with the Sharpie. They look amazing! 🙂