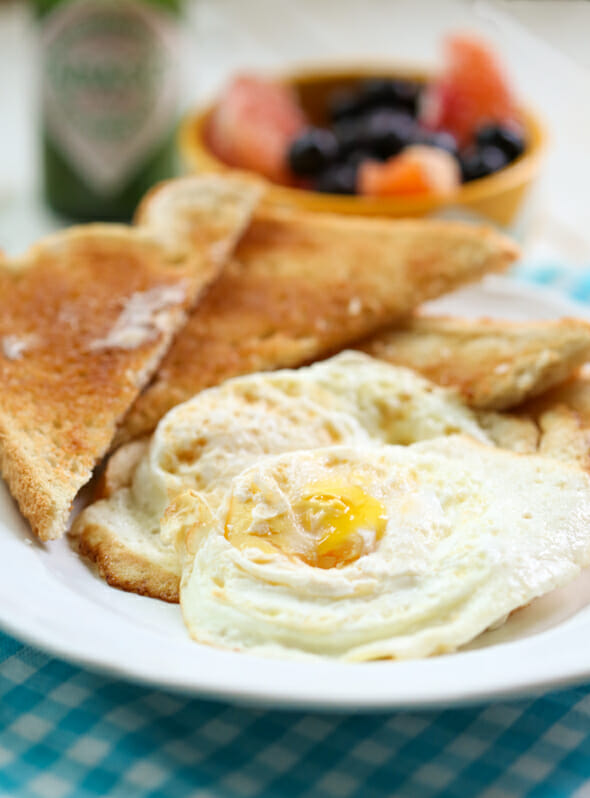
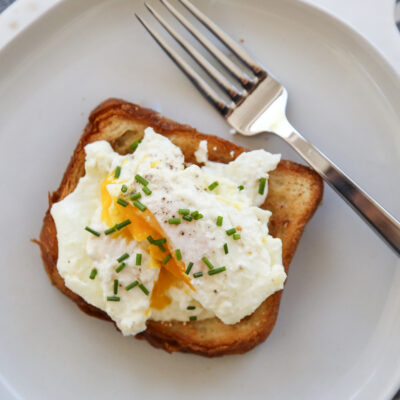
Making a good fried egg should be simple. I set out to to make the Perfect Fried Egg for me with the following requirements:
1) Fully-cooked white. No sliminess. Anywhere. Also, I really like the crispy white parts around the edges.
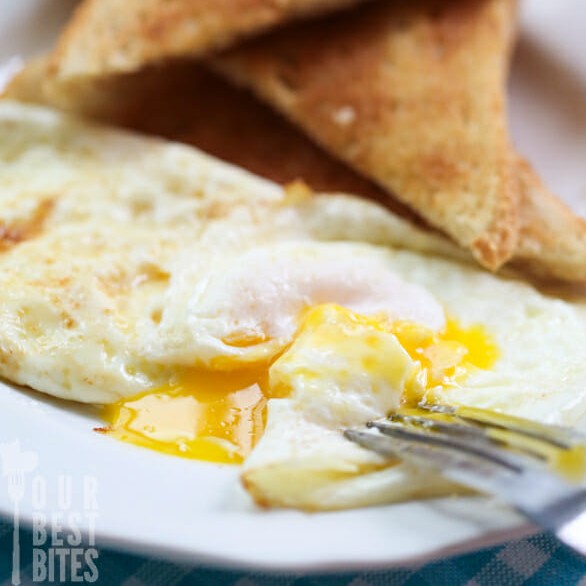
2) Yolk cooked long enough to be firm-ish but still runny.
Of course, everyone likes their eggs fried a little differently–some like them sunny side up, which means they’re not getting flipped at all (and thus potentially slimy), some people don’t like the crispy white edges, some people want the yolk totally solid. Which is all totally possible here–if you like ’em sunny side up, don’t flip them. If you want the yolk solid, cook the egg a little longer after you flip it. I’m just going to share a few tips I found along the way to make things a little easier.
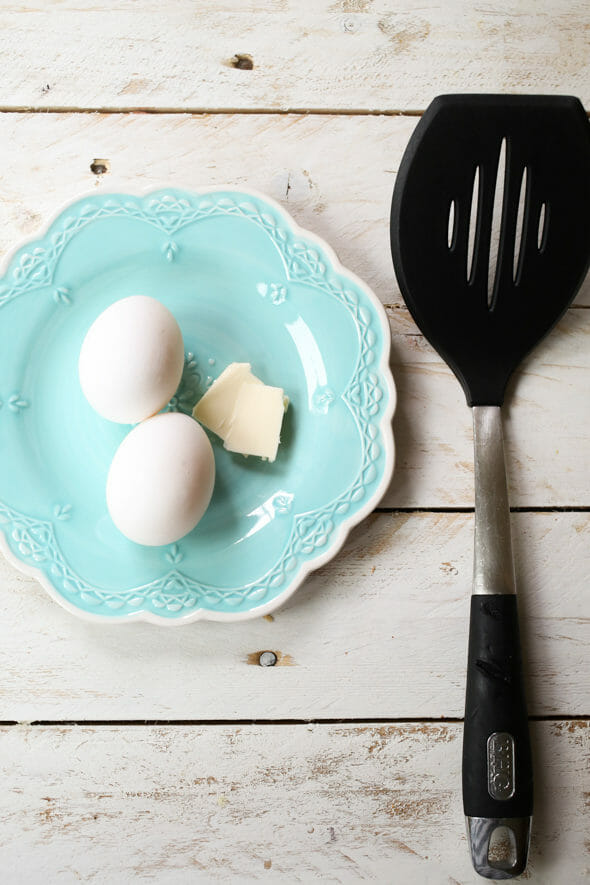
Ingredients and Equipment Needed
This is just a preview of ingredients and method, keep scrolling for full printable recipe.
- Eggs
- Butter – I can only guarantee results here using real butter. Cooking spray just doesn’t quite cut it for me.
- Non-stick pan – Use a bigger pan than you think you’ll need. Or, even better, an electric skillet. I know, I know, you have visions of the perfect little round eggs and think it’s going to happen in that tiny skillet you got in your wedding pots and pans. I can tell you from a lot of first-hand experience that it’s SO much easier to flip eggs when you have plenty of room. So bring out the big guns–it’s worth it, I promise. And if you want your perfect eggs, you can always use egg or pancake molds (this is just an example–there are lots of different options and shapes!).
- Thin, wide spatula – You’re dealing with something very delicate and want to disturb it as little as possible. I have a very thin silicone spatula that I use for stuff like this, but I really want this one.
How to Make the Perfect Fried Egg
- Okay, are you ready? Heat a non-stick skillet to heat set to just a little above medium. When you can hold your hand about 2 inches from the surface and tell that it’s very hot, add 1/2-1 teaspoon of butter per egg. Melt the butter, and spread it into a circle about 6″ in diameter.
- Carefully crack a cold egg into each melted butter circle (cold eggs will spread less; fresh ones will, too, but hopefully your eggs are reasonably fresh). It will start cooking immediately from the outside in. Sprinkle each egg with a small pinch of salt. Cook for about 2-3 minutes, watching the whites carefully–the area around the yolk will become more solid and opaque and if you gently poke the yolk, it will bounce back and won’t feel as fragile as a raw yolk will.
- Once the “thickest” part of the white is almost completely cooked, gently jiggle a thin spatula under the egg and quickly flip it. Cook for about 1 more minute and then quickly remove the egg from the pan and serve it immediately (the yolk will continue to cook for a little while after you remove it from the pan, so if you’re after the runny yolk, be quick!). I serve mine with another tiny sprinkling of salt and a few shakes of green Tabasco sauce.
Storing and Other Tips
- While fried eggs are best eaten fresh, you can absolutely save leftovers in an airtight container and store them in the fridge. I’d eat them within 2-3 days for best results.
- For a sunny side up, instead of flipping your egg, add a tiny splash of water to the pan to create steam and pop a lid on to trap the steam. Allow the steam to cook the top of the egg whites.
Frequently Asked Questions
Stainless steel has a bit of a learning curve and is more temperamental than other pan choice. While there are definitely ways to fry a perfect egg in a stainless steel pan, I prefer non-stick for consistent results and that’s what this tutorial is written for.
As many as your pan allows, while still providing enough room to get your spatula under them! If you need to make a bunch at once, you may want to try this Large Batch Poached Eggs and Fried Eggs recipe where you bake the eggs in the oven.


How to Make the Perfect Fried Egg
Equipment
- nonstick skillet
- wide, flat spatula
Ingredients
- eggs
- butter
Instructions
- Heat a non-stick skillet to heat set to just a little above medium. When you can hold your hand about 2 inches from the surface and tell that it’s very hot, add 1/2-1 teaspoon of butter per egg, melt the butter, and spread it into a circle about 6″ in diameter.
- Carefully crack a cold egg into each melted butter circle (cold eggs will spread less; fresh ones will, too, but hopefully your eggs are reasonably fresh). It will start cooking immediately from the outside in. Sprinkle each egg with a small pinch of salt. Cook for about 2-3 minutes, watching the whites carefully–the area around the yolk will become more solid and opaque and if you gently poke the yolk, it will bounce back and won’t feel as fragile as a raw yolk will.
- Once the “thickest” part of the white is almost completely cooked, gently jiggle a thin spatula under the egg and quickly flip it. Cook for about 1 more minute and then quickly remove the egg from the pan and serve it immediately (the yolk will continue to cook for a little while after you remove it from the pan, so if you’re after the runny yolk, be quick!) I serve mine with another tiny sprinkling of salt and a few shakes of green Tabasco sauce.
Notes
- While fried eggs are best eaten fresh, you can absolutely save leftovers in an airtight container and store them in the fridge. I’d eat them within 2-3 days for best results.
- For a sunny side up, instead of flipping your egg, add a tiny splash of water to the pan to create steam and pop a lid on to trap the steam. Allow the steam to cook the top of the egg whites.
- Use a much bigger pan than you think you need, so you have room to flip your egg.
Nutrition


Questions & Reviews
I watched am Amish woman fry a dozen eggs all at once in a huge pan! Most amazing thing I had ever seen and they all came out perfect! And she used a tiny (TINY!) flexible metal spatula. As you said, she “cut” the eggs apart and flipped each one individually. They had an egg business where they sold to local supermarkets and restaurants, and like many Amish families, they had a lot of kids, so I guess she had a lot of practice. Watching her was like watching a work of art being formed. (They also had toast, bacon, sausage links, and cereal. I can’t imagine making breakfast like that every morning for years on end!)
Here’s a trick that works every time but removes the need to worry about overcooking the yolks. Crack your egg into your pan and then use your spatula to “break” the whites. They’re in a little sac that keeps them together. Break it and they’ll spread out a little more, meaning they’ll cook WAY faster, before your yolk overcooks. Perfect every time!
This is and excellent guide for cooking fried eggs. I followed the instructions exactly and had fantastic results. One of the best eggs I’ve ever cooked. Thanks a ton!
So I just searched your page before writing you an email because i found a DELICIOUS under 400 calorie breakfast that is satisfying and I think… pretty “clean” and it involves… fried eggs. And so I figured I’d see if you had a “fried egg” recipe on here.
This method is what I’d call over-easy though. Which is how I always preferred my eggs before visiting my dad this summer. The SUPER easy Fried-egg method is SUPER close to this… except you need a pan with a lid.
1) melt oil (I use coconut, but for non-typical reasons. And I use the refined stuff cause… I don’t want my eggs to taste like a pina colada, but any oil would work. Just a tsp-ish.)
2) crack egg in hot pan. the pan should be hot enough that the whole bottom of the egg turns white almost immediately.
3) pour some water in. maybe… a tbsp ish per egg.
4) Immediately top with a lid.
5) wait a few minutes.
the steam cooks the top of the egg, the pan cooks the bottom… you are done when there’s no “snot” around the yoke. The yoke is runny and thick… there’s no “pasty” yoke… and you only need to lift the egg out of the pan and onto your plate – so no yoke-breaking while flipping/cooking – my nemesis of the over-easy method 😀
Next: the reason I searched. I found a delicious method of using said fried eggs in what I’d consider a pretty healthy breakfast.
It uses salsa that my UNCLE showed me this summer as well (we visited a lot of family this summer)
Salsa:
2 pints cherry tomatoes, finely diced (don’t cheat. use a knife. It’s annoying, but you need the juice to stay IN the tomatoes). he squeezes out the seeds to reduce the water-y-ness of the salsa, and uses cherry tomatoes because they’re sweeter and hold solid better once diced.
1 bunch chopped cilantro, finely diced
1/2 a sweet onion, finely diced. he red when I was visiting, but was raving about how sweet they were from the farmers market… I’m afraid of red onion, so I use sweet white 😛
Juice of 1 lime
pinch of salt
That’s it. surprised me too.
Mix together and let sit for a while (aka: make ahead)
NOW: get some corn tortillas – I prefer yellow. Heat them up. Put them on a plate. Put your fried egg on top, then some salsa (1-2 tbsp), and then a slice of avocado. (cheese is also delicious, but… I’m going for healthy, and… avocado’s got better fats I think. You can go crazy and do both and that’s DIVINE, but one or the other is delish too)
2 eggs, 2 mission yellow corn tortillas, 3 tbsp salsa, and 1/4 an avocado works out to 318 calories and that’s glorious in my book 😉 Adding extra salsa only adds a few calories too
I just had 1 for snack this afternoon because… oooooooooooh yum. AND it takes like, 5 minutes to get ready. total (especially if you keep a griddle on your stove for the tortilla)