We love waffles at our house. There are some great waffle recipes out there, but a lot of them require you to whip egg whites or prepare the batter the night before, and sometimes you just want an easy waffle.
Enter Light and Crispy Waffles, also known at our house as the Waffles of Insane Greatness. I made them for the first time a few months ago after discovering them on the Food Network site and they have become a weekly deal for us. I mean, we pretty much always have the ingredients, they take a few minutes and a few dishes to whip up, and everyone’s happy with breakfast. Airy, crispy-tender, insanely great waffles. What more could you ask for?

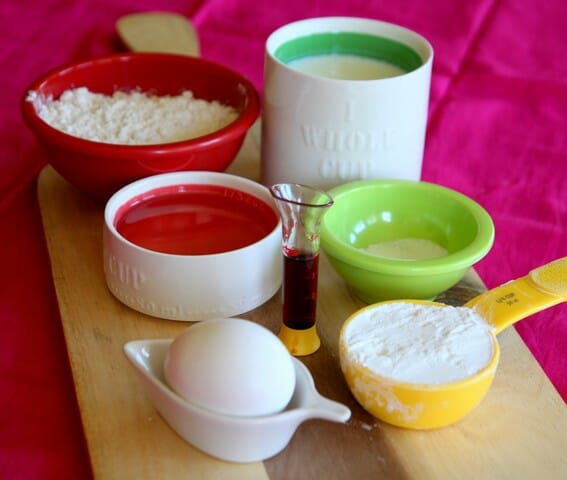
Ingredients and Equipment Needed
This is just a preview of ingredients and method, keep scrolling for full printable recipe.
Ingredients
- All-purpose flour
- Cornstarch
- Baking powder
- Baking soda
- Table salt
- Buttermilk
- Vegetable oil
- Egg
- Granulated sugar
- Vanilla extract
Equipment
- Waffle iron – Waffle irons can vary a lot in size and capacity. Using a Belgian waffle iron (the round kind), this recipe will yield 7-8 4-inch Belgian waffles, or about 4 7-inch Belgian waffles. Does it have to be a Belgian waffle iron? Nope! Any waffle iron will do, your yield will just vary based on how much batter it needs.
How to Make Light and Airy Waffles
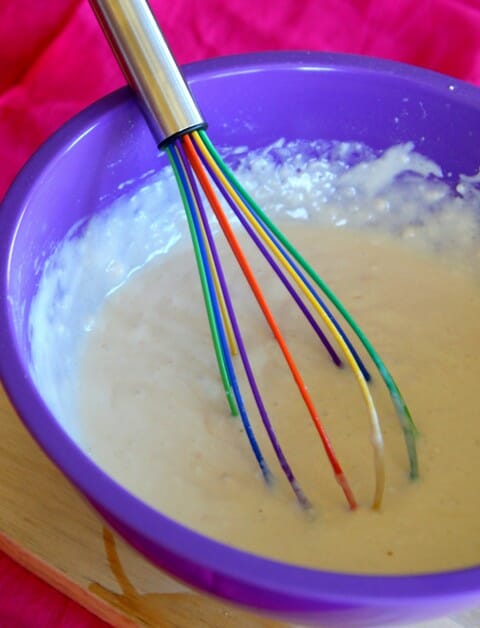
- These waffles are so simple! Whisk together the dry ingredients and then whisk in the wet ingredients. If you have time, you let the batter rest for a few minutes to allow the flour to fully absorb the wet ingredients, but you can also just cook it right away.
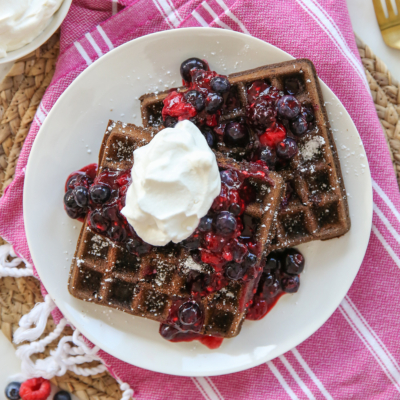
- Preheat your waffle iron. When hot add your batter and cook until golden brown. Serve immediately with chopped fresh fruit, whipped cream, maple syrup, or buttermilk syrup.
Storing and Other Tips
- Store finished, cooled waffles in an airtight container in the refrigerator and enjoy within 3-4 days for best results.
- You can make this batter smoother than you make pancake batter–don’t worry too much about over-mixing the ingredients!
- If possible, allow the batter to stand for 30 minutes. This allows the flour to fully hydrate, relaxes gluten, and allows air bubbles to form. All of these things help give the waffles their delicious light, airy texture.
- You can also refrigerate the batter overnight if you need to.
Frequently Asked Questions
To reheat from the fridge you can pop these in a toaster, or bake at 350°F for 5-8 minutes.
To reheat from frozen, you can toast straight from frozen or bake at 375° for 8-12 minutes.
Preheat your oven to 200°F with a baking sheet inside and transfer waffles to the baking sheet as you take them out of the waffle iron. If you want to keep them extra crispy, place them directly on the oven rack and do not stack. You can keep them in there for 30-45 minutes before serving this way.
Yep. Allow to cool completely on a wire rack then freeze in a single layer on a baking sheet until firm (about an hour). Transfer to a freezer-safe bag and enjoy within 2 months for best results.
I can’t guarantee exactly how these waffles would turn out with substitutions but, in theory, you should be able to replace the flour with a good 1:1 gluten-free flour blend and the buttermilk with a dairy-free milk or yogurt. If you need to substitute both, you may need an extra egg to help with structure.


Light & Crispy Waffles
Equipment
- waffle iron – Waffle irons can vary a lot in size and capacity. Using a Belgian waffle iron (the round kind), this recipe will yield 7-8 4-inch Belgian waffles, or about 4 7-inch Belgian waffles. Any waffle iron will do, your yield will just vary based on how much batter it needs.
Ingredients
- ¾ cup all-purpose flour
- ¼ cup cornstarch
- ½ teaspoon baking powder
- ¼ teaspoon baking soda
- ½ teaspoon table salt
- 1 cup buttermilk
- ⅓ cup vegetable oil
- 1 egg
- 1 ½ teaspoons sugar
- ¾ teaspoon vanilla
Instructions
- Whisk together the dry ingredients. Add the wet ingredients and whisk until combined. Allow to stand for 30 minutes, if possible.
- Heat a Belgian waffle iron. Make waffles by ladling a generous ⅓ cup of batter into the waffle iron and cooking until golden brown, about 3-5 minutes per waffle. Serve with desired topping (Buttermilk Syrup is our favorite!)
Notes
- Store finished, cooled waffles in an airtight container in the refrigerator and enjoy within 3-4 days for best results.
- You can make this batter smoother than you make pancake batter–don’t worry too much about over-mixing the ingredients!
- If possible, allow the batter to stand for 30 minutes. This allows the flour to fully hydrate, relaxes gluten, and allows air bubbles to form. All of these things help give the waffles their delicious light, airy texture.
- You can also refrigerate the batter overnight if you need to.


Questions & Reviews
I have never made a waffle in my life & I’m almost 66. WE just always made pancakes. I didn’t to go on keto & got the ok from my dr. I love this recipe & I am going to use it regularly. I also seen where you can make all kind of different things on the waffle iron I just got. I’ll be tracking down those recipes as well. Thank you!