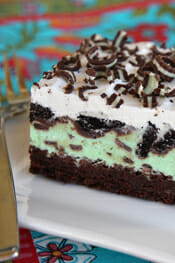
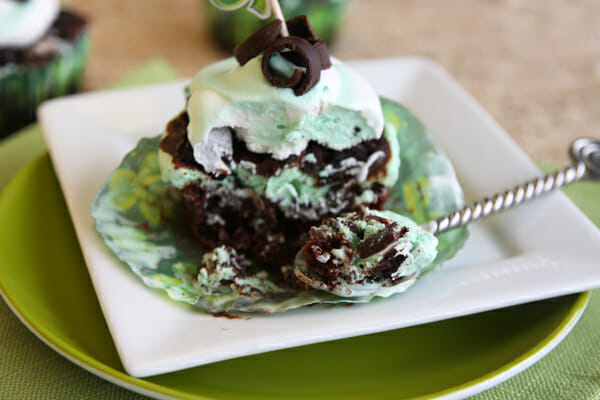
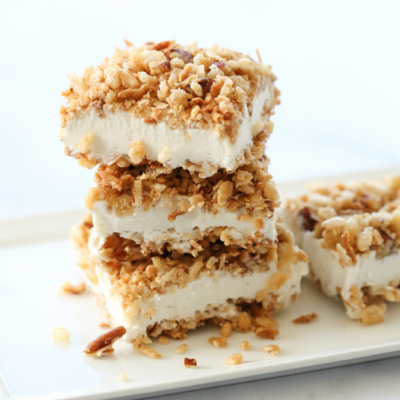
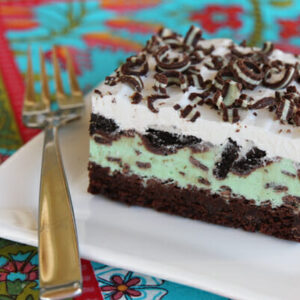
My love of peppermint and chocolate goes back a long way and this is one of my favorite ways to enjoy that combo. These Mint-Chip Ice Cream Brownie Squares are kind of an ice cream version of my most favorite brownies (have you made those yet?? ). It has layers of brownie, mint-chip ice cream, chocolate ganache, Oreo cookies, whipped topping, and Andes chocolate curls. This is one of my favorite desserts to make for a crowd because it makes a big ol’ pan, and you can prepare it several days ahead of time. Also, people will suddenly worship you after they eat it, and that’s pretty awesome too.

Ingredients Needed
This is just a preview of ingredients and method, keep scrolling for full printable recipe.
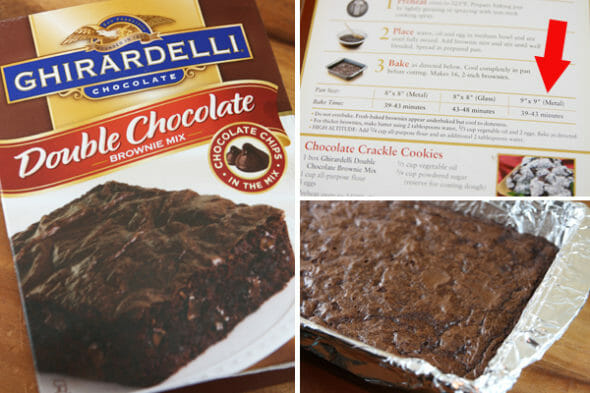
- Brownies – You’ll need a box of brownie mix, baked according to package directions. If you’d like to use homemade, try these Chewy Fudge Brownies with Crackly Tops.
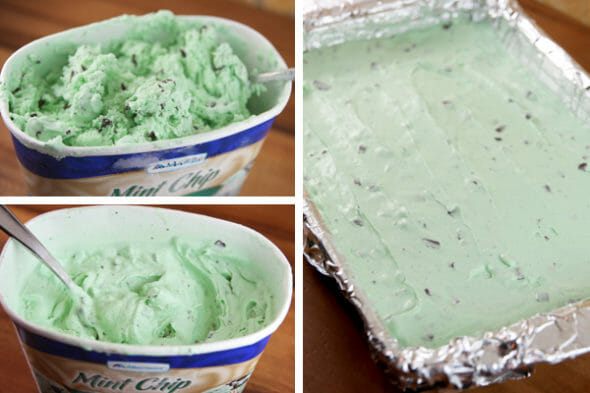
- Mint chocolate chip ice cream – You’ll need 1 1/2 quarts, which is a standard tub. This is going to need to soften until it’s spreadable.
- Chocolate chips – Dark or semi-sweet.
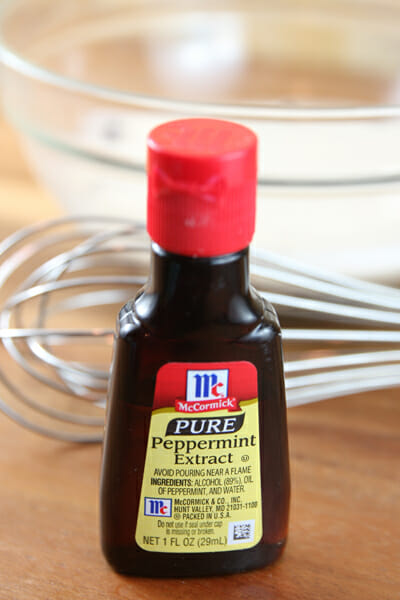
- Peppermint extract
- Oreo cookies – You’ll need about 20.
- Whipped topping – You could use Sweetened Whipped Cream here, but I actually prefer Cool Whip because it thaws at about the same rate as ice cream so everything is a good consistency for serving.
- Green food coloring – optional.
- Shaved or curled chocolate, Andes mints, or sprinkles – Optional.
How to Make Mint-Chip Ice Cream Brownie Squares
- You’ll start off with a pan of baked brownies.
- Next you’ll let a tub of mint chip ice cream thaw, stirring occasionally, until it’s the consistency of soft serve and easily spreadable. Spread that over your brownie layer and pop in the freezer to chill.
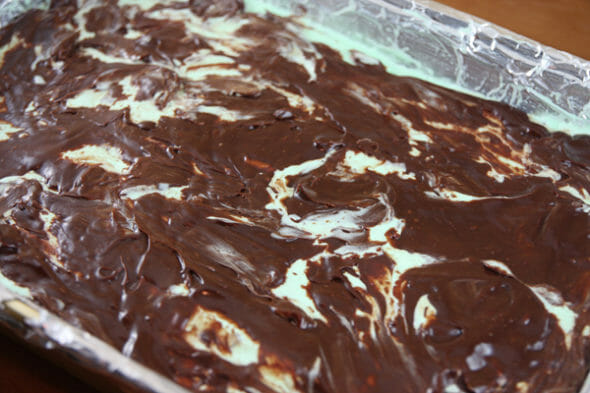
- While that’s firming up, you’ll make a quick peppermint ganache with chocolate chips, cream, and peppermint extract. When that has cooled close to room temperature, you’ll pour it over your ice cream layer.
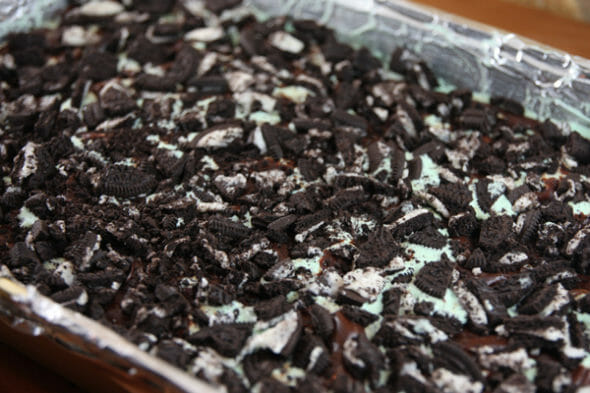
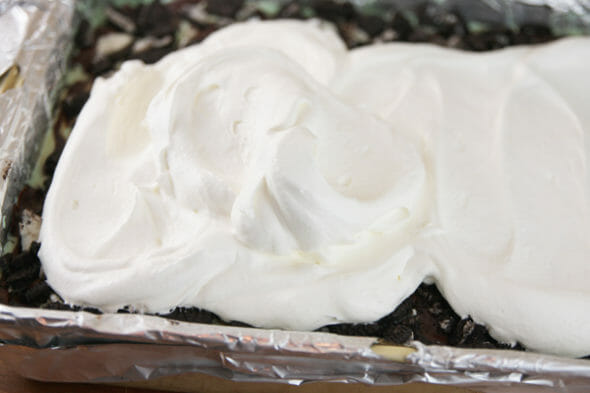
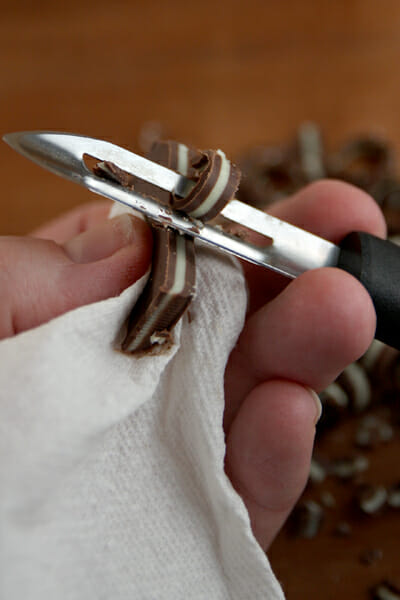
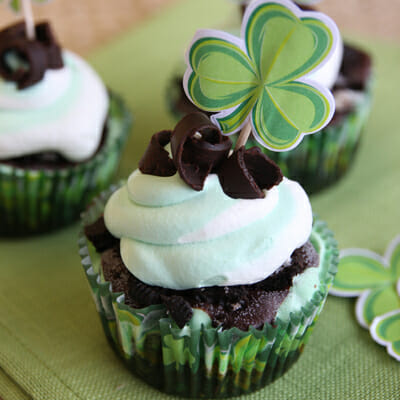
- Crush up some Oreos and press them into the ganache layer, then top everything with whipped topping (tinted with green food coloring, if desired). To finished things off, I like adding some Andes mint shavings with a vegetable peeler. Chocolate curls or sprinkles work well here, too.
- Pop that back in the freezer. When ready to serve, let sit at room temperature for 10-15 minutes then slice and serve.

Storing and Other Tips
- Once made, cover tightly with plastic and store in the freezer until ready to serve, up to 2 weeks for best texture and flavor.
- When adding the ganache layer, drizzle as evenly as possible for easy distribution. The cold ice cream will make the ganache harden up pretty quickly!
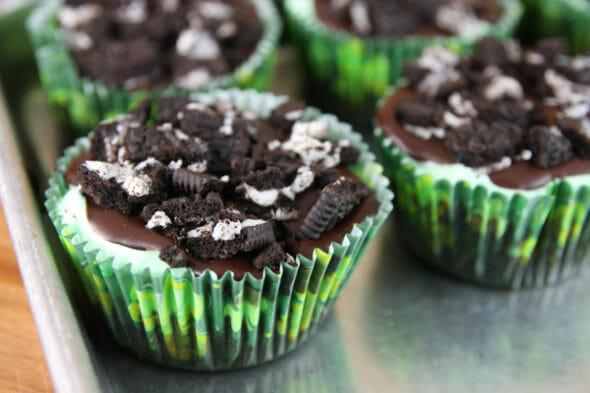
- You can also make these in individual servings by baking 1-2 tablespoons of brownie mix in muffin tin with liners. You’ll have to eyeball the baking time but they shouldn’t need more than 10-15 minutes in the oven. Once they’ve cooled, continue layering the remaining ingredients on top. You can get at least 24 ice cream cake cupcakes this way, possibly more.
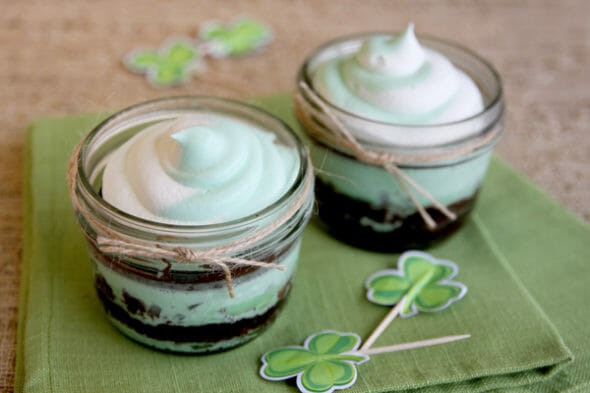
- They are very cute baked individually in little canning jars as well. Pop a lid on and keep them in your freezer until you need a little snack to pull out!
Frequently Asked Questions
Yep! Cover tightly with plastic and store in the freezer. For best results, serve within 1-2 weeks.
Absolutely. Brookie base with cookie dough ice cream anyone?! A brownie base with vanilla ice cream, toasted pecans, and a drizzle of caramel syrup over the top would be amazing, too!
Sure! Just make sure your freezer can accommodate whatever you plan to make. It’s probably best to use two 9×13 pans. A cutting board is helpful to stack them in the freezer.
Mint-Chip Ice Cream Brownie Squares
Equipment
Ingredients
- 1 box brownie mix baked in 9×13 inch pan (check sizes on back of box)
- 1 ½ quart mint chip ice cream
- 1 cup dark or semisweet chocolate chips
- ½ cup cream heavy or regular
- ¼-½ teaspoon McCormick pure peppermint extract
- 15-20 Oreo cookies crushed
- 1 8-ounce container whipped topping
- green food coloring optional
- shaved or curled chocolate, or chocolate sprinkles optional
Instructions
Squares
- Line a 9×13 inch pan with parchment paper and let it extend at least 1 inch over edges of pan. Bake brownies according to package instructions. Cool completely and place in freezer to chill.
- Soften ice cream until you can easily stir it with a spoon. Gently spread in an even layer over brownies. Place pan in freezer to chill.
- Place chocolate chips in a bowl. Heat cream in microwave in 15 second intervals until hot and bubbly, about 1 minute. Pour over chocolate and cover bowl with plastic wrap. Let sit 5 minutes and then whisk until smooth.
- Whisk in peppermint extract and let chocolate mixture cool to close to room temperature. Drizzle in an even layer over ice cream layer in pan.
- Sprinkle crushed cookies evenly over chocolate and lightly press in with your hands. Top with whipped topping and spread out into an even layer. If desired, sprinkle shaved or curled chocolate, or sprinkles on top.
- Freeze at least several hours (and up to several days, covered), until firm. When ready to serve, let sit at room temperature for about 10-15 minutes to soften. Remove dessert from pan using parchment, and then cut into squares.
Cupcakes
- If desired, bake 1-2 tablespoons brownie batter in cupcake liners. Once cooled and chilled, layer remaining ingredients on top. Pipe on whipped topping (color with food coloring first, if desired) and freeze until firm.
Notes
- Once made, cover tightly with plastic and store in the freezer until ready to serve, up to 2 weeks for best texture and flavor.
- When adding the ganache layer, drizzle as evenly as possible for easy distribution. The cold ice cream will make the ganache harden up pretty quickly!


Questions & Reviews
OUTSTANDING dish! Absolutely miserable time peeling foil from brownie layer. I should have known to grease the foil, but next time (and there WILL be a next time), I’ll use parchment. Thanks for sharing such an awesome recipe!
The easiest dessert EVER!! And the step-by-step plus the added pictures make this the best on-line recipe I have ever used. Share more – And Thanks!
I made this dessert and it tasted wonderful! However I had a problem with the brownie layer getting stuck to the foil. Has anyone else experienced this? I am going to make it again without the foil.
I am going to make these cupcakes for my daughter’s birthday in two days. How do you store the cupcakes in the freezer and keep them from getting smashed but also from getting frosty or freezer burned? Thanks!
These were amazing! I made these for my niece’s 2nd b-day party and they were a HIT! Soooo good! Can’t wait to make them again. I baked the brownines about 20-25 mins(they were a little overdone). I used mint-oreo’s and needed 2 tubs of cool whip (8oz each). I used a potato peeler to curl the andes mints. SOOO Good! Heaven on earth!
oh I also used parchment paper since I’ve wrestled too many foil wrapped dishes, it worked much better than the foil…I also forgot to line the pan, so just cut it to slide it out, rinsed the pan and replaced the brownie…then added the ingredients like I hadn’t forgotten in the first place.
Just made these and LOVE THEM…I split it into thirds to try something…1 section had the mint oreo’s, one had regular and one had the rest of my brownie mix that I cooked up then crumbled (I used a 9×13 mix, but only put halfish in the pan). I have to say the mint oreo’s won hands down. I think that gave it the finishing touch (of course the Andies mints on top helped too), I will forever make it with the mint oreos now.
I am making this for Father’s Day!
I don’t know if I’ll get an answer for this because it was posted back in March, but I’m wondering about the cooking time for the brownies. If the mix’s largest size is a 9×9, how do you adjust the cooking time for a 9×13 since the brownies will be thinner?
Just eyeball them, they take a little less, but not too much!
Made this for Mother’s Day along with a cookies n cream version for the kids in the family that don’t care for mint….. This by FAR is the BEST dessert I have made. Everyone loved it and the cookies n cream version was super yummy as well… Rich but yummy…. 🙂 A keeper!!!