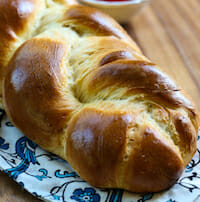
If you’re looking for soft, fluffy, homemade rolls but don’t want to spend all day waiting for dough to rise, these One-Hour Dinner Rolls are about to become your new favorite. They’re perfectly light, slightly sweet, and bake up golden on the outside with a soft, tender center—all in just about an hour from start to finish. Whether it’s a holiday meal or a weeknight dinner, these rolls deliver that cozy, homemade bread vibe with minimal time and effort.
Ingredients Needed
- Non-fat milk – The lower fat content here helps these rolls rise nice and quickly. If you don’t have non-fat milk, no worries! This recipe will work with whatever you have, even whole milk, your rise time just may be slightly extended.
- Butter
- Granulated sugar
- All-purpose flour
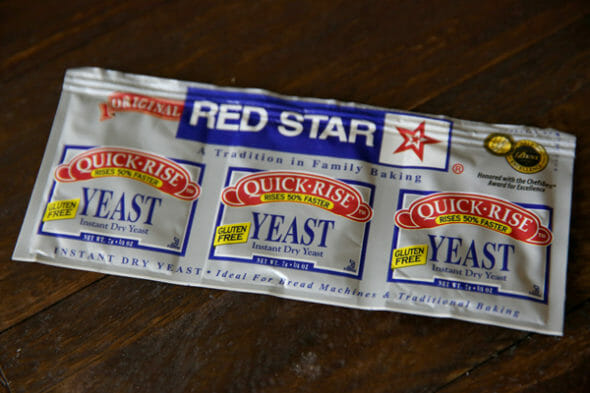
- Rapid rise/ quick rise yeast – One of the tricks of quick rolls is to use “rapid rise,” “quick rise,” or “instant” yeast. “Bread machine yeast” is usually the same thing as well. There’s no proofing involved here, (that’s when you mix the yeast with warm water until it’s foamy) you can just put the yeast directly into the flour and stir it up. I usually keep a jar of yeast on hand, so I’m calling for a tablespoon here, but know that if you don’t make bread very often and you have little packets of yeast and don’t want to open more than one, this will work just fine with a packet.
- Table salt
- Egg – If you prefer, you can skip the egg and replace it with 1/4 cup water. I find the egg gives the rolls a bit more structure. Without the egg, the rolls are just as delicious, it’s just a little bit different texture. It is important to note, however, that you’ll want to let your egg sit in a bowl of warm water for about 5 minutes to bring it to room temperature. Otherwise, when you put the chilled egg into your dough with that warm milk, it will bring the temperature down.
- Additional melted butter – For brushing over the roll tops after baking.
How to Make One-Hour Dinner Rolls
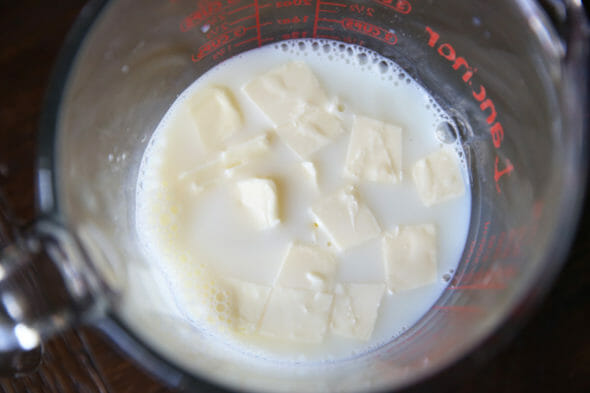
- First place some milk, butter, and sugar in a microwavable container. If you’re out of milk, water will work fine, too. You want the temperature to be between 120-130°F; in my microwave that’s just about exactly 2 minutes.
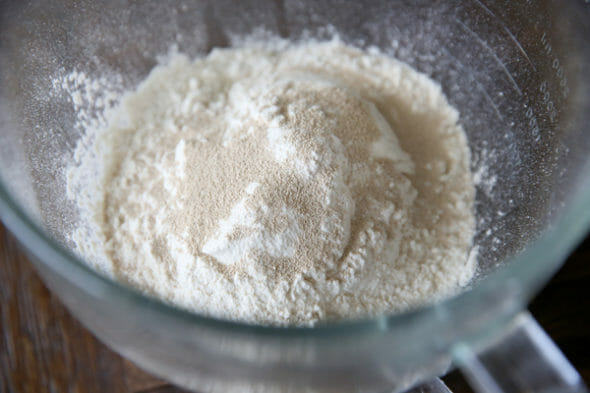
- While that’s warming up, mix the dry ingredients.
- You need the milk mixture to be between 120-130°F. It needs to be at least 120°F, and anything over 140°F will damage the yeast, so I usually shoot for right around 125°F. If you have a digital thermometer you can pop in there quickly, it will save you lots of guess work.
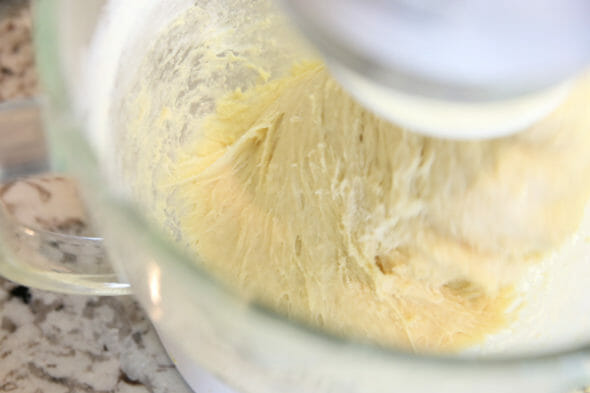
- Add the milk mixture to the flour mixture. If you’re using a stand mixer (I could sing the praises of my KitchenAid all day long), just turn the beater on and slowly pour it in, along with a room temperature egg.
- Then add a little more flour. This dough will be very soft and sticky, so don’t start thinking it needs way more flour and go dumping it in. Or if you do, don’t come back and leave me comments saying your rolls were dense and gross. It should just barely come away from the bowl when you’re beating it, but still be sticky to the touch. I add just a little less than 4 1/2 cups, usually more like 4 1/4 cups, and then I put the last 1/4 cup on the surface where I’m rolling out my dough.
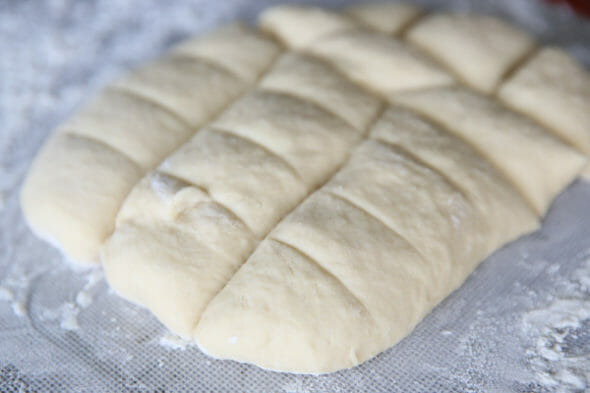
- The trick here is to get that nice flour-covered surface, and then gently scrape the dough onto it using a spatula. Once it’s all plopped on out, use the flour on your board to sprinkle all over the dough so it doesn’t stick to your hands. Don’t knead the flour in, just use it to coat the outside of the dough. Use light hands and form the dough into a smooth-ish shape.
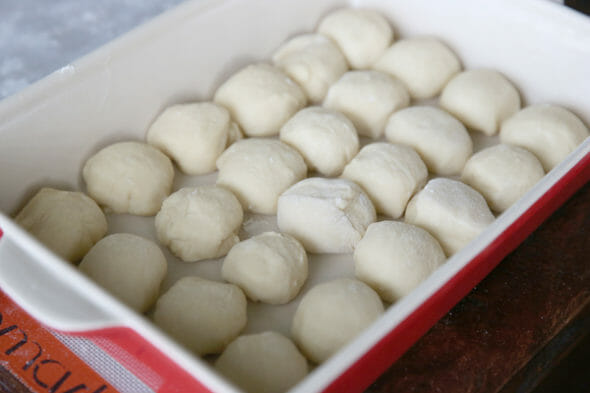
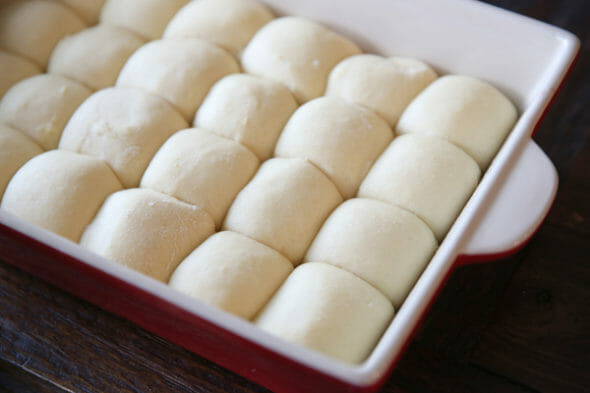
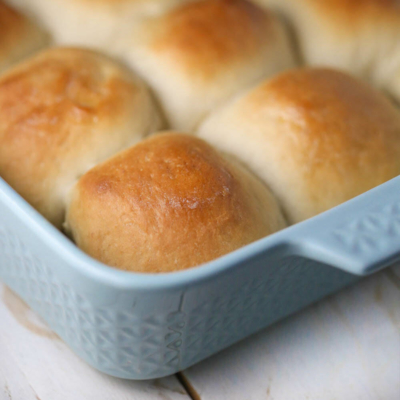
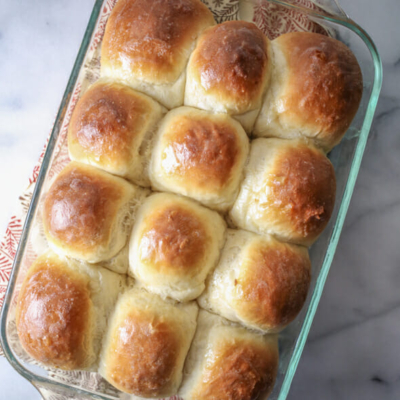
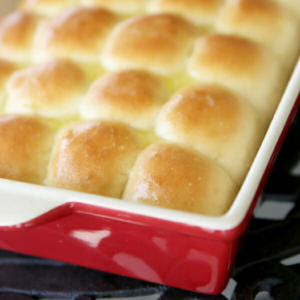
- I like to then score my dough with a pizza cutter, it helps to get even sized rolls. For dinner rolls, I do 24. Then just grab the portions and lightly form into balls. And I use the term “ball” loosely here. As you can see, you don’t need to spend very much time perfecting little dough spheres. Just lightly round them and plop them in there.
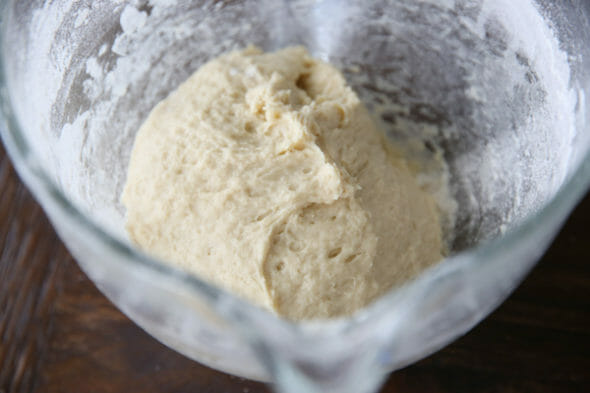
- You’ll need to set them aside to rise now. See the “Options for Proofing Your Dough” section below for helpful tips. After 20-30 minutes, the dough should be nice and plumped up; about double in size (or just a bit less). I usually let them rise closer to 30 minutes. Most one-hour recipes will tell you 20, but that’s almost never long enough for me.
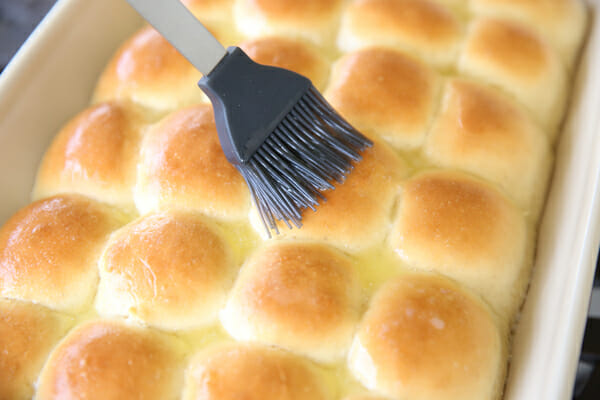
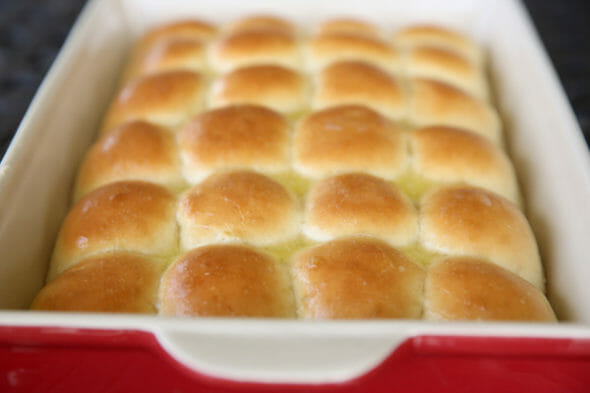
- After they’ve grown and plumped, pop them in a preheated oven and bake them until they’re nice and golden. When they come out of the oven, immediately brush them with melted butter.
Options for Proofing Your Dough
- One of my favorite features of my Thermador ovens is that they have a “proof” setting, which warms up the oven to a cozy 100°F. But I have a couple of other ways to create the best environment for rising dough. If you’ve got double ovens, you’ll want to preheat one of them to actually bake the rolls, but with the other, you can turn it on to the very lowest temperature setting (that’s usually 170-200°F) when you start prepping the dough. Leave it on for about 5 minutes and then turn it off and that should warm things up nicely.
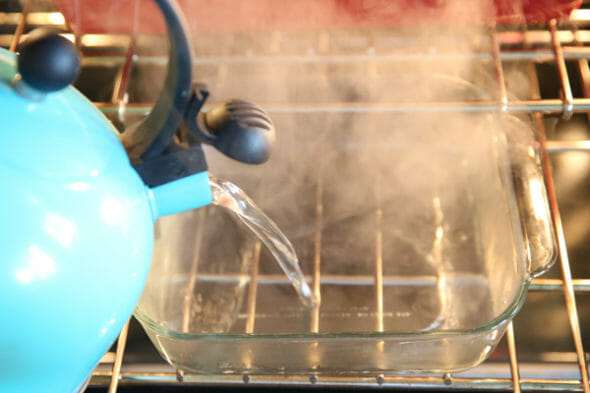
- Another favorite trick, which I actually still use, even with that proof setting on my oven, is to create a little steam room. Place your pan of rolls in the oven (the oven is turned off) and place a pan underneath it. Pour boiling water into the extra pan and then immediately shut the oven door. The steam will not only warm up the space, but it also creates moisture that will help the dough stay elastic and not dry out on top.
- If you have a single oven, and need to preheat it for baking, I used to do that steam trick in my microwave. If you have a rack, you can place rolls on top and steam on bottom, and if you don’t have a rack, chances are you can fit a drinking glass or mug in the corner (or two) of the microwave and achieve the same thing.
Storing and Other Tips
- Homemade rolls are best eaten the same day as baking. If you do need to make them a day ahead of time, make sure they are cooled completely before storing in an airtight container.
- For best results, consume rolls within 1-2 days.
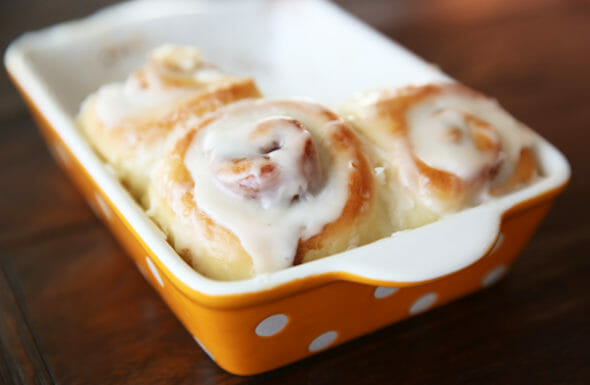
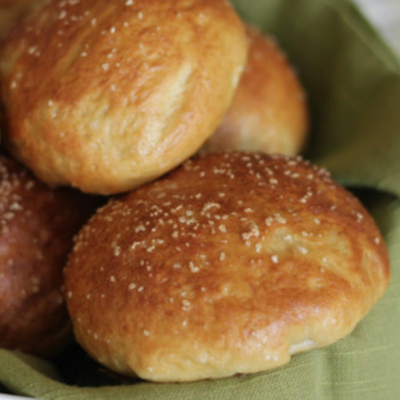
- If you want to make these into bread sticks, you could roll dough in butter and our Garlic Bread Seasoning, or if you’re like me, you’ll save at least a little to bake a tiny pan of cinnamon rolls. As you can see by this photo, these didn’t even last long enough for me to snap a picture.
- Definitely, definitely, make a batch of this Maple Cinnamon butter to go with these, no matter how you make them!
Frequently Asked Questions
Nope. Mixing up the dough is sufficient for gluten development and yeast distribution here!
Because these rolls are so easy, I always make them fresh. In theory you could prepare the dough through shaping and placing in the pan, then cover tightly and refrigerate overnight, allow to rise at room temp the next day and bake, but I have not personally tested this.
Make sure your liquids are warmed to 110–125 °F; too hot kills the yeast, too cold means it won’t wake up. Also, check your yeast’s freshness—nobody likes stale yeast!
Absolutely—shape your rolls, freeze them individually, and bake from frozen (adding a few extra minutes) for fresh-out-of-the-oven bread anytime.
You may have over‑measured flour or over‑kneaded the dough. Use the spoon‑and‑level method for flour, add it gradually, and mix just until the dough is soft and smooth.

Butter-Topped One Hour Dinner Rolls
Equipment
Ingredients
- 1 ½ cups non-fat milk
- 3 tablespoons butter cut into chunks
- 3 tablespoons sugar
- 4 – 4 ½ cups all purpose flour divided
- 1 tablespoon rapid rise/quick rise yeast or if you have packets, one packet (2 1/4 teaspoons will work just fine)
- 1 ½ teaspoons table salt
- 1 egg room temperature. If eggs are not room temperature, place in a bowl of warm water for at least 5 minutes
- additional melted butter a few tablespoons for brushing on at end
Instructions
- Preheat oven to 350℉.
- Place milk, butter, and sugar in a microwavable container and heat for about 2 minutes. You want this mixture to be between 120-130℉, for best results use a digital instant read thermometer to gauge the temperature.
- While the mixture is heating, combine 3 ½ cups of the flour, yeast, and salt in a mixing bowl. When milk mixture is heated to about 125℉, add to the flour mixture and start to beat. Add egg and continue to beat until everything is combined. Scrape down sides of bowl and then add the remaining flour, ¼ cup at a time. I almost always add 4 ¼ cups total. The dough will be very soft and sticky.
- Place remaining flour on a cutting board or silicone mat (or additional flour, if you used all of yours in the dough) and very gently scrape out the dough using a spatula. Dust the top of your dough with flour and then using your hands, lightly pat the dough into a rectangle.
- Score the dough into sections (24 for dinner roll size) and gently form portions into balls. Place in a 9×13 pan that has been sprayed with non stick spray. Let dough rest for 20-30 minutes until puffed and almost double in size.
- Bake rolls in preheated oven 15-20 minutes until golden brown. Remove from oven and immediately brush with melted butter.
Notes
- To accelerate rising, place dough in an oven or microwave that has been turned off, and place a pan of steaming water underneath.
- Homemade rolls are best eaten the same day as baking. If you do need to make them a day ahead of time, make sure they are cooled completely before storing in an airtight container.
- For best results, consume rolls within 1-2 days.
- If you want to make these into bread sticks, you could roll dough in butter and our Garlic Bread Seasoning, or if you’re like me, you’ll save at least a little to bake a tiny pan of cinnamon rolls.
- Definitely, definitely, make a batch of this Maple Cinnamon Butter to go with these, no matter how you make them!


Questions & Reviews
It was already 5:00 when my husband said he liked the idea of potato soup more than the dinner plan I had in mind. I wanted rolls to go with it and remembered that this had been posted today. We were eating by 6:30 and everyone was thrilled with the meal. Thanks OurBestBites! You did it again! Easy to make, delicious to eat – totally what I think of with your recipes.
Best compliment. Thanks Jenny!
I am going to try this. I enjoy rolls but I never think about making them early enough to have them ready for dinner.
I like the idea of making a mini dish of six cinnamon rolls with part of the dough. Do you think you would score and use the same amount of dough for six dinner rolls or do you need more dough for the cinnamon rolls? Thanks! Your recipes are so great. Your cookbooks are always out on my counter since I use them ALL the time:)
You’ll need a little more dough that you would for 6 dinner rolls. I’d probably divide the dough in half and just use half for rolls and half for cinnamon. The cinnamon rolls are super flexible because you can make them big or small, you just need a rolled out rectangle about 9 inches wide and maybe at least about 6 inches the other way.
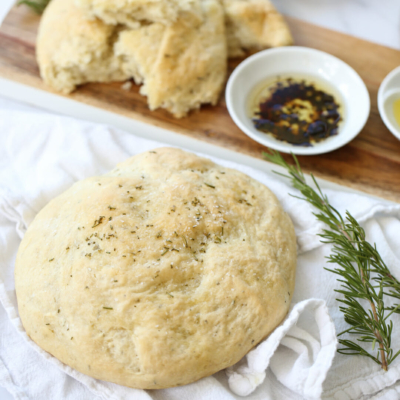
Pressed this recipe into service as a faux focaccia. Instead of rolling the dough into balls, I spread it in a 9×13 pan, scored it, let rise, dimpled it, and baked at 350. Next time, I’ll add Parm, garlic, and Italian seasoning to the dough and cut the sugar a bit. Great recipe!
Good to know- that sounds super yummy!
Hi! I’ve never deviated from one of your recipes (because they’re all perfectly delicious), but given my dislike of sweet bread , especially sweet dinner rolls,, I was curious how much I could cut the sugar and still have enough to feed the yeast? Thanks!
Ok, so I start out with 3.5 c of flour, and then I’m adding an additional 4-4.5 cups of flour? I’m confused because the list of ingredients says 4-4.5, not 7-7.5 or whatever. I’m a bit confused because I’m at that stage and 4 cups seems like a lot. I guess I’m going to have to wing it!
You ad 4-4 1/2 cups TOTAL. So to start, you add 3 1/2 cups and get it all mixed up, and then add the remaining cup or so.
You use a total of 4 1/4 cups of flour. Start with the 3 1/2 and work you way up. They are really good!
I went through all my cookbooks tonight trying to find a quick dinner roll recipe. No luck, came on here and wolla, quick and easy dinner rolls! Thank you! They are in the oven proofing right now.
These turned out awesome! So delicious!
Oh boy, these look good and easy enough for me to make. That’s a dangerous combo. 🙂
I have to own your baking dish that your cinnamon rolls are in. This is non-negotiable. Where did you purchase such beauty?
Isn’t that cute? I got it at Tai Pan, but I’ve seen them at places like Ross and TJ Maxx, too. I bought 6 of them in all different sizes, shapes and colors and they were only like, 3 bucks each. Such a deal!
OH MY! These sound so yummy right now. We will be having these with dinner, soon. Thanks for sharing.