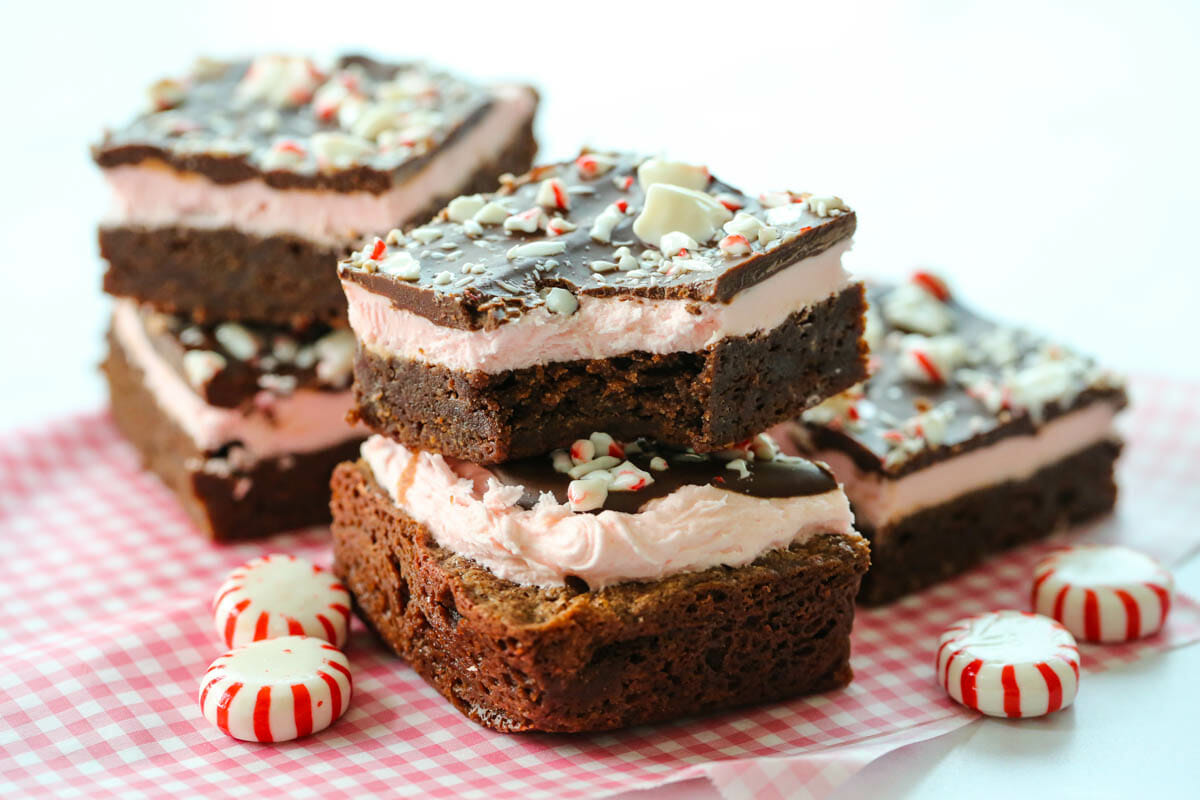
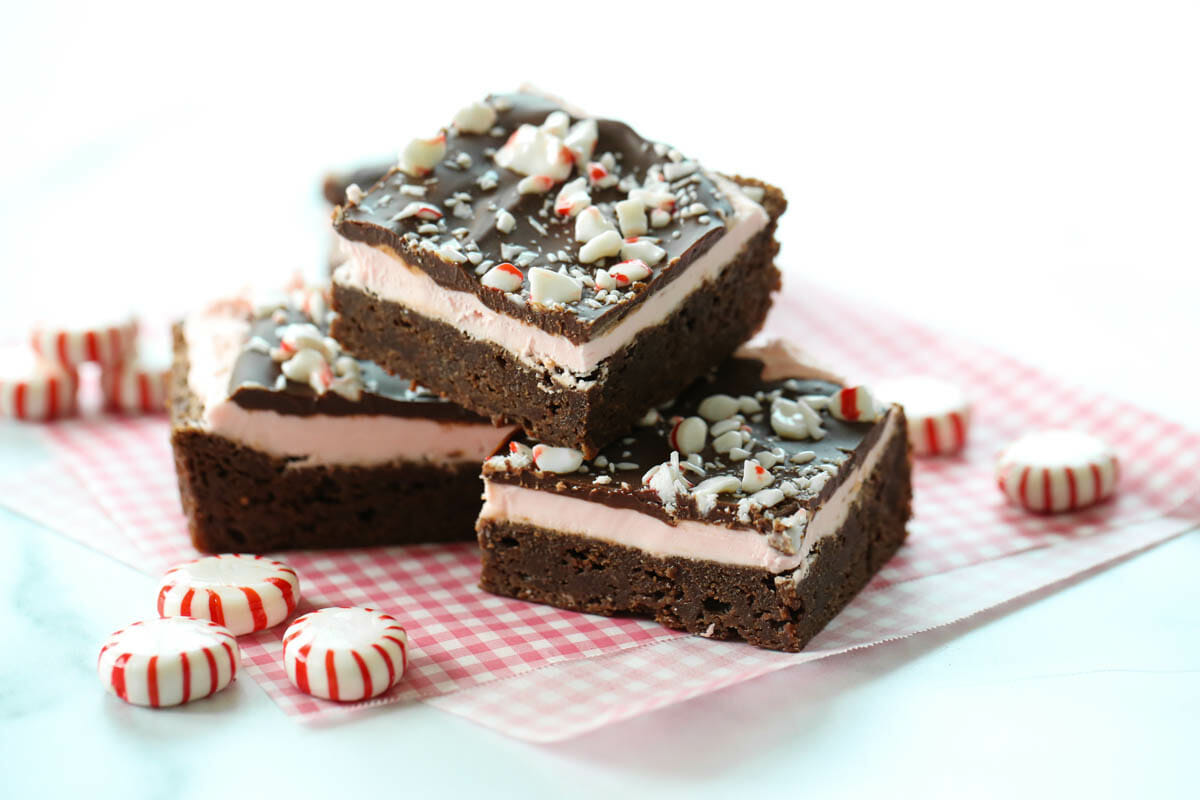
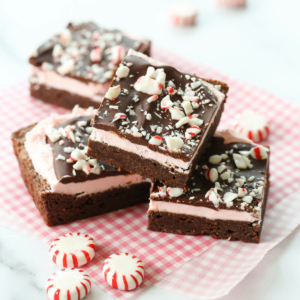
My #1 top favorite holiday dessert! I’ve been making this mint brownie recipe since I was a kid and during Christmas time we love replacing the green food coloring with red, and giving them a festive sprinkling of crushed candy cane. This starts with a super rich and fudgy brownie, topped with a cool layer of peppermint frosting, and finished with a creamy chocolate ganache.
I made a jumbo batch of these yesterday to deliver to neighbors and think it’s worth the highlight here. These brownies have a few steps, and take a little extra planning, but they’re so, so worth it. You can even make them all the way, or part of the way, a day ahead of time and spread out the work. This is my Mother’s recipe, and something I requested from her often, so I have tender memories associated with it.

Ingredients Needed
Brownies
- Unsweetened chocolate – This recipe calls for unsweetened chocolate. This is the unsweetened Baker’s squares, found near the chocolate chips on the baking aisle.
- Butter – Real butter is always best!
- Eggs
- Granulated sugar
- Vanilla extract
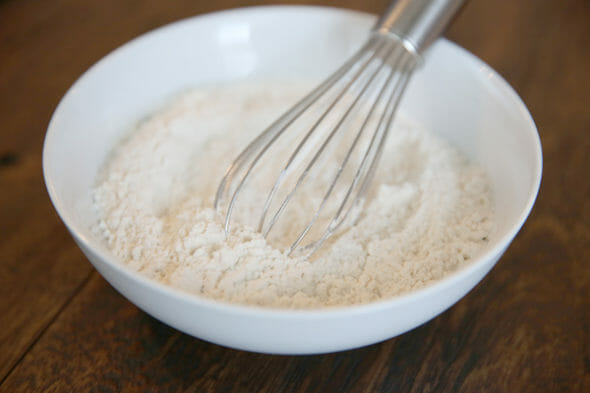
- All-purpose flour
- Baking powder
Frosting
- Powdered sugar
- Butter
- Peppermint extract – Peppermint Flavoring – Extract or flavoring oil can be used here. You could certainly use this same recipe for other flavor profiles. Orange frosting and candied oranges or raspberry frosting and raspberry chocolate chips in the ganache would be delicious!
- Milk
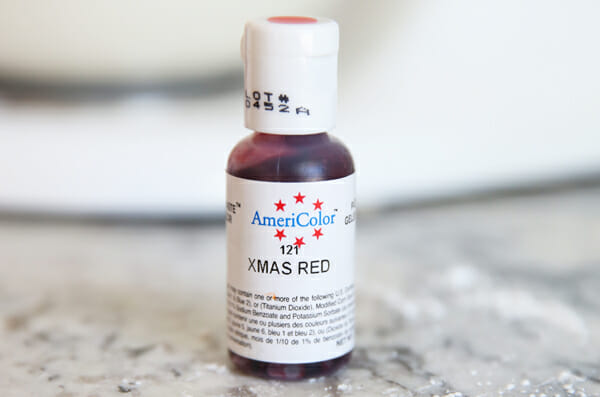
- Food Coloring – These AmeriColors gel colors are my new favorites. I LOVE that they conveniently squirt out instead of me having to get out a toothpick to dip into the little jar and then inevitably getting it all over my hands and counter.
Chocolate Ganache
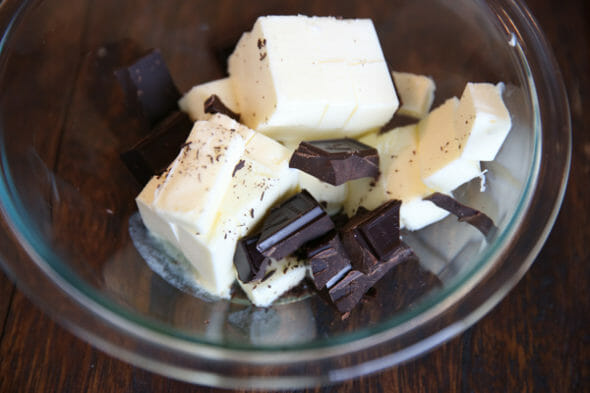
- Chocolate chips – You can use semi-sweet or dark chocolate chips, or a chopped up chocolate bar.
- Butter
Topping
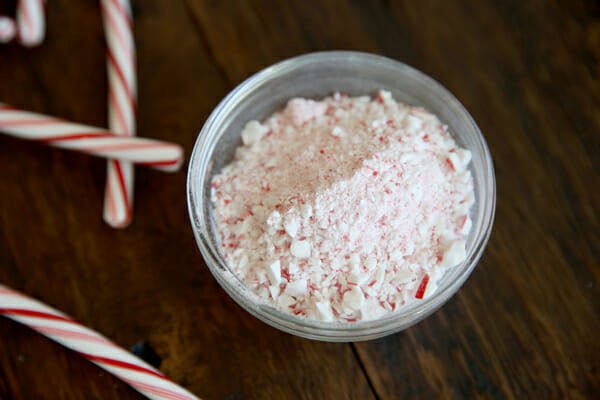
- Crushed candy canes – I use Bob’s or Brach’s. I don’t recommend Spanglers.
How to Make Peppermint Candy Cane Brownies
Step 1: Make the Brownies
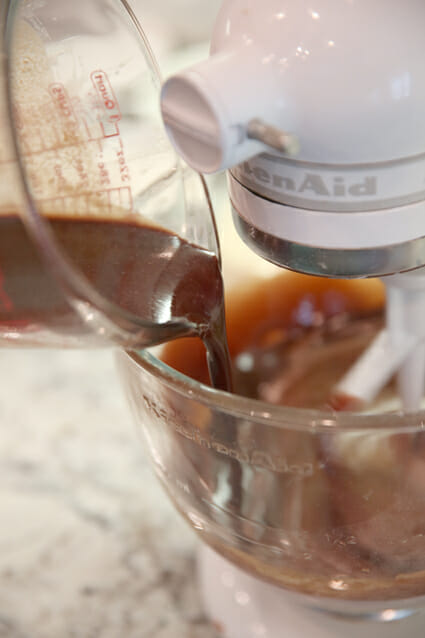
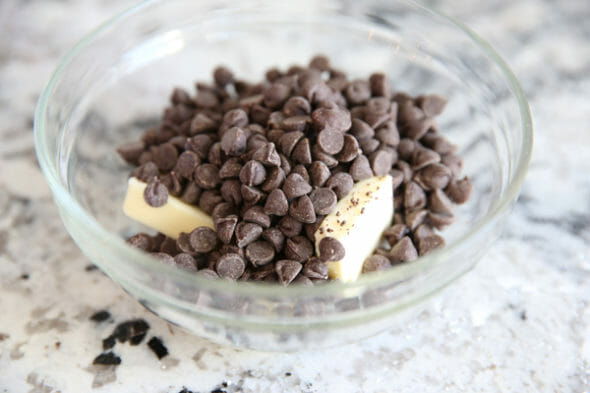
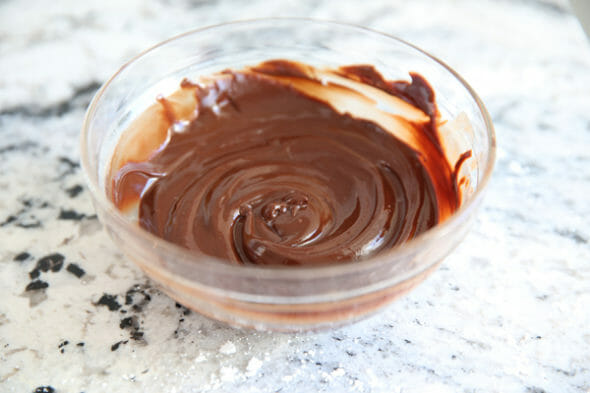
- You’ll start by making the brownie layer. You want to use unsweetened baking chocolate, which is sold in bars by the chocolate chips. Make sure it is unsweetened. Place it in a microwave-safe bowl along with 2 sticks of butter that you’ve chopped up. Melt in 30-45 second intervals, stirring in between, until melted and smooth. Set aside. Don’t accidentally stick your finger in the melted butter and chocolate combo because it will laugh at you for forgetting that it is unsweetened. I do it every. single. time.
- Beat eggs and sugar for a minute, until they’re nice and smooth. Then slowly pour in your chocolaty butter mixture and mix just until it’s combined.
- You’ll add a bit of flour and baking powder, and again just mix until it’s combined. You never want to over-mix brownies. I also always sift my flour for this recipe. You can just put it in a mesh strainer and shake it right into the batter. I’ve noticed when I don’t, I sometimes get little visible flour spots in my brownies.
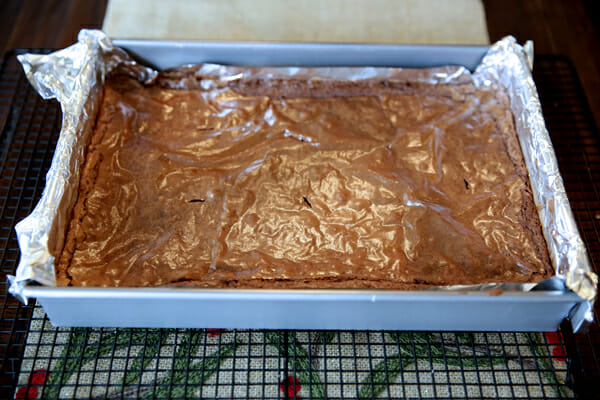
- Bake those until a knife comes out clean. I’ve found that baking time really varies on these, so make sure to do the knife test. And I always line my pan with foil because it makes cutting and serving so much easier when you can just lift the whole sheet right out of there.
- Let those cool all the way. If it’s cold out, pop them outside, otherwise after they’ve cooled to room temp, I just stick them in the fridge.
Step 2: Make The Frosting
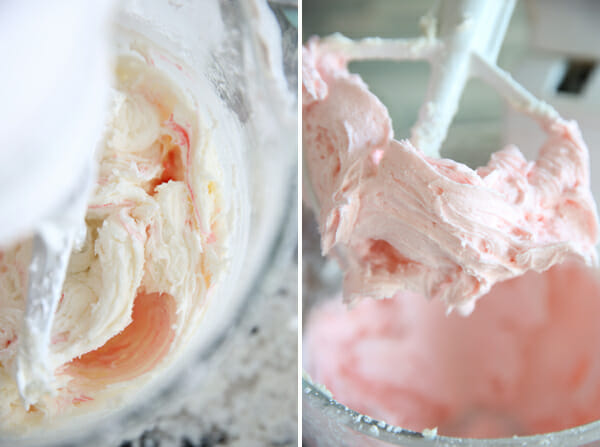
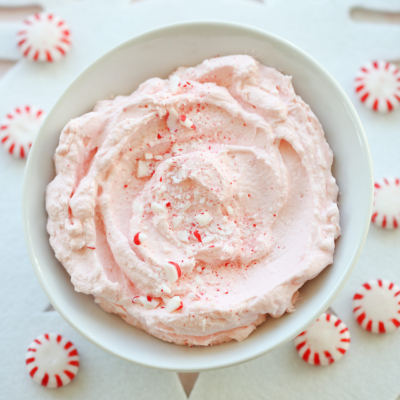
- Next layer is the frosting. Whip up some butter (real butter!) and then add powdered sugar.
- You’ll add a little milk (this frosting is on the firm side, don’t go crazy with the milk), and quite a lot of peppermint extract. It will probably seem like too much, but it’s purposely strong. This is the only peppermint going into the brownies, and it’s a thin layer. So that one cool, creamy layer has to be enough to contrast all of the rich chocolate.
- Whip to creamy perfection and add a couple drops of red food coloring.
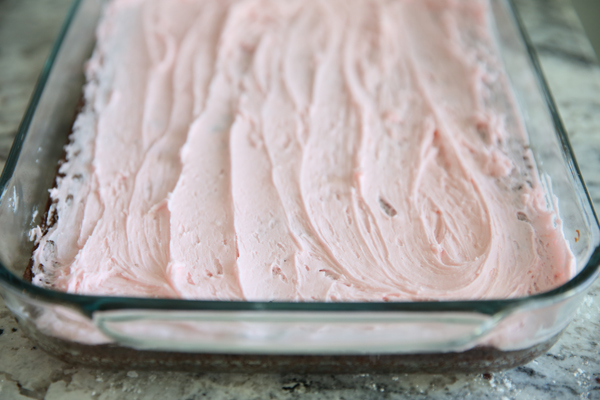
- Then carefully spread the frosting on your cooled brownies. You have to use a soft hand in order to not tear up the top of the brownie layer. If you get a few bits in there it’s okay though, because we’re going to cover that up anyway.
- Pop that in the fridge again to chill.
Step 3: Make the Chocolate Topping
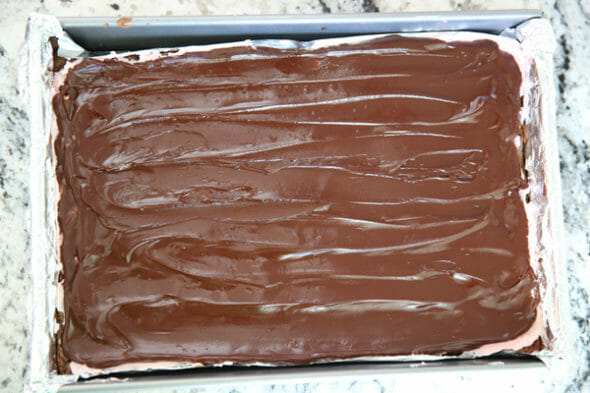
- Melt some semi-sweet (or dark) chocolate chips and more butter. I prefer to use unsalted in this top layer, but you can use either.
- Melt it until it’s smooth and creamy. Remember in the first step when I told you to not accidentally let your finger fall in the chocolate butter mixture? Totally doesn’t apply to this chocolate butter mixture.
- Let it cool off so it’s still super spreadable, but not hot (if it’s hot it will melt your frosting and make a big gooey mess. Just spread it on quickly and evenly.
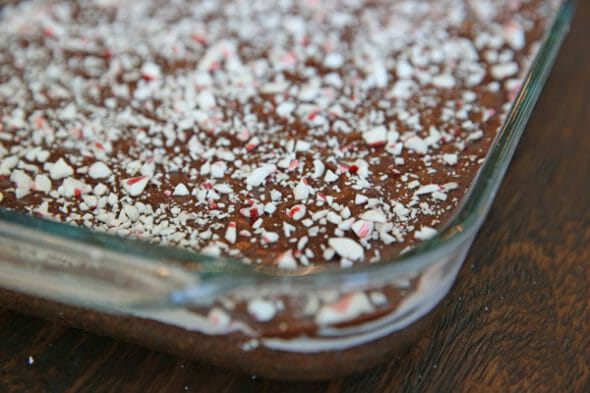
- While it’s still wet, sprinkle on some crushed candy cane– a little, a lot, whatever floats your boat. You get three distinct layers here of rich and fudgy brownie, cool creamy frosting, and smooth decadent chocolate. The little bits of candy cane are icing on the cake. Or topping on the brownie. Whatever.
Storing and Other Tips
- Because these mint brownies are so ooey-gooey, I think they are best served chilled! I keep them in the fridge until we’re ready to eat them. There’s also something about a peppermint dessert being chilled that just makes it extra delicious. Store in an airtight container in the fridge and consume within one week for best results.
- You don’t have to store these in the fridge. You can also store at room temperature if needed. Just cover tightly and consume within 3-4 days for best results.
- You can make this whole pan a day ahead of time. Just cover well and place in the fridge (uncut) overnight.) When you’re ready to serve, pull the foil out so you remove the whole sheet of brownies and cutting is a cinch.
- Tip: When you get to the frosting step, spoon your frosting in small mounds all over the brownies (rather than dumping it all in one big pile). This will make it much easier to spread evenly without tearing up your beautiful brownie layer!
Frequently Asked Questions
Yep. Feel free to make them completely a whole day ahead of time. Just cover and keep in the fridge. You can also make the brownies a couple of days in advance and store in the fridge or freezer until ready to assemble.
The safest way to double recipes for baked goods is to simply set out two bowls and measure one-batch worth of ingredients into each as you go.

Peppermint Candy Cane Brownies
Equipment
Ingredients
Brownies
- 4 ounces unsweetened chocolate
- 1 cup butter 2 sticks
- 4 eggs
- 2 cups sugar
- 1 teaspoon vanilla
- 1 ¼ cups flour
- ½ teaspoon baking powder
Frosting
- 2 cups powdered sugar
- 4 tablespoons butter softened
- 1 ½ teaspoons peppermint extract
- 1 tablespoon milk
- pink or red food coloring
Chocolate Glaze
- 6 ounces about a cup semi-sweet or dark chocolate chips
- 6 tablespoons real butter I suggest unsalted just for this step
Topping
- ½-1 cup crushed candy canes Use Bob’s or Brach’s; I don’t recommend Spangler’s
Instructions
Brownies
- This portion should be done well ahead to allow chilling time.
- Preheat oven to 350℉. Line a 9×13" pan with foil and grease the foil. Set aside.
- Roughly chop baking squares and 1 cup of butter. Place them in a microwave-safe bowl. Melt in 30-45 second intervals, stirring in between, until melted and smooth. Set aside.
- In a stand mixer or with electric beaters, beat eggs for about 3 minutes until thick and frothy. Add sugar and vanilla and beat to combine, then add in the reserved melted chocolate and butter combination. Combine flour and baking powder and whisk into brownie batter by hand until just combined.
- Pour into the prepared pan. Bake for 20-25 minutes. Test with a toothpick for doneness and don’t over bake! When a toothpick comes out clean, cool on a cooling rack. When completely cool, place the pan in the refrigerator to chill (this makes spreading the peppermint icing easier).
Frosting
- Combine all frosting ingredients and beat until light and fluffy. Add extra milk by teaspoonful if you need a little more. Spread evenly over cooled & chilled brownies and place back in the fridge to chill again while you do the final step.
Chocolate Ganache
- Place chocolate chips and butter in a microwave-safe bowl and melt in 30 second intervals until smooth.
- Set aside for a few minutes, stirring occasionally, so it can cool off just a bit. Quickly spread on top of brownies. You need to work quickly so the chocolate glaze doesn’t melt the peppermint frosting.
- Sprinkle the crushed candy canes on top and return to the fridge until chocolate is set on top.
- Remove from fridge a few minutes before cutting into squares. Enjoy!
Notes
- These brownies are very rich. Plan on cutting small and getting at least 24 per batch!
- Because these mint brownies are so ooey-gooey, I think they are best served chilled! I keep them in the fridge until we’re ready to eat them. There’s also something about a peppermint dessert being chilled that just makes it extra delicious. Store in an airtight container in the fridge and consume within one week for best results.
- You don’t have to store these in the fridge. You can also store at room temperature if needed. Just cover tightly and consume within 3-4 days for best results.
- You can make this whole pan a day ahead of time. Just cover well and place in the fridge (uncut) overnight.) When you’re ready to serve, pull the foil out so you remove the whole sheet of brownies and cutting is a cinch.
- Tip: When you get to the frosting step, spoon your frosting in small mounds all over the brownies (rather than dumping it all in one big pile). This will make it much easier to spread evenly without tearing up your beautiful brownie layer!


Questions & Reviews
I made these a few weeks ago and really enjoyed them, but my husband thought the glaze on top was a little to rich/dark. Have you ever used milk chocolate chips for the glaze and would it be good?
Kanani- ya know, I really should configure it for a jelly roll pan because they do take a bit of time to make and it would be nice to get more brownies out of the process! If I were just guessing I'd say you might want to 1 1/2 the brownie part and definitely double both the frosting and the chocolate topping. And it would definitely take less time to bake since it would be thinner. If you try it out I'd love to know how it goes!
This sounds soooo delicious. Have you ever made a thinner variety by baking the brownies in a jelly roll pan? Any suggestions for how long to bake it and would I need to make more frosting?
I don't think you need to adjust anything for altitude on these. I've made them both at sea level and up in the mountains and they've been great every time! It's a dense, thick brownie, so you don't need to worry too much about delicate rising.
Do you think any alterations need to be done for high altitude? Would hate to make a mess out of the brownies….
I have been searching far and wide for a recipe just like this! None of them were quite what I was looking for. These look perfect!! There's nothing better than chocolate and mint during the holidays. THANK YOU for posting this; I cannot wait to make them!!
Just made these…they are AMAZING!!! And I think I'm going to do cupcakes with that frosting, because it is too good not to use more often during the holidays! Thanks!!
Oh my I have provided a link to this brownie on my web page. Brownie recipe. If you are not happy with this let me know and I will remove it.
Hi, I made these last Saturday for a holiday luncheon. I enjoyed them. I’m thinking everyone else did as well as there were no left overs! Thanks for sharing the recipe!
Happy 2009!
~ingrid
I just made these brownies over the weekend and they were SO YUMMY! Thanks for the great recipe! It will be one I will make every Christmas!