I posted this tutorial a few years ago and it has become somewhat of a tradition to bring it back every year! One of our family Easter traditions is dying eggs with pieces of silk. I saw a cute lady show Martha how to do it a few years ago and I ran upstairs right then to steal a tie! It’s way cooler than those cups of neon liquid that end up all over your clothes, your furniture and your hands plus it gives you an excuse to rid a man’s closet of ugly ties.
Supplies Needed
This is just a preview of supplies and method, keep scrolling for full printable instructions.
- Eggs – These eggs are purely decorative, as you’re using clothing to dye them and will be boiling them for a long time. I have not tried using decorative egg options so I don’t know how those would work out. I just use regular raw, white eggs! See this Blown Egg Ornaments post for details on using blown eggs that you can bring out year after year.
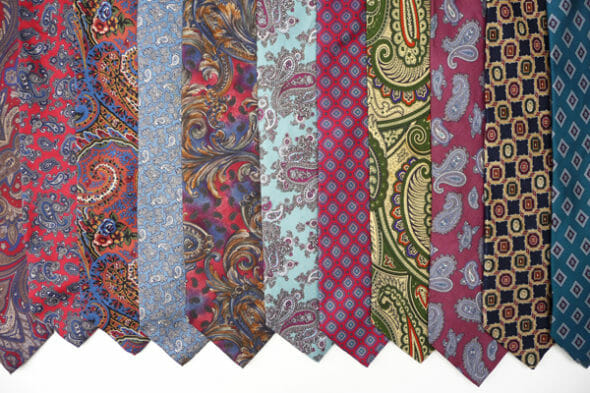
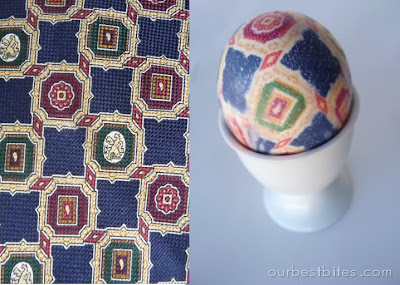
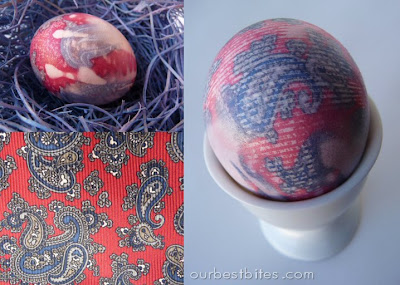
- Silk ties – You need 100% silk for this to work. Make sure to check the labels to make sure you’re not buying polyester, which can look similar. I grab old ties at the thrift store where they’re usually pretty cheap (that Christian Dior tie pictured below was 50 cents). And remember: when it comes to ties, you may not want ugly ones on your man, but ugly ties do make pretty eggs! You could also use silk from an old blouse, a scarf, or whatever. So if you’re rummaging through a thrift store, check out some other areas as well.
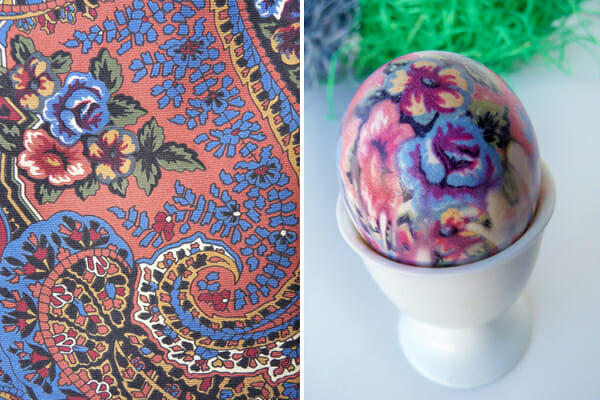
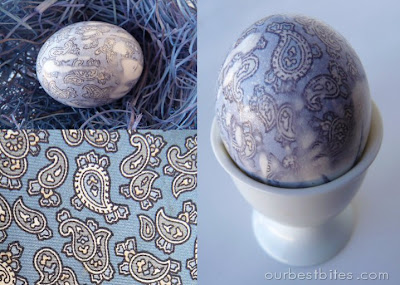
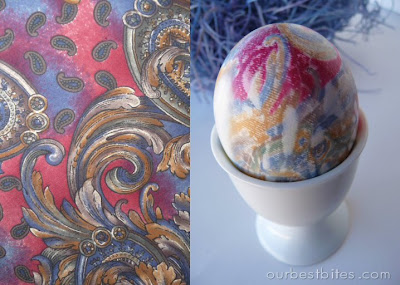
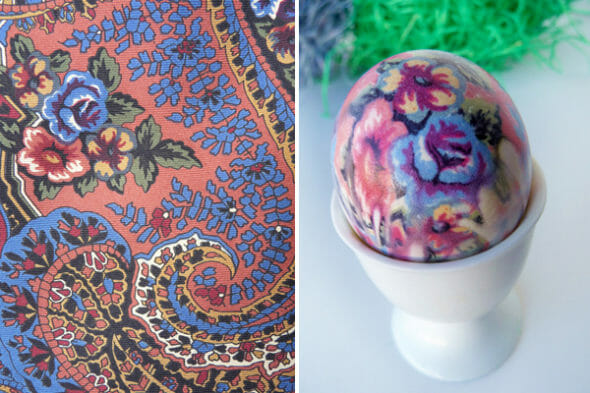
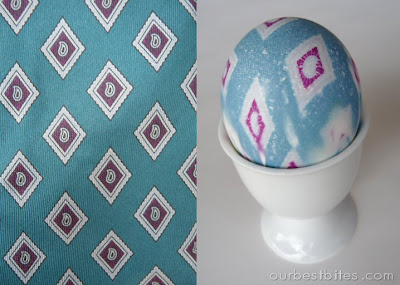
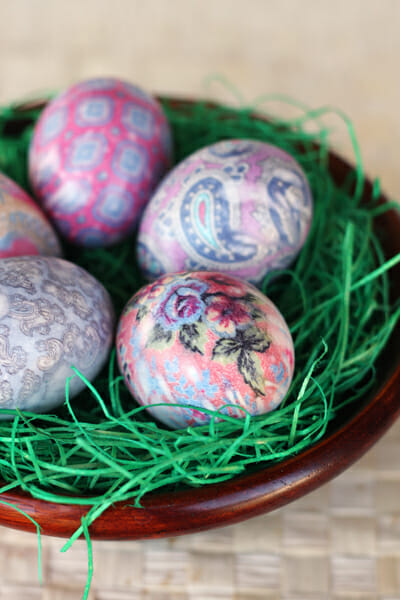
I try to find an assortment of colors and patterns. Usually dark blues, purples, and reds work the best, but it’s fun to experiment with all kinds of things. The interesting thing is that you never know how much of the color and pattern will transfer to the eggs. Sometimes ties I think will be awesome really disappoint, and ones I didn’t think much of make the most beautiful eggs.
Usually it will tell you if it’s 100% silk right on the main label of the tie, but a lot of them don’t, and if that’s the case, check that little tiny end, it’s usually hiding there. - Light colored fabric and twine/twist ties- You’ll need these to help tie the silk in place and prevent dye from spreading from egg to egg. Any light colored, thin fabric will work, like an old tea towel or pillowcase. If you’re already picking up ties from the thrift store, look around for something that will work here!
- Vinegar – Adding vinegar to the boiling water will help set the dye on the egg shell.


How to Make Silk Dyed Eggs
- First you’ll want to deconstruct your ties. Snip the seams and remove the lining so you’re just left with the still.
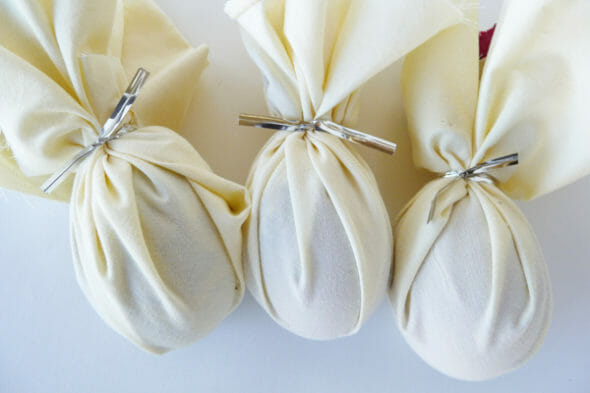
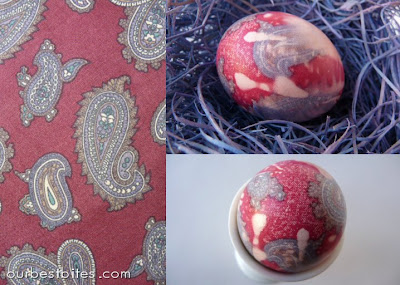
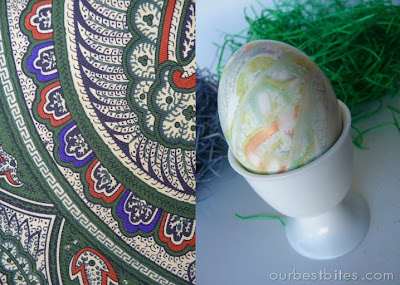
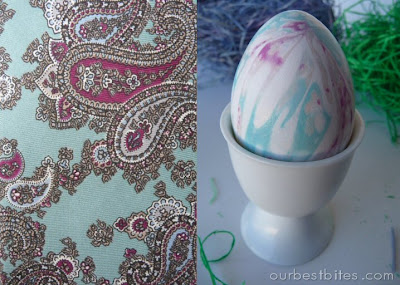
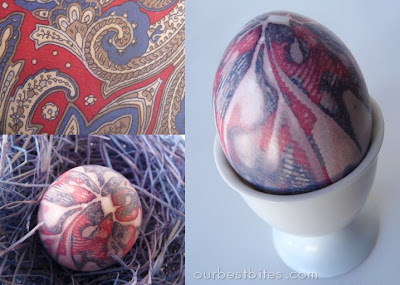
- Next cut a piece large enough to cover an egg. Wrap the egg with the right side of the fabric making contact with the egg. The right side is the printed side, or the side that would be on the outside of the tie. You want to try to wrap the fabric as tight as you can without breaking the egg of course. The more direct contact the silk has with the egg shell the clearer the imprint of the pattern. Where there are folds in the fabric you’ll get kind of a swirly water color effect. I love those parts- it adds to the charm. Once wrapped, tie with a piece of string or a twisty tie. (Do yourself a favor and go with the twisty tie!)
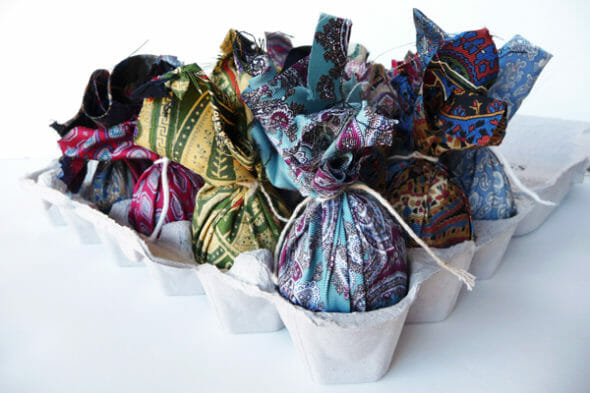
- After the eggs are wrapped in silk, you’re going to wrap them again with a light colored light weight piece of fabric. An old pillowcase, sheet, or thin dish cloth is perfect.
- Put all those little guys in a pot and cover them with water. Add 1/4 cup vinegar and bring it to a boil. After about 20 minutes you can remove the eggs and set them in a colander or on a towel to dry and cool. Once they’re cool enough to handle you can remove the fabric.
Storing and Other Tips
- I don’t recommend eating these eggs. However, they should be stored in the fridge if not actively out as a decoration for something.
- If you want to give your eggs a little shine, just rub a small amount of vegetable oil onto them when they’re finished.
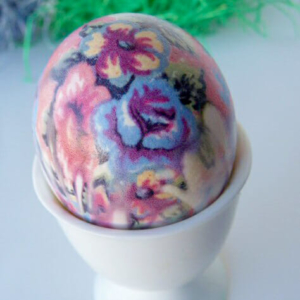
- You’ll notice I tied the eggs in the above photo with the tie on the top of the long side of the egg. If you do this, the opposite end of the egg will have the best pattern. If you are going to be sitting the eggs upright in an egg cup, this is the best way to wrap them.
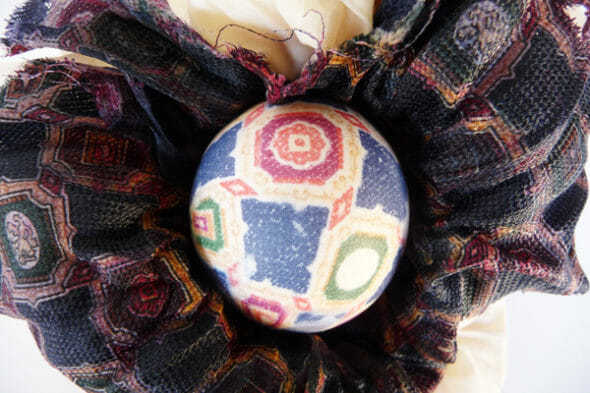
- However, if you want the best part of the design on the wide side of the egg, you’ll want to wrap them horizontally, like this:

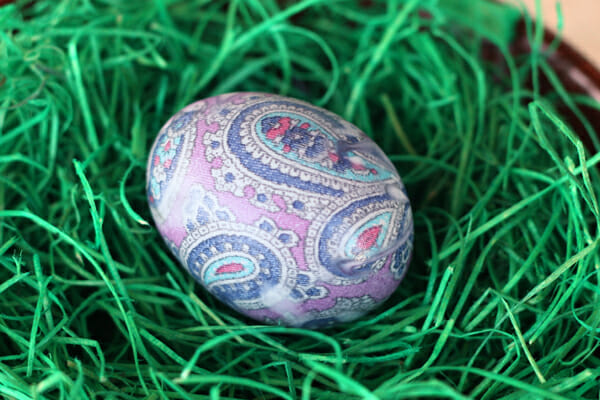
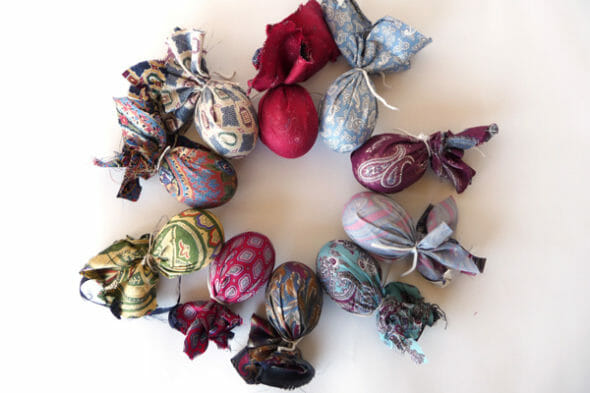
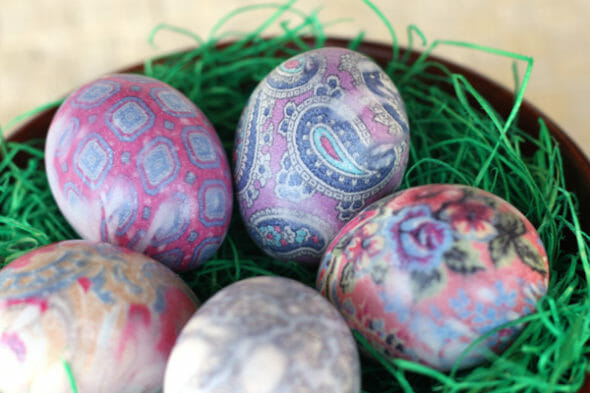
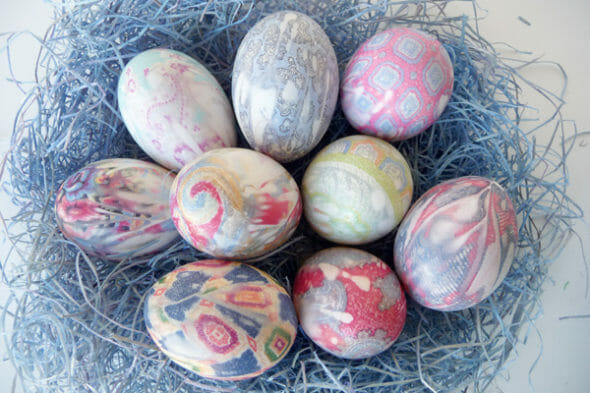
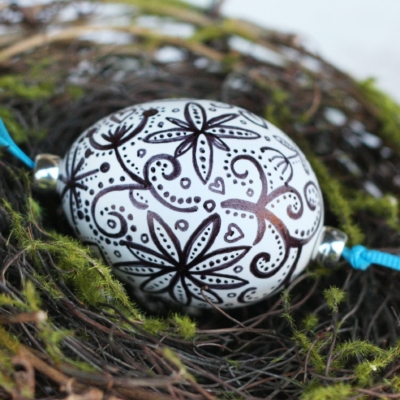
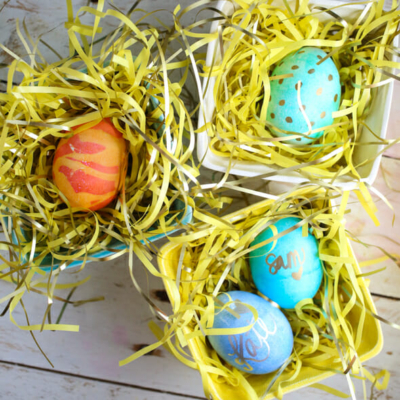
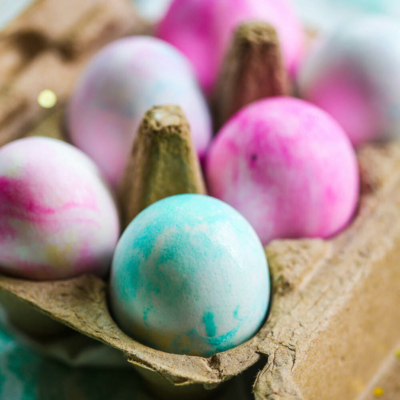
Final Products
My favorite part is unwrapping the eggs to see how they turned out!
Frequently Asked Questions
These eggs are boiled for a long time and you’re using unknown fabric dyes from the silk to color them, so I don’t recommend eating these.
Yes! Click here for a tutorial on how to blow out eggs, and also turn them into hanging ornaments. Instructions on how to do silk-dyed eggs with blown out eggs are found in that post.
Honestly, I did not know there was such a thing until everyone left comments asking about it on this post! Readers who have tried this have reported it does not work very well with wooden eggs.
I think it does help keep the colors in there next to the egg and therefore make them more vibrant, but if you want to try skipping that step- chances are it will still work just fine.
Nope! Anything that’s 100% silk. A tie, a scarf, a blouse, etc.
You can, but the colors will fade a little more each time.

Silk Dyed Easter Eggs
Ingredients
- raw white eggs
- 100% silk fabric from ties, blouses, etc.
- twine or twist ties to secure fabric around eggs
- thin, light colored fabric
- ¼ cup vinegar
- water
Instructions
- Cut pieces of 100% silk large enough to cover an egg. Wrap as smoothy and tightly around egg as possible, with right side of fabric facing in, and secure with a twist-tie or piece of string. Repeat process, but wrap with a plain piece of lightweight fabric, like an old white pillowcase or sheet.
- Place eggs in a large stock pot and cover with water at least 2 inches above eggs. Add ¼ cup white vinegar. Bring pan to a boil and reduce to simmer. Simmer for 20 minutes and then use a pair of tongs to remove eggs and lay them (still wrapped) on layers of paper towels or an old dish towel.
- Let cool to room temperature and then remove the fabric wrappings. Store in the fridge until ready to display. If desired, rub with a small amount of vegetable oil for shine.
Notes
- These eggs are boiled for a long time in unknown fabric dyes. I do not recommend trying to eat them.
- See this Blown Egg Ornament post for info on using blow out eggs you can bring out year after year.
- The best pattern and color transfer will be opposite of wherever you tied your egg. If you intend to display upright, tie at the opposite long end of the egg. If you intend to lay them in a bowl or nest, tie the egg on the opposite side you want displayed.


Questions & Reviews
I just discovered your blog today. So many cool recipes and ideas. The silk egg idea is really cool. I sure wish I could still celebrate holidays so I could do neat things like this.
These are so cool! I especially like the flowered one. In fact, I liked them so much that I decided to make some yesterday! I think they came out rather well…even though I didn't leave the eggs in the water/vinager long enough.
Just a thought…..
I read an article on onion dyed eggs and you have to use blown eggs. The instructions say to suck some water into the blown eggs to weigh them down so they don't float during the dyeing process. For those of you that would like to try this with blown eggs this might work. Please post your results if you try this!
I want to share my photo of my beautiful eggs but am not sure how to do that…any suggestions
Wow, Judy, where do you live? It's so interesting that something like this has caught on so big locally!
I bought a very light silk shirt and it didn't dye as vibrant as the ties. I use the rubber bands that are around our daily newspaper. they get it quite tight and then I just snip them off. Didn't realize how popular this was until I went to Goodwill to look for ties and they said they had been snapped up for weeks for this purpose. Will start now for next year.
Thank you so much for all the tips! It was just what I needed to read before I tried this myself, and it went really well!
(Blogged: http://www.knucklesalad.com/2010/04/happy-easter-give-me-your-tie.html)
wow! these are so neat. I will add these to my list of ways to dye eggs tomorrow along with pysanky eggs… now I just have to find some ties since my hubby doesnt wear them.
We gave it try yesterday and we were happy with results…
Check it out.
http://www.facebook.com/pages/DoilyMania/277911954581?v=photos#!/album.php?aid=157902&id=277911954581
Thank you for sharing idea . 🙂
I just tried it with silk SHIRTS (same price as the ties at the thrift shop, and a lot more fabric) and it worked great I just wrapped raw eggs and hardboiled them as we usually do but with the 1/4c of vinegar.thanks so much for the detailed instructions and the great photos that motivated me to actually try it!