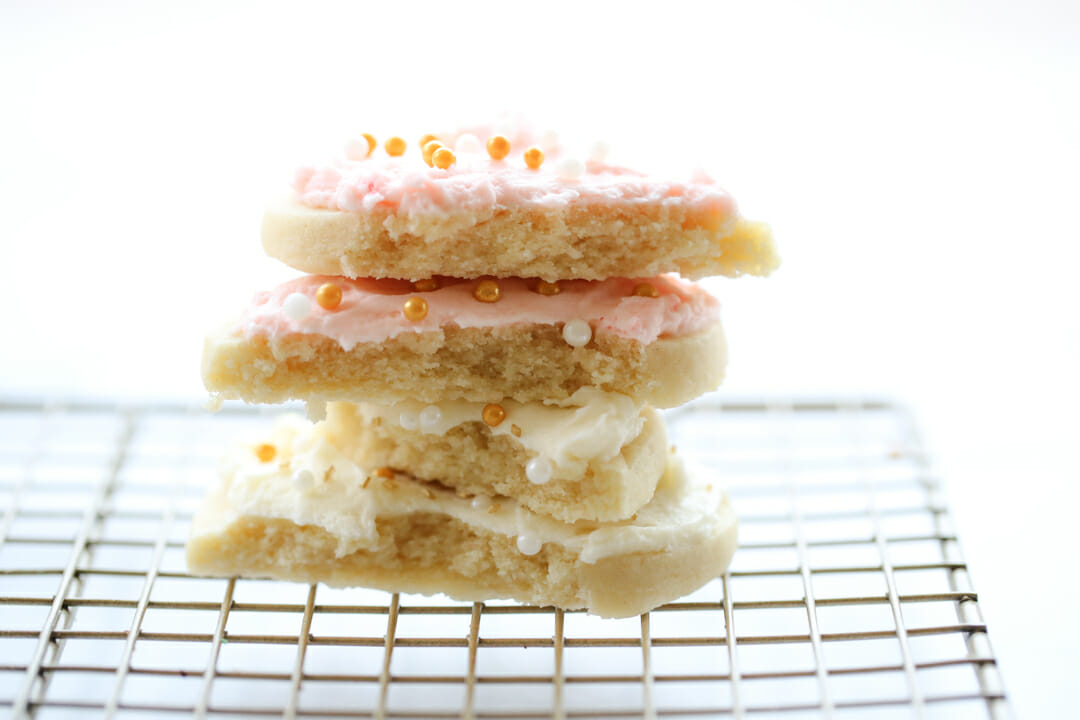
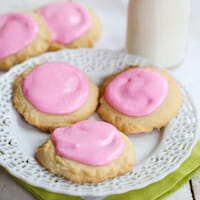
This Sugar Cookie Recipe has been a crowd favorite for YEARS because it produces a consistent cookie with the perfect buttery flavor. These cookies hold their shape beautifully when cut with cookie cutters and one of the best things is that you can choose to bake these sugar cookies soft and thick, or thin and crisp and both ways are phenomenal! You can cut them out with cookie cutter shapes, or simply roll balls in sugar and flatten with the bottom of a glass. We love them topped with our Classic Fluffy Buttercream or for something more fun and fancy, our Glace Icing.
Ingredients and Equipment Needed
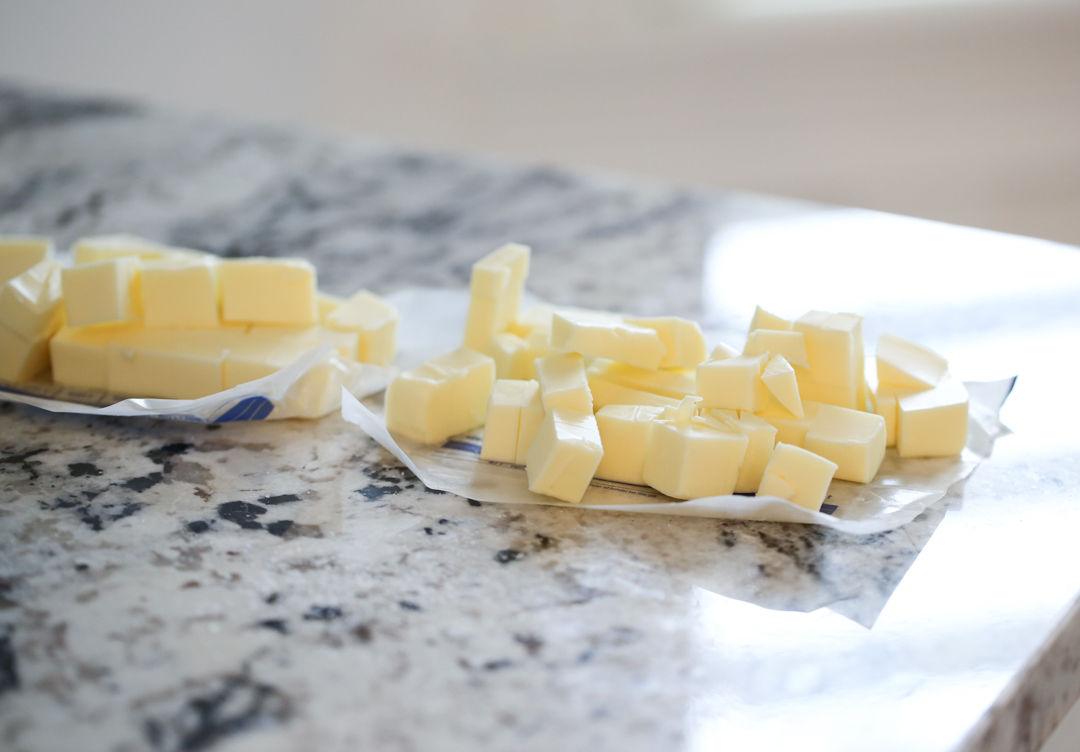
- Butter – unless you have a dairy allergy or preference that prohibits butter, I recommend real butter for these cookies. I have not tested with plant-based alternatives so I cannot speak to that. Your butter should be a room temperature. If it’s not at room temp already, I like to cut my butter into small pieces and leave on the counter for 20-30 minutes. This generally works better than softening in the microwave, which often leads to uneven melting.
- Sugar – These cookies use white granulated sugar for sweetness and texture.
- Egg– It’s important to use a large or extra large egg in this recipe. If you use a small egg, there might not be enough liquid to bring the dough together.
- Extract – You may use vanilla or almond extract in these cookies, or a combination of both! My personal favorite is almond extract.
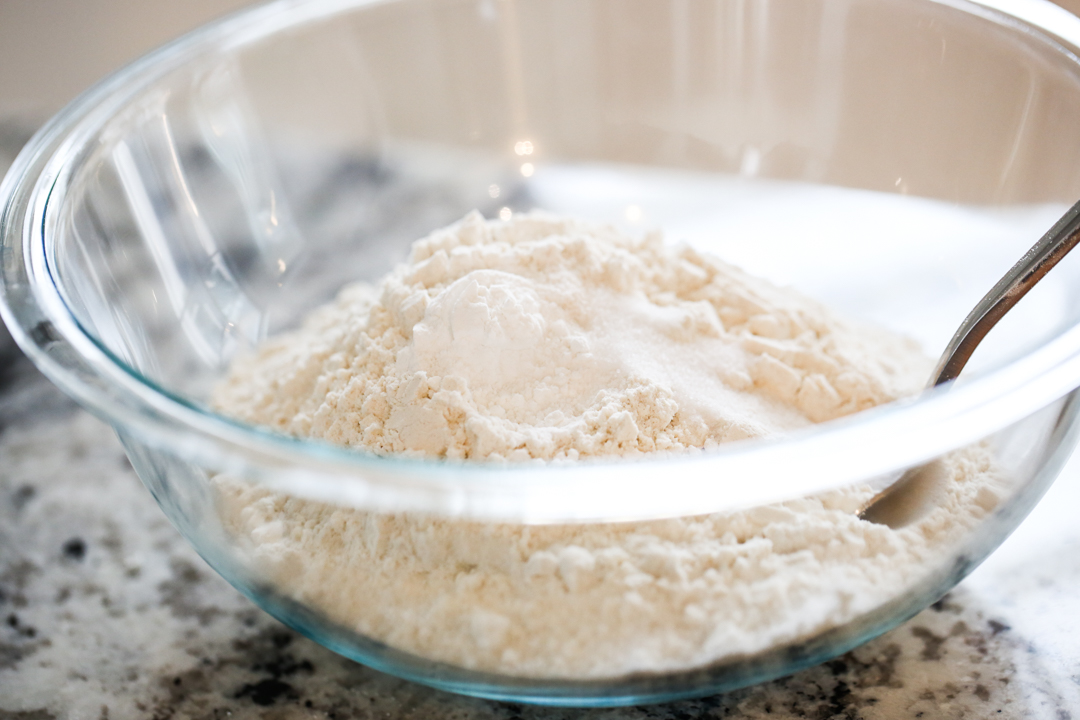
- All Purpose Flour– Use all purpose here, and make sure to measure carefully. Too much flour and the dough will be dry and crumbly. I recommend using a scale to measure by weight, but if that is not available, fluff your flour first with a spoon before measuring, then measuring by lightly spooning the flour into the measuring cup and leveling off with a knife.
- Baking powder
- Salt
- Stand Mixer – You can absolutely make these cookies with a hand mixer, but if you have a stand mixer, I recommend you use it. After your dry ingredients are added, the dough will sometimes look a little dry and crumbly but it will come together quickly into a soft, cohesive dough. It takes a little more time with a hand mixer, but a stand mixer will whip it up in a hurry!
How to Make the Best Sugar Cookies
Make Your Dough
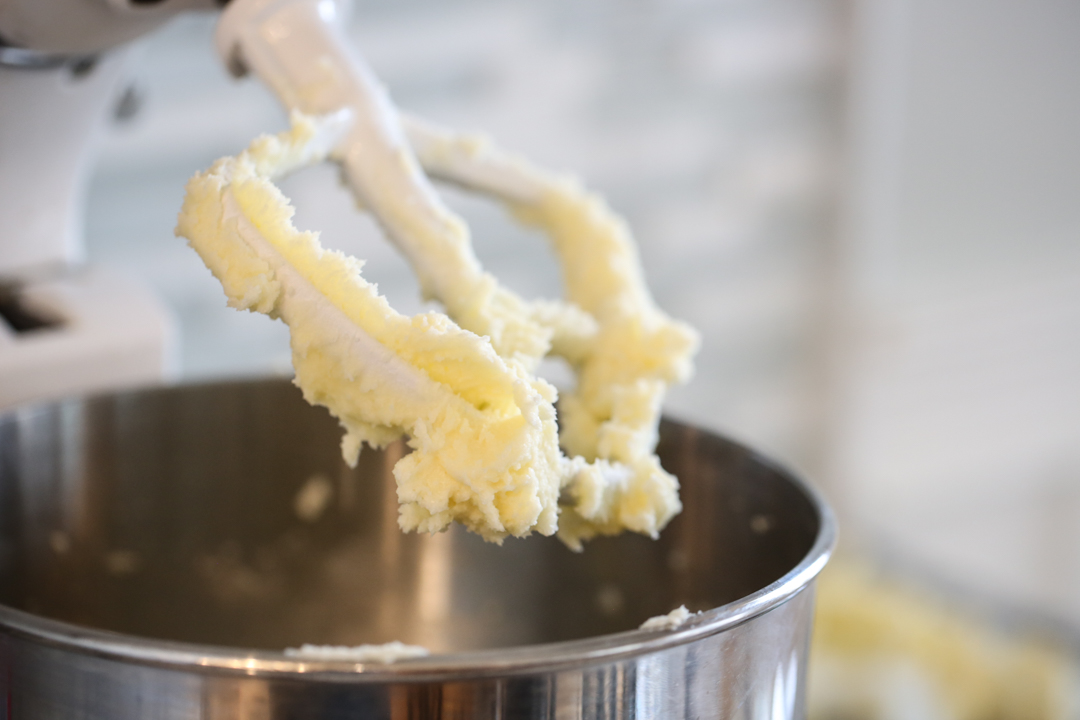
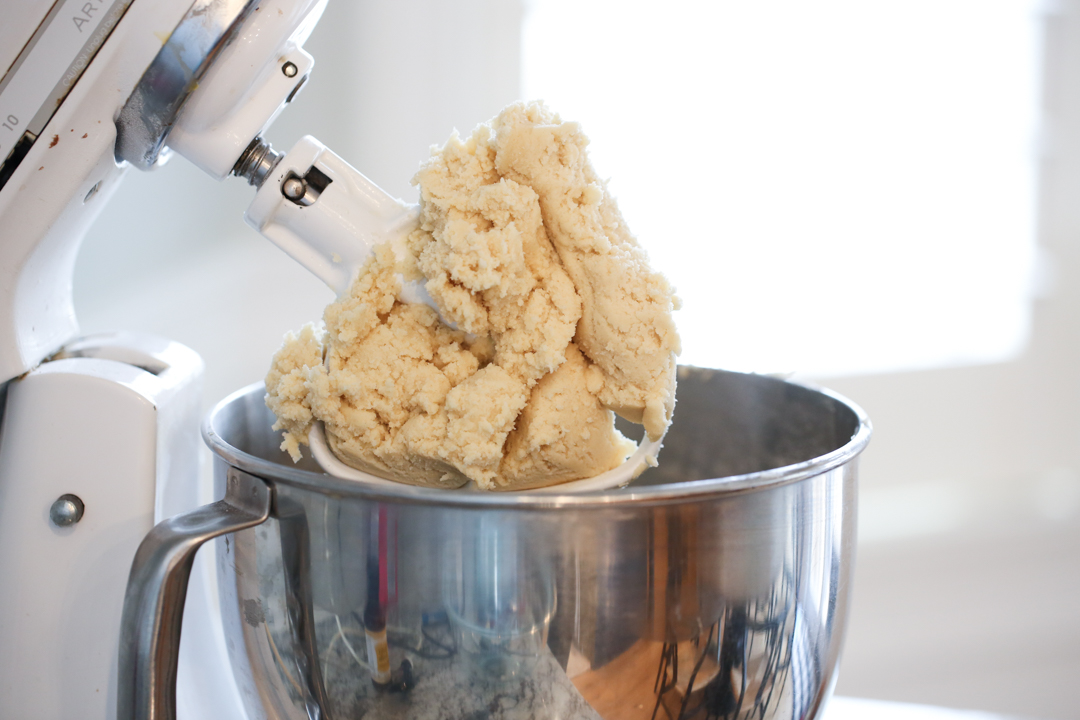
- Start by beating your real butter and sugar and continue creaming for a full 2 minutes or so. Your mixture will turn light and creamy in texture. Scrape down the sides of the bowl as you go.
- Add egg and extract and mix to incorporate.
- In a separate bowl combine flour, baking powder and salt.
- Slowly add the flour mixture to the butter mixture and mix until completely combined. Your dough will first look crumbly, but keep mixing with a stand mixer and it will quickly turn into a soft cohesive dough.
- You’ll need to chill your dough for about 1 hour. You can do so with dough gathered into one large mass, or use my preferred method which not only cuts down on chill time, but saves effort by rolling dough while it’s soft!
Roll It Out: How to Easily Roll Sugar Cookie Dough with no Additional Flour
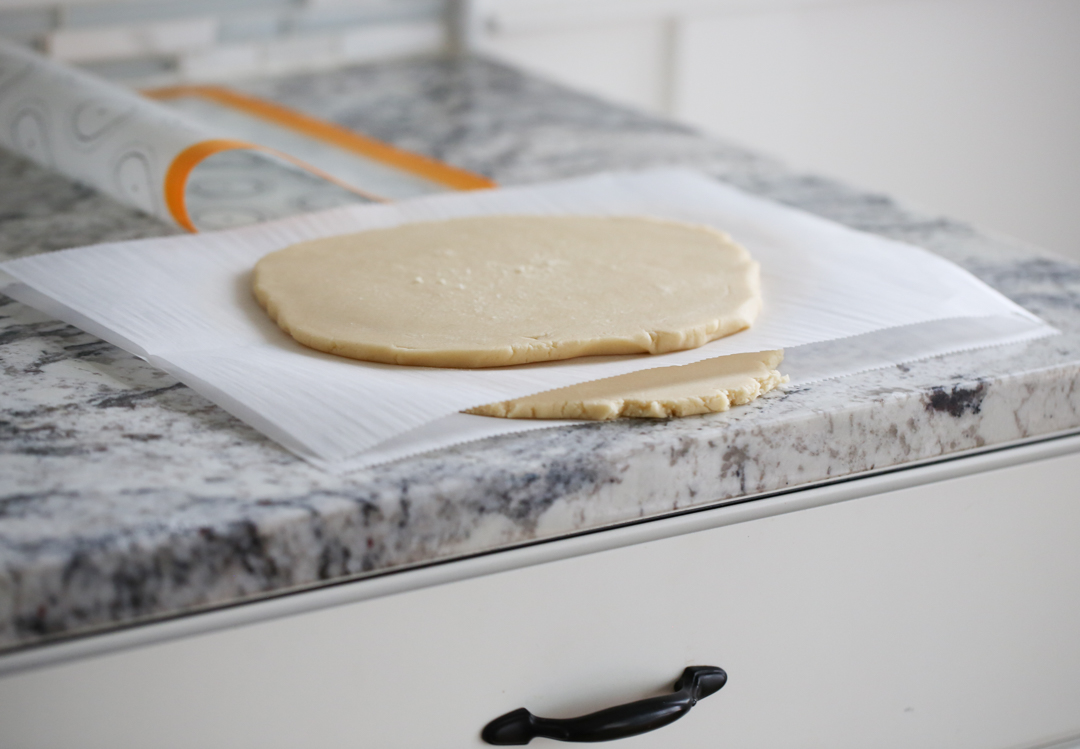
One of the problems with dusting your surface with flour before rolling cookies, is that you add a bunch of extra flour to your dough. Try to handle it as little as possible. Here is the best method to do that.

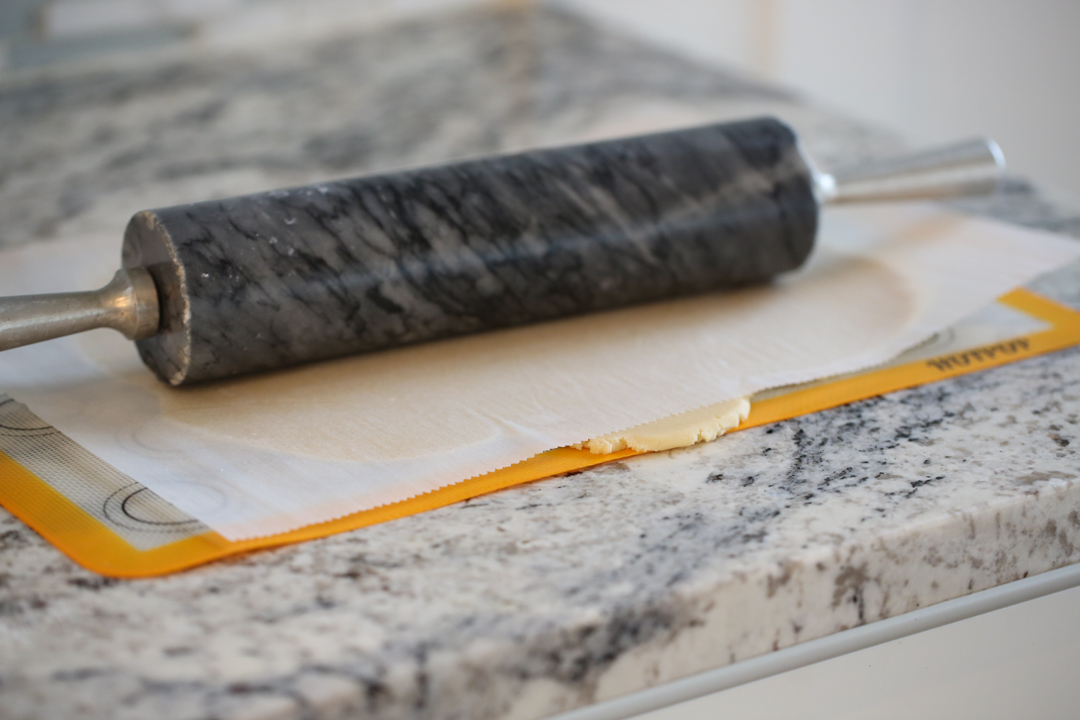
- Start by taking half (or all) of your dough and forming it into a rough ball and then flattening a little onto a silicone baking mat. If you don’t have a silicone baking mat, you can use parchment or plastic wrap but they tend to slide around the counter so it just takes a little more effort.
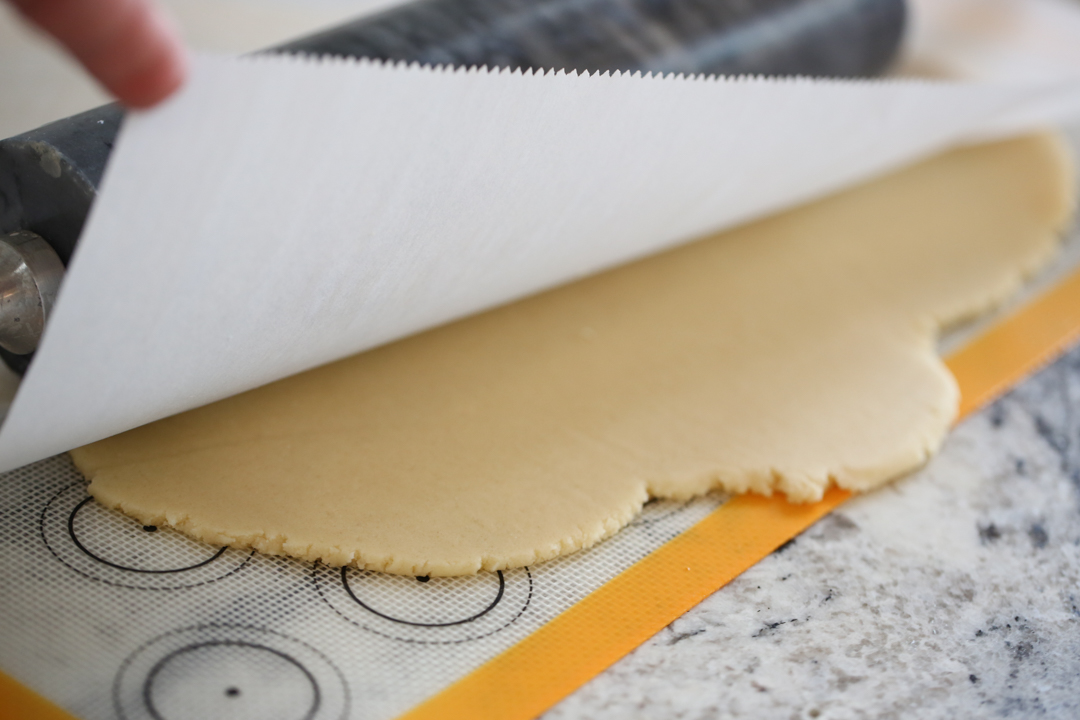
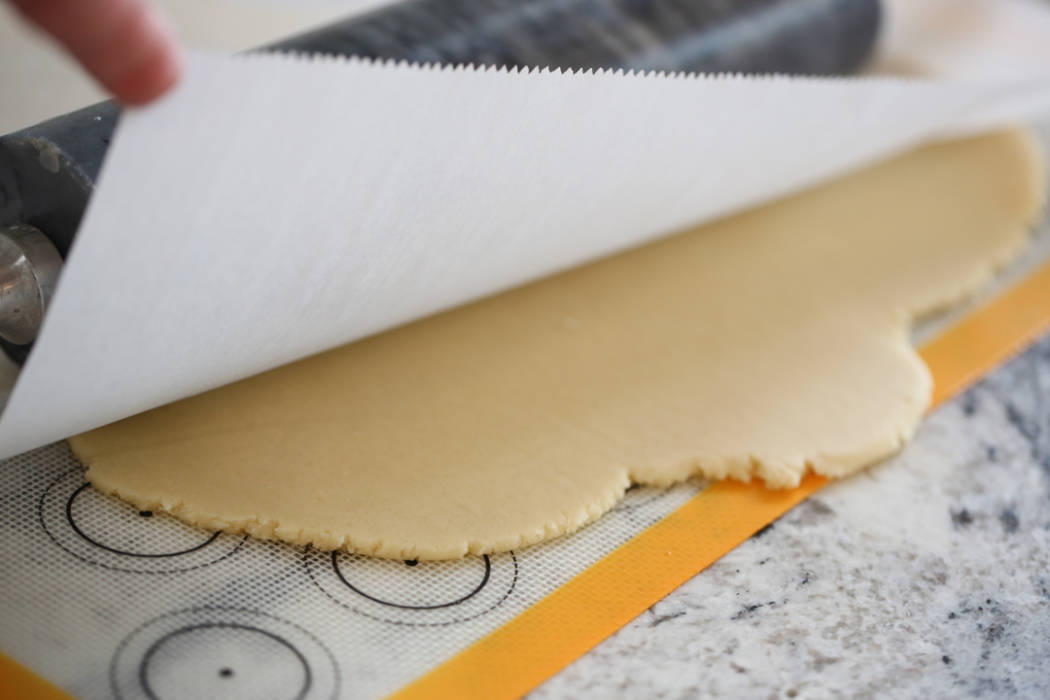
- Then place a piece of parchment paper (or plastic wrap) over your dough and use a rolling pin to roll out the dough between the baking mat and the parchment. This makes it so you can easily roll the dough with no flour needed, and nothing sticks to anything.
- What I do next is pick up my silicone baking mat and flip the whole “package” over, so the parchment is on the counter, the dough in the middle, and the baking mat on top. Peel off the baking mat and place your parchment and dough on a baking sheet that can now go in the fridge or freezer to chill. I put it on a baking sheet or directly onto a flat surface in the fridge or freezer.
Cut Your Shapes
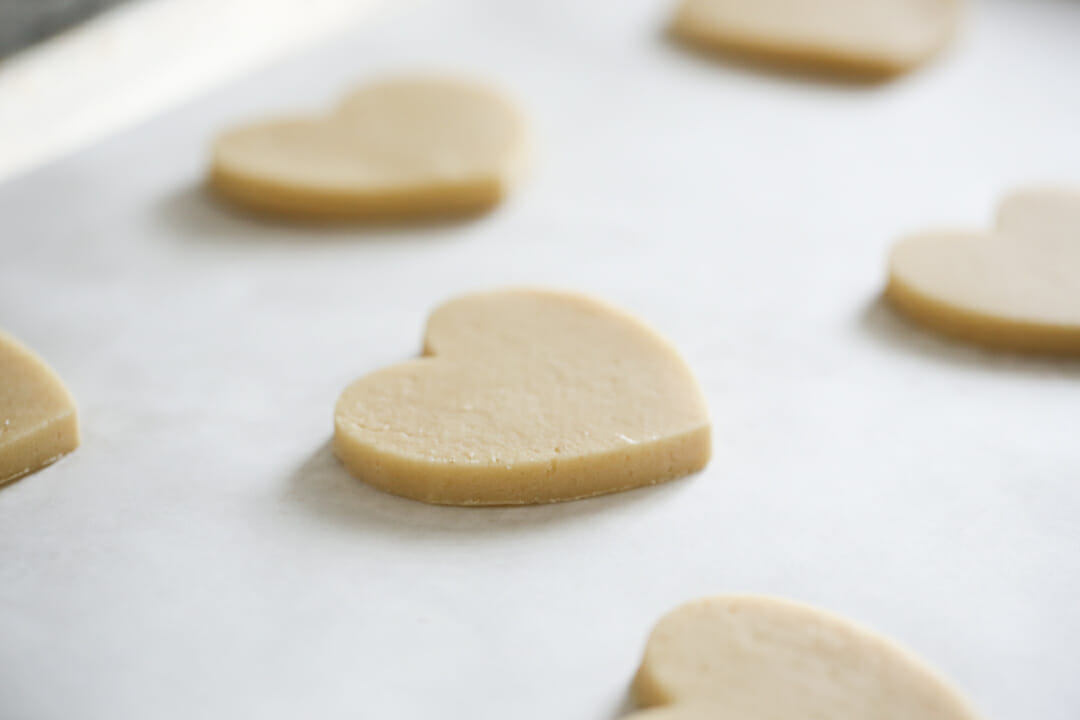
- This dough retains its shape incredibly well, just make sure it’s chilled. I like to place mine in the freezer for 15 minutes or so, but you can also place it in the fridge. If you’ve used my method of rolling the dough out first, it needs far less time to chill.
- Then cut out shapes and repeat the rolling process with the remaining dough. If you want super crisp edges on your finished baked cookies, you can even pull out your cutter again and re-cut when they are hot right out of the oven.
Bake
- The great thing about this recipe is that you can roll these cookies thick and under-bake them and they will be crazy soft and delicious. OR you can roll them thinner (1/4 inch or less) and bake until you see the edges start turning golden brown and they are perfectly buttery-crisp on the edges. Many recipes will simply be dry when baked till golden brown, but these are incredibly good- similar to a shortbread cookie that melts in your mouth. I love them both ways! Here’s a photo example of what you’d be looking for:
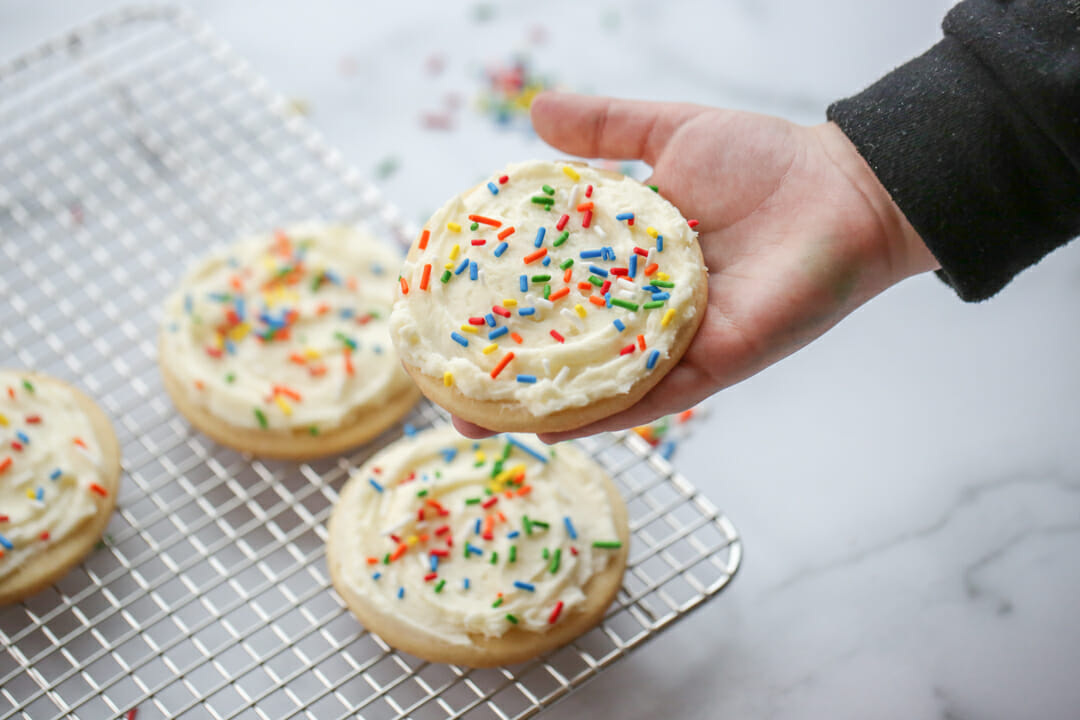
Frost: 3 Ideas!
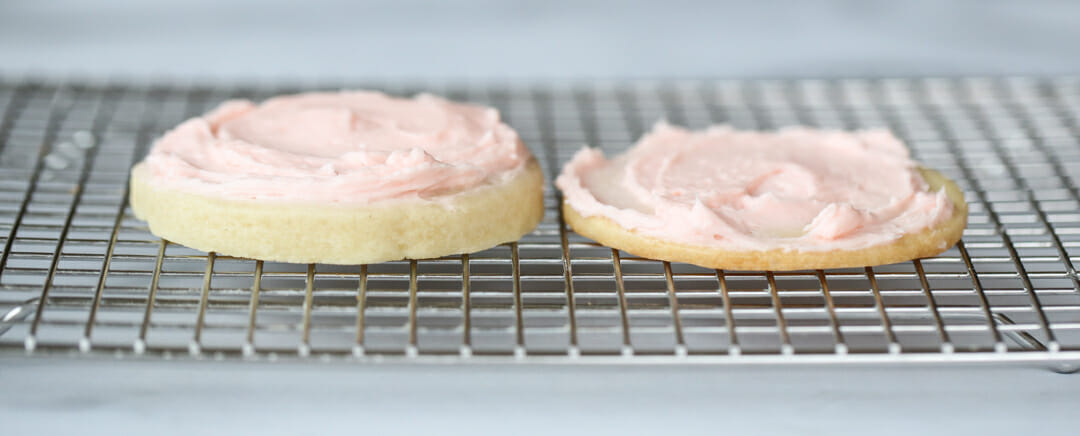
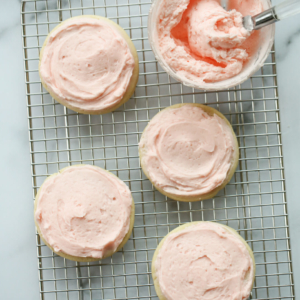
- For straight up flavor, we love our Classic Buttercream Frosting on sugar cookies. It’s the most traditional combination!
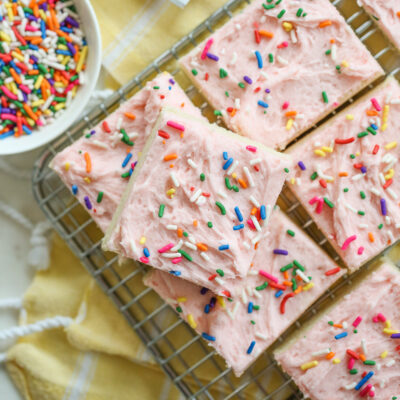
- If you’d like something a little more fun and artistic, try our popular Glace Icing and glaze.
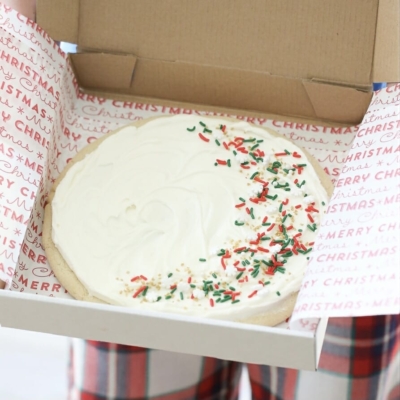
- And if you’d like to top them with royal icing, you can try my hand painted decorating technique!

Storing and Other Tips
- If I’m making a large amount of sugar cookies I will almost always make them ahead of time because sugar cookies freeze beautifully! Simply cool completely after baking and then layer between parchment in the freezer. When you are ready to frost, just pull them out of the freezer- you can even frost them while still frozen and let them come to room temperature on the counter. Alternately, you can simply place baked cookies in an airtight container and store at room temperature.
- Store completed cookies at room temperature in an airtight container. While technically safe to eat for a week or more, these are probably at their best if consumed within 3 days.
Frequently Asked Questions
For a consistent cookie, I do recommend cookie cutters. If you’d like a more rustic cookie, feel free to portion into balls and flatten into discs before baking (or make these Amish Sugar Cookies with Sour Cream Icing). If you’d like to cut them out but don’t own cookie cutters, an appropriately sized thin-edged drinking glass or a canning jar lid work in a pinch! Just dip in flour between cutting to help the dough not stick.
For cutout shapes, definitely—chilling firms the dough and helps cookies hold their outline during baking.
Yes! Sugar cookie dough freezes beautifully—either in a disk or scooped balls—for up to 3 months. Thaw slightly before rolling, or bake directly from the freezer with a minute or two added to the baking time.
Use royal icing or a simple powdered sugar glaze. Let the cookies cool completely before decorating to prevent the icing from running.

Sugar Cookies
Equipment
Ingredients
- 1 cup butter no substitutions, room temperature
- 1 cup granulated sugar
- 1 egg large or extra large
- 1 ½ teaspoons vanilla or almond extract
- 3 cups all purpose flour lightly spoon into measuring cup and level, do not scoop flour.
- 1 ½ teaspoon baking powder
- ½ teaspoon table salt
Instructions
- Note: I recommend a stand mixer for this recipe, if you have one. If not, a hand mixer will work just fine.
- Cream butter and sugar until light and fluffy- about 2 minutes, scraping the sides of the bowl occasionally. Add in egg and extract and mix to incorporate.
- In a separate bowl combine flour, baking powder and salt. Tip: Don't use your measuring cup to scoop up the flour. Preferably weigh it, or use a regular sized spoon and lightly spoon the flour into the cup and then level it off with a knife.
- Slowly add the flour mixture to the butter mixture and mix until completely combined. Your dough may at first look crumbly, but keep mixing and it will quickly turn into a soft cohesive dough.
- Refrigerate for at least one hour, OR use my method of pre-rolling as explained below.
- Preheat oven to 350℉ and line baking sheets with parchment paper.
- Roll chilled dough and cut into shapes.
- Bake for 8-12 minutes depending on the thickness of your cookies. Baking time is a personal preference. Watch for the edges and tops to be set. If you like your cookies crisp on the edges, roll them thinner and bake until just golden brown on the edges. If you want thick, soft cookies, remove from oven when cookies are puffed and set, but no browning is visible.
Suggested Pre-Rolling Method:
- Gather half (or all) of your dough and form into a large ball. Place on a silicone baking mat (or a large piece of plastic wrap) and press down gently. Place a sheet of parchment paper on top of your dough and then roll on top of the parchment into an even layer about 1/4 inch thick, or thicker if you desire thick cookies. Pick up your silicone mat and flip the entire thing over. Peel off silicone baking mat so you are left with your sheet of parchment with your rolled dough on top. Place this parchment-lined dough on a baking sheet and place in the fridge or freezer. Repeat with remaining dough. (See recipe tutorial for photos of this process.) Refrigerate for about 20 minutes or pop in the freezer for about 10. Continue with recipe as written.
Notes
- We recommend our well-loved buttercream frosting for this recipe.
- If I’m making a large amount of sugar cookies I will almost always make them ahead of time because sugar cookies freeze beautifully! Simply cool completely after baking and then layer between parchment in the freezer. When you are ready to frost, just pull them out of the freezer- you can even frost them while still frozen and let them come to room temperature on the counter. Alternately, you can simply place baked cookies in an airtight container and store at room temperature.
- Store completed cookies at room temperature in an airtight container. While technically safe to eat for a week or more, these are probably at their best if consumed within 3 days.


Questions & Reviews
Ok Kate,
I'm going to believe you and give it a chance…. not immediately as I am on a low carb diet to go to a wedding, but perhaps after:D Only 9 more days to go!!! I'm actually going to go ahead and blame you and your blog for my weight gain:D I have become addicted to it and the food is AMAZING!!! Darn you LOL…. If only I had a smidge of any sort of self control…hmmmm… perhaps they have some at that Christmas Tree Shop LOL.
Thanks for the tips. I will give it a try and hope for the amazingness to hit my little taste buds.
PS. I was just reading some more of these posts and there seems to be a severe silpat addiction on here LOL. I just came across a silpat wannabe that is tremendously cheaper, but seems to be the exact same thing at this place called "The Christmas Tree Shop". Now, I have no idea why it is called this, as it does not contain Christmas stuff, nor does it sell trees (unless it's Christmas time, but still no trees):/ It is like a glorified dollar store… cheap cheap cheap and TONS of wonderful things!!! Beware, you may find yourself wanting a cart midway through this place!! Or, bee line to the kitchen goods for your $6.99 "silpat" and GET OUT OF THERE!
Angela, this is seriously the best! And I'm not just saying that, haha! These are my hubby's FAVORITE cookies and he won't touch a dessert that doesn't have chocolate in it.
Here are my hints in a nutshell:
–Use the best butter and in no circumstances should you use margarine or shortening.
–Lightly spoon the flour into the measuring cups and level it with a knife. The biggest problem people have with this recipe is adding too much flour, which will make the dough crumbly and the cookies like hockey pucks.
–After you make the dough, instead of letting it chill first, roll it onto a sheet of parchment or plastic wrap and then top it with another layer of parchment or plastic wrap. It will chill much faster this way and it's so much easier for the cookies to hold their shape.
–If you like 'em soft, roll them about 1/4" thick and then bake them just until they're starting to get a little golden around the bottom edges.
–Don't leave out the almond extract!
That's it! Happy cookie baking! LEt us know how it goes!
Ok girls…. here is the big question LOL…. lemme back up first. I ONLY like those soft deliscious grocery store sugar cookies… you know the ones, they taste soooo good and it's like they aren't even fully cooked.. YUMMMOOOO! Every home cooked sugar cookie I have EVER eaten NEVER tastes like this. Here's the question: Is this another one?
Kate is right! Spooning makes all the difference! I have ruined alot of batches, just because I did not spoon the flour. Sounds weird, but true! Take the time and spoon the flour and you will have the most awesome, buttery sugar cookies ever! They are worth another try!!
DeVore Family–Spooning the flour into the measuring cup actually makes a HUGE difference in this recipe. I've gotten lazy a time or two with how big my spoonfuls were and the dough was significantly more crumbly. I guarantee that that was your problem. 🙂
Crumbly (like super crumbly) dough here too. I let the butter sit out beforehand. The egg was large, I didnt hand scoop flour into the cup but I cant imagine it would make that much of a difference, I had to add like 1/4 cup of milk… so weird!
I am so glad I found this blog! I followed the directions exactly. I did scoop my flour before I read the comments on crumbly dough so I was worried, but it turned out okay! I used my stand mixer with very soft butter, but I think the key is room temp softened butter, don't microwave your butter!
All I have so far is the dough, but it's amazing. I can't wait to bake the cookies tomorrow.
Do you normally bake with unsalted butter? I used regular butter and the dough is slightly salty, but I am sure with icing they will be perfect. My name is Sara, and I am also a sugar cookie snob!
The frosting I always use for frosting my sugar cookies is about 3/4 stick real butter, melted; 3-4 cups powdered sugar; 3-4 tablespoons milk; and 1-2 teaspoons vanilla (or whatever) extract. I never measure anything either! But I think it's important to melt the butter; I've tried it without melting the butter and I don't like it as well. My sugar cookie recipe is almost exactly like this one, except for two changes: It has 2 tsp cream of tartar in it, and it has 2 extra eggs (3 total.) Otherwise everything else is exactly the same. I wonder what the extra eggs do? I love my sugar cookie recipe, but I might try this one next time just to see how they're different!
While I have yet to bake these cookies, I have just made the dough, twice. The first batch came out crumbly, so I scoured the comments and discovered that it was most likely due to me scooping (oops!) the flour instead of spooning it. I also softened the butter even more before creaming it. The second batch of dough came out perfect! Very soft, very smooth, very easy to press into disks to put in the fridge. So there you have it, the method of four measure makes a HUGE difference! Can't wait to bake these in the morning!