Valentines day is just around the corner and if you need something that is 100% guaranteed to put a smile on someone’s face- I have it right here! These little Sweetie Pies Pops are genuinely adorable. They’re also one of those things that look like tons of work and effort, but in reality they’re pretty quick and easy! So go ahead and impress people with your skills. Or just sit in a dark room and eat them all yourself in one sitting. We won’t tell, I swear. I have tons of variations shown below, as well as some options for fillings so if you really wanted to, you could make these super fast with store bought filling and dough.

Ingredients Needed
This is just a preview of ingredients and method, keep scrolling for full printable recipe.
- Pie crust dough – You can make your own using this Light and Flaky Pie Crust Recipe, or use sore bought refrigerated pie crust dough.
- Filling of choice
- Apple pie filling
- tart green apple
- cinnamon
- brown sugar
- all-purpose flour
- lemon juice
- butter
- Canned pie filling – Any flavor, but small fruit works best. I used raspberry.
- Chocolate chips – If desired.
- Apple pie filling
- Topping/ finish of choice
- Course sanding sugar and butter
- Glaze
- powdered sugar
- butter
- milk
- 6-inch lollipop sticks – These are available at craft stores like Hobby Lobby or Michaels, near the cake and candy making items. You can also order them online.
- Cookie cutter – I used a heart shape. You’ll want to keep them fairly small, otherwise the lollipop sticks won’t be able to hold them up. A 2-inch heart worked perfectly for me.
How to Make Sweetie Pie Pops
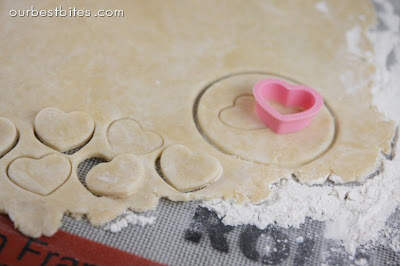
- Roll your dough out on a floured work surface and cut out desired shapes.
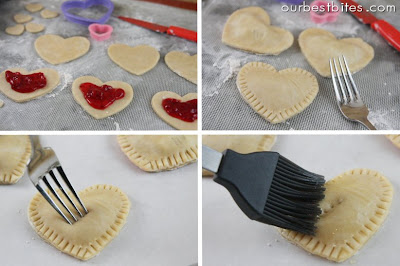
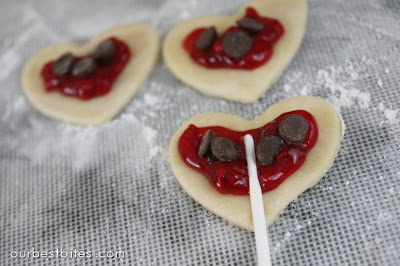
- Place a small amount of your chosen filling in the center of the heart, staying away from the edges to prevent the filling from seeping out during baking.
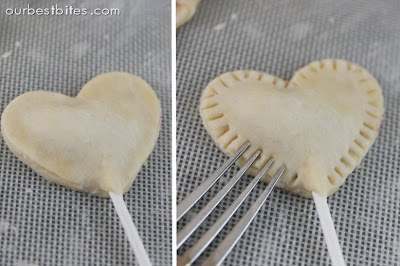
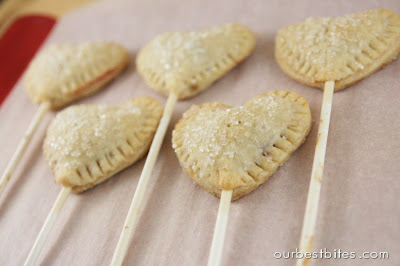
- Press a lollipop stick gently into the dough (make sure the stick reaches well into the pop, not just at the bottom), run a wet finger along the edge and top with another cut out piece of dough. Seal with a fork.
- If desired, brush with butter and sprinkle with sanding sugar. Poke a little hole in each pie for steam to escape and pop them in the oven. Allow to cool completely before packaging.
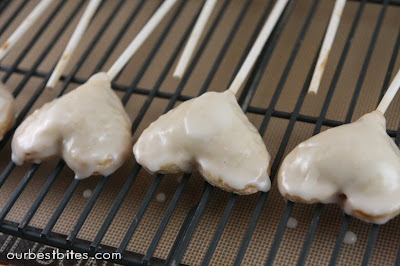
- If you didn’t finish your pops with butter and sanding sugar, you can whisk up a quick glaze of powdered sugar, milk, and milk. Spoon this on while the pies are still warm. Allow to cool completely before packaging.
Storing and Other Tips
- Store finished pies in their own packages or together in an airtight container at room temp. Enjoy within 1-2 days for best results.
- Freeze individual pies, wrapped in plastic wrap and then in a freezer-safe container for up to 2-3 months. Thaw at room temperature.
- You don’t have to use lollipop sticks. These make adorable little hand pies as well!
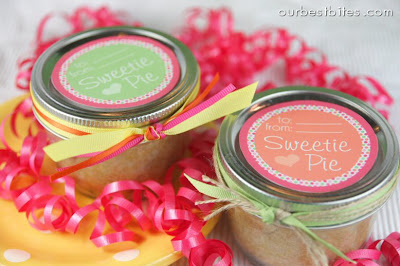
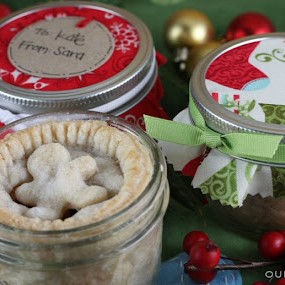
- If you love our Pies-In-a-Jar, those are super cute topped with pieces of heart dough as well!
Downloadable Labels
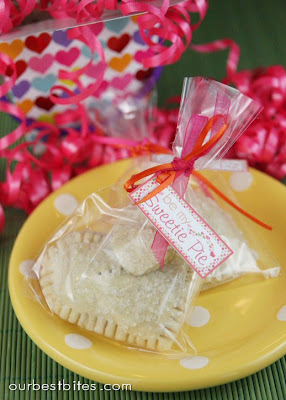
- CLICK HERE for the “Be My Sweetie Pie” Valentine Labels
- CLICK HERE for the “Sweetie Pie” Pie in a Jar Labels {4 different colors!}


Sweetie Pie Pops
These cute little pie pops are a quick and easy treat to gift to those you love!
Servings
Equipment
- 6-inch lollipop sticks
- cookie cutters
- fork for sealing the pies
Ingredients
For the Pie Crust and Sealing the Pies
- 1 recipe pie crust or store bought pie crust dough
- small bowl of water
Apple Pie Filling – Combine All Ingredients
- 1 medium tart green apple peeled and grated
- ¼ tsp ground cinnamon
- 1 tablespoon packed brown sugar
- 1 tablespoon flour
- ½ tablespoon lemon juice
- 1 tablespoon cold butter grated
Other Filling Option
- canned pie filling
Glaze
- ½ cup powdered sugar
- 1 tablespoon butter melted
- 1-3 tsp milk
Other Finishing Option
- 2 tablespoons butter melted
- Course sugar or sprinkles for top
Instructions
- Preheat oven to 375℉. Line a baking sheet with parchment or a silicone baking mat if desired.
- Roll out pie dough on a floured surface about 1/8 inch thick. Cut out heart shapes (or other shape of your choosing) and place them on your baking sheet.
- Place about 1-2 tsp of filling on one cut out, keeping it at least 1/4 inch away from the edges. Place 6 inch lollipop stick in center of shape, with the top of the stick near the top of the shape. Wet your finger in a small bowl of water and wet the edge of the pie dough shape. Wet the edges of a 2nd pie dough shape (one without filling) and place on top of the other. Press together gently with your fingers to seal the pieces together. Use a fork to crimp edges, being careful to seal edges around the stick. Poke a fork into top of pie one time so steam can vent.
- If desired, brush top of pie in melted butter and sprinkle with sugar. (Or leave plain to glaze after.)
- Bake pies for 15-20 minutes until barely golden brown. Cool for a few minutes and then transfer to a cooling rack. If glazing, mix up all glaze ingredients and gently brush or spoon glaze over pies while still warm. Cool completely before packaging. If desired, place in cellophane bags and tie with ribbons and labels.
Notes
- Store finished pies in their own packages or together in an airtight container at room temp. Enjoy within 1-2 days for best results.
- Freeze individual pies, wrapped in plastic wrap and then in a freezer-safe container for up to 2-3 months. Thaw at room temperature.
- You don’t have to use lollipop sticks. These make adorable little hand pies as well!
- If you love our Pies-In-a-Jar, those are super cute topped with pieces of heart dough as well!
Nutrition
Serving: 1Apple Pie Sweetie Pop with Glaze, Calories: 86kcal, Carbohydrates: 12g, Protein: 1g, Fat: 4g, Saturated Fat: 2g, Polyunsaturated Fat: 0.4g, Monounsaturated Fat: 2g, Trans Fat: 0.1g, Cholesterol: 4mg, Sodium: 55mg, Potassium: 26mg, Fiber: 1g, Sugar: 6g, Vitamin A: 51IU, Vitamin C: 1mg, Calcium: 5mg, Iron: 0.3mg
Calories: 86kcal
Cost: $7
Did You Make This Recipe?Snap a picture, and hashtag it #ourbestbites. We love to see your creations on our Instagram @ourbestbites!


Questions & Reviews
Hi – I’m trying to solve my problem. I love making Pie Pops – I generally make them for family and friends. My problem is I would love to make these a day or two before but my crust is great the day I make them but then gets to soft as time goes on. How can I prevent that – is there anything you can do to keep your crust – crispy/firm for a couple days? Any help would be appreciated.
Just made these and they didn’t turn out. They taste like pie crust. Anyone know what I could have possibly done wrong? Try some with only a little filling and some with filling gushing out of them…..
Great idea! I’m definitely making these as my 1st baking lesson and for the girl I’m in love with. By the way, does anyone know what’s the name of the blue vase/bucket called? I’m trying to find it, wanna make the exact things like the creator did 🙂
Beautiful idear. I love it <3
Congrats on getting pinned by Martha Stewart! Love this idea. 🙂
Great! I made them for my sister’s daughter! She apparently gave them to her boyfriend! I gave them to my kids!
Making the heart-shaped applie pie pops right now and my house smells amazing! Even made the glaze, can’t wait!!!
Your blog has given me courage to attempt things I probably never would have, like pie crust from scratch! Who knew it could be so easy???! I made the mini hand pies today for a v-day treat for my family (including your pie crust recipe). I can’t wait to try the finished product!!
Love these so much! I cheated a little and used a chunky homemade (not by me though;) apple butter and added a little caramel. They were absolutely perfect for our V-day celebration!
I just made a batch of hand pies for school (never mind that I’m in graduate school…) and everybody LOVED them! I love your blog <3