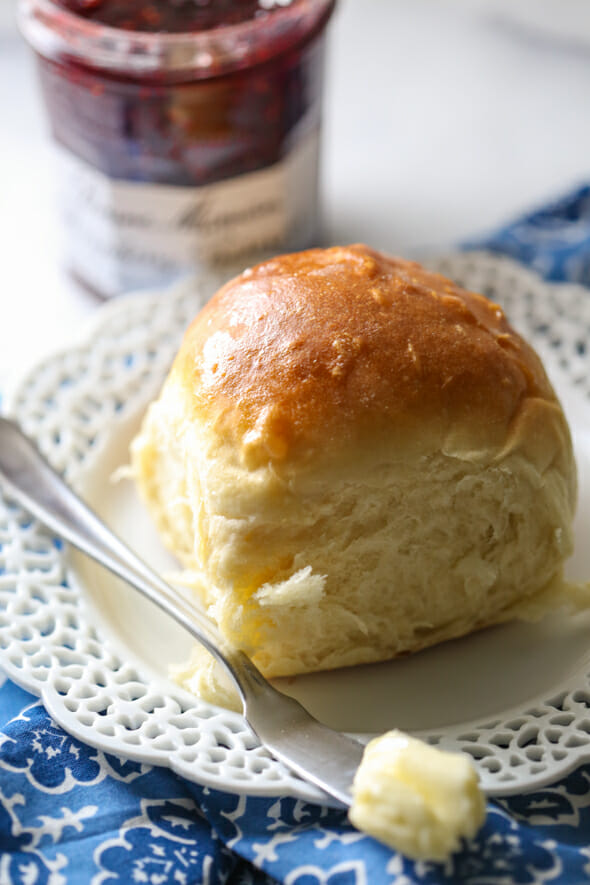
Is there anything better than warm bread smeared with melty butter? Thousands of people across the country have fallen in love with these dinner rolls, and for good reason- they truly are THE BEST! They are beginner friendly, so if you’re nervous about working with yeast, don’t be. This recipe makes two full pans of rolls and will definitely fill a standard Kitchenaid mixer to the absolute brim, so feel free to cut it in half if you are feeding a smaller crowd.
Ingredients Needed
- Milk – Whole milk is best. You can use 2% in a pinch, but avoid 1% or skim.
- Active Dry Yeast – This recipe calls for active dry yeast. I have not tried using rapid rise yeast, where the first rise is replaced by a 10 minute rest of the dough. If you feel like experimenting feel free to give it a try, just know it hasn’t been tested for this particular recipe. If you’re nervous about working with yeast, check out this post on tips for working with yeast dough.
- Eggs – You’ll notice the recipe calls for beaten eggs. Why should you beat your eggs first? Same reason you should combine your dry ingredients before adding them to moist ingredients when making cookies and cakes–it ensures everything is well-mixed and can be evenly-distributed through your dough or batter. If you add the whole eggs, your dough may not be as consistent.
- Sugar
- Butter
- Salt
- Warm water
- All-purpose flour
- Eggs
How to Make the World’s Best Dinner Rolls
- Combine milk, sugar, butter, and salt in a medium saucepan. Heat over medium heat until butter melts. It’s salty. It’s sweet. Yum.
- Remove from heat. Allow to cool to lukewarm. I usually rub some ice cubes along the sides of the pan or pop the entire pan in a sink full of ice cubes to cool the mixture down because this step can take forever. This step is really important because if the mixture is too hot, it will kill the yeast.
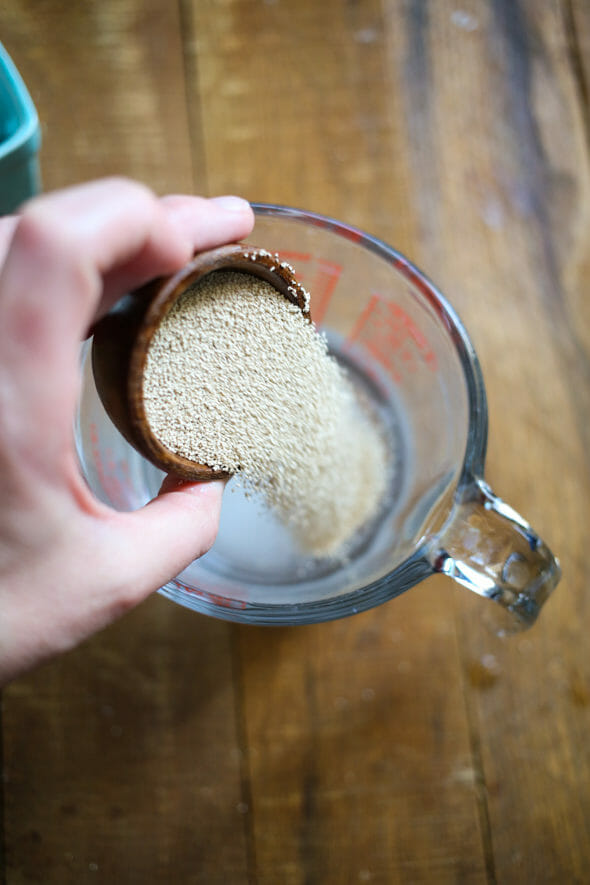
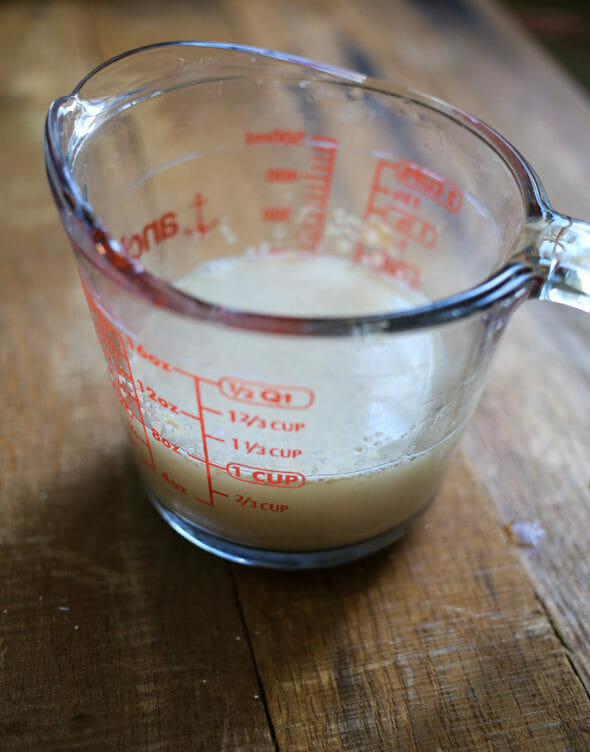
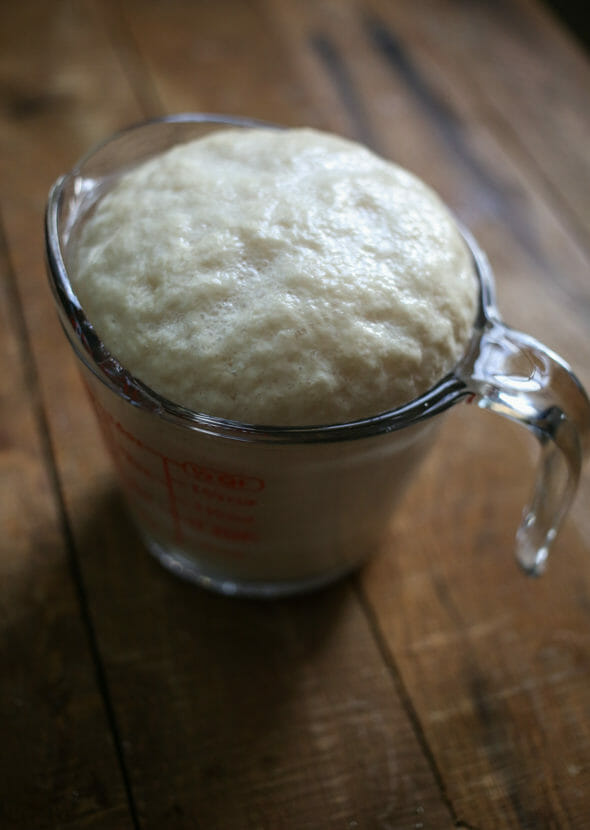
- While the milk mixture is cooling, dissolve the yeast and sugar in warm water. Let stand about 10 minutes or until the yeast is very bubbly and the mixture has risen significantly. If the yeast hasn’t bubbled, you’ll need to repeat this step–moving on with yeast that hasn’t been activated properly will only end in heartache.
- In a large mixing bowl, combine 3 cups of flour and milk mixture. Beat on low for 30 seconds, scraping sides of bowl constantly. Add yeast mixture and beat on high for 3 minutes.
- Crack your eggs and give them a good whisking (this little heart whisk is one of my favorite tools for jobs like this). Add to dough mixture and mix until well combined.
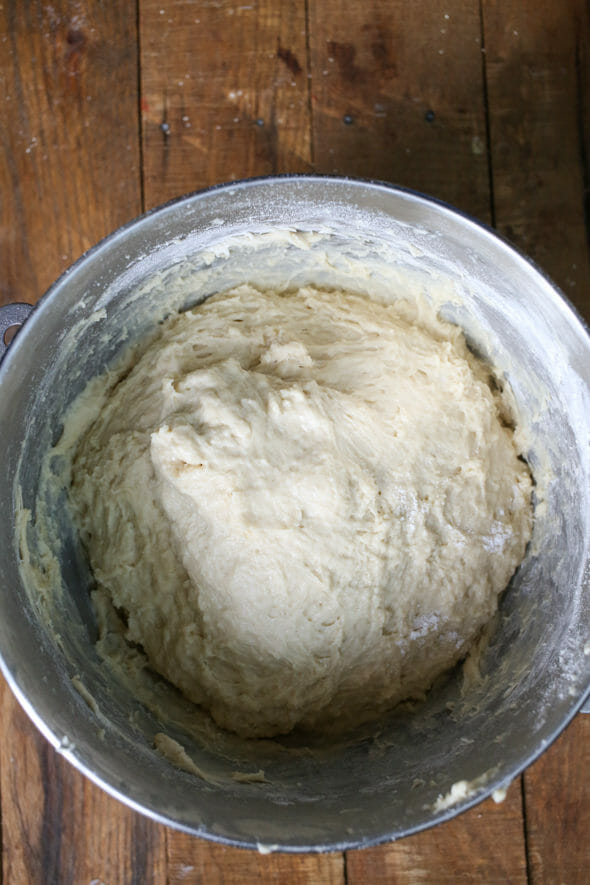
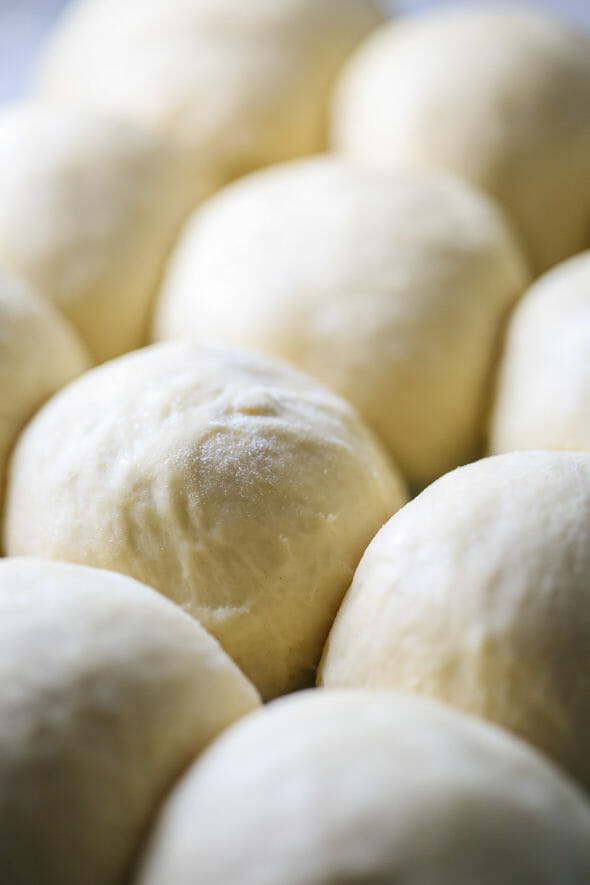
- Stir in as much remaining flour as needed to make a soft dough. This dough should be very soft–it will be coming away from the sides of the bowl, but it will still stick to your finger when you touch it. Don’t worry, it will firm up during the rising process. Part of what makes these rolls so good is that they’re so soft and light; if you add too much flour, they will be heavy and dense.
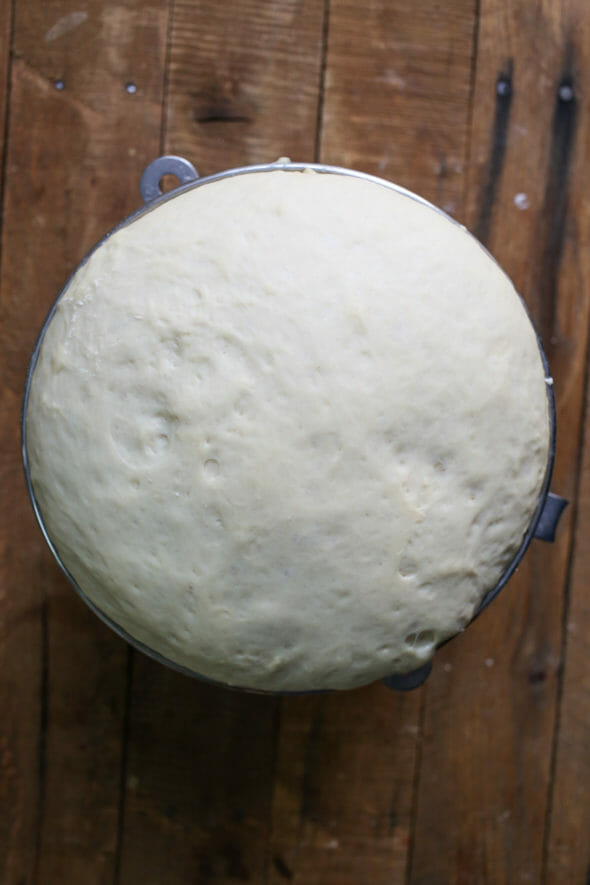
- Place the bowl in a warm place and cover with a clean towel; allow to rise 1 hour.
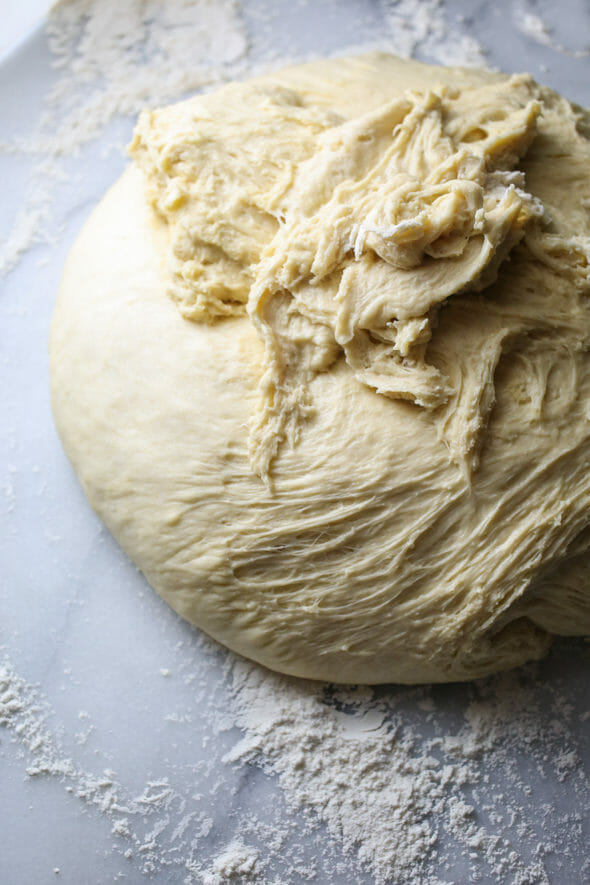
- Punch down dough. Lightly flour your work surface and turn dough out onto surface. Divide in half.
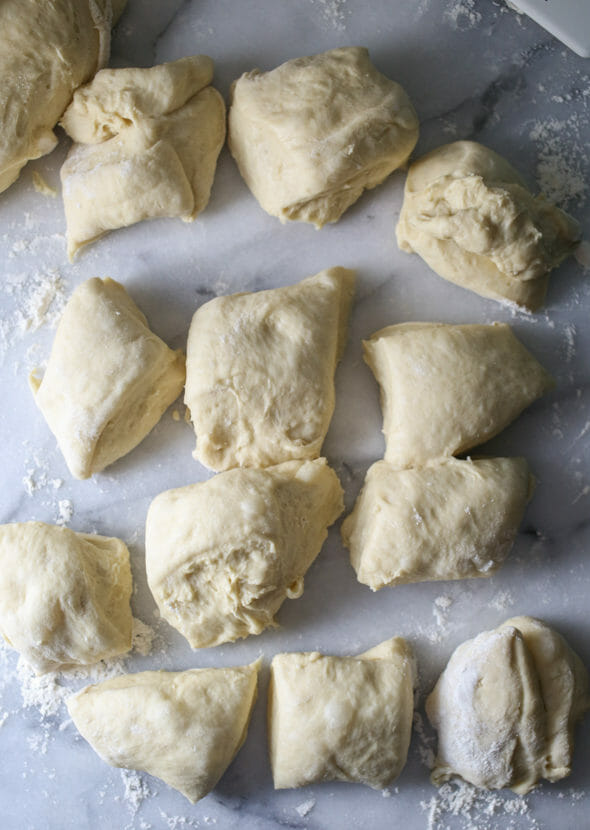
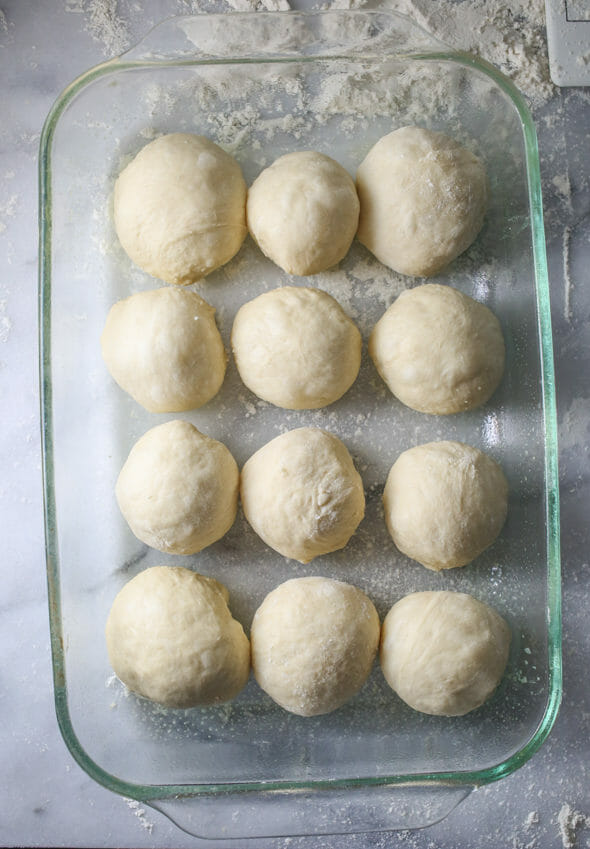
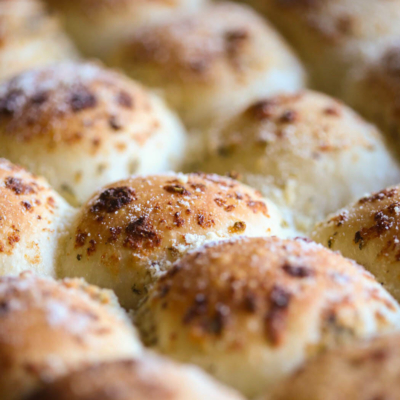
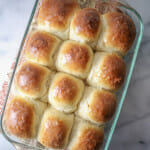
- Spray 2 9×13 glass pans with cooking spray. Roll first portion of dough into a rectangle and then cut it into 12 equal-sized pieces. I like to use a pizza cutter because it has a blade on each side (a plastic bowl scraper is also fantastic), so it cuts right through dough without sticking to the blade. This dough should be very easy to work with, almost like playdough. Shape each piece into a ball and place in prepared pan. Repeat with remaining dough in the second pan.
- Cover with a clean cloth and allow to rise in a warm place for about 30 minutes. When dough has about 15-20 minutes to go (depending on your oven), preheat oven to 375°F.
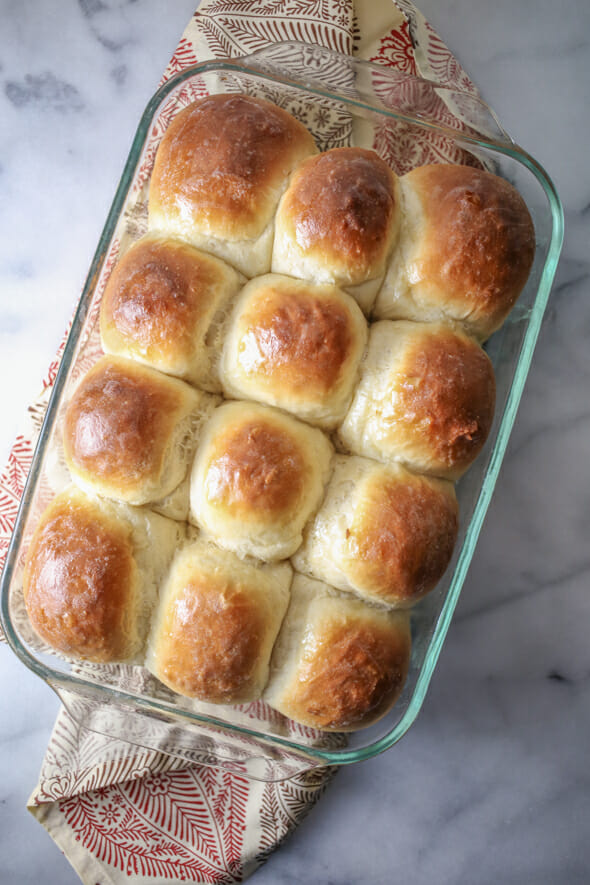
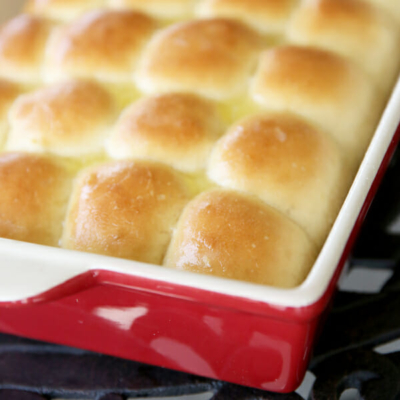
- Bake for 15-18 minutes or until golden-brown. When done, remove from oven. Rub a stick of cold butter over the tops of the rolls. You must now eat one. Now. While it’s hot. Then pop the rest into a bowl and no one will ever know that you cheated.
Storing and Other Tips
- Homemade rolls are best eaten the same day as baking. If you do need to make them a day ahead of time, make sure they are cooled completely before storing in an airtight container.
- For best results, consume rolls within 1-2 days.
- P.S. Using this cinnamon roll filling or these cinnamon or orange roll filling, this dough makes fabulous cinnamon or orange rolls. Just bake at 375°F for 15-20 minutes or until golden brown.
Frequently Asked Questions
While I do think rolls are best fresh and hot the day you make them, you can in fact prepare these ahead of time. Make dough through the roll-shaping step. Place your shaped rolls on parchment paper in a single layer and place in freezer. Once frozen solid you can place them in a bag together. When ready to cook, leave at room temperature, lightly covered with a piece of plastic wrap sprayed with non-stick spray. They will need to defrost and then also have time to rise (think store-bought Rhodes rolls) so you will want to leave plenty of time for that (I’m guessing 3-5 hours). You can also cook the rolls, cool completely, and then freeze immediately.
There could be a few culprits here. If your yeast is old or not activated properly, the dough will fail to rise and create air pockets, leaving the final product flat and dense. Too much flour will do the same thing. Make sure your yeast is fresh and active and refer to the pictures above to see how your dough should look when it has the perfect amount of flour! Lastly, don’t rush the rise. If your house isn’t very warm, it will take longer for your rolls to proof and be ready to bake!
In theory, this would work ok, but I have not personally tried that method with this recipe. If you feel like trying it out, give it a go! If you’re looking for a recipe designed for use with rapid rise yeast, try out these One-Hour Dinner Rolls.
World’s Best Dinner Rolls
Equipment
Ingredients
- 2 cups whole milk if you’re in a pinch, you can use 2%, but whole is best. Don’t use 1% or skim.
- ½ cup + 1 tablespoon sugar divided
- ⅓ cup butter 5 ⅓ tablespoons
- 2 teaspoons kosher salt
- 2 packages active dry yeast or 4 ½ teaspoons
- ⅔ cup warm water 105-115℉
- 8-9 cups all-purpose flour divided
- 3 beaten eggs
Instructions
- Combine milk, ½ cup sugar, butter, and salt in a medium saucepan. Heat over medium heat until butter melts. Remove from heat. Allow to cool to lukewarm. I usually rub some ice cubes along the sides of the pan or pop the entire pan in a sink full of ice cubes to cool the mixture down because this step can take forever. This step is really important because if the mixture is too hot, it will kill the yeast.
- While the milk mixture is cooling, dissolve the yeast and 1 tablespoon sugar in warm water. Let stand about 10 minutes. If the yeast hasn’t bubbled, you’ll need to repeat this step–moving on with yeast that hasn’t been activated properly will only end in heartache.
- In a large mixing bowl, combine 3 cups flour and milk mixture. Beat on low for 30 seconds, scraping sides of bowl constantly. Add yeast mixture and beat on high for 3 minutes.
- Add beaten eggs.
- Stir in as much remaining flour as needed to make a soft dough, about 5 – 6 cups. This dough should be very soft–it will be coming away from the sides of the bowl, but it will still stick to your finger when you touch it. Don’t worry, it will firm up during the rising process. Part of what makes these rolls so good is that they’re so soft and light; if you add too much flour, they will be heavy and dense. Place the bowl in a warm place and cover with a clean towel; allow to rise 1 hour.
- Punch down dough. Lightly flour your work surface and turn dough out onto surface. Divide in half.
- Spray two 9×13 glass pans with cooking spray. Roll first portion of dough into a rectangle and then cut it into 12 equal-sized pieces. I like to use a pizza cutter because it has a blade on each side, so it cuts right through dough without sticking to the blade. This dough should be very easy to work with, almost like playdough. Shape each piece into a ball and place in prepared pan. Repeat with remaining dough in the second pan.
- Cover with a clean cloth and allow to rise in a warm place for about 30 minutes. When dough has about 15-20 minutes to go (depending on your oven), preheat oven to 375℉.
- Bake for 15-18 minutes or until golden-brown.
- When done, remove from oven. Rub a stick of cold butter over the tops of the rolls.
Notes
- MAKING AHEAD: We have received tons of comments and emails asking about making these rolls ahead, or freezing the dough, etc. Note that we have never before tried any of these methods so we can’t give you an answer for sure. You can try freezing the dough after they have been shaped (but before the second rise) and you can certainly try cooking and cooling completely and then freezing. Just keep in mind we only make these fresh and eat them hot from the pan so that’s all the info we can give you.
- For best results, consume rolls within 1-2 days.
- P.S. Using this cinnamon roll filling or these cinnamon or orange roll filling, this dough makes fabulous cinnamon or orange rolls. Just bake at 375°F for 15-20 minutes or until golden brown.


Questions & Reviews
Can the recipe be successfully halved-don’t need 24 rolls for upcoming Easter dinner ?
Sure! Try one whole egg and an egg yolk when dividing the eggs. 🙂
I made these for Thanksgiving and everyone loved them! Very easy to make in the KitchenAid. I will be making these again!
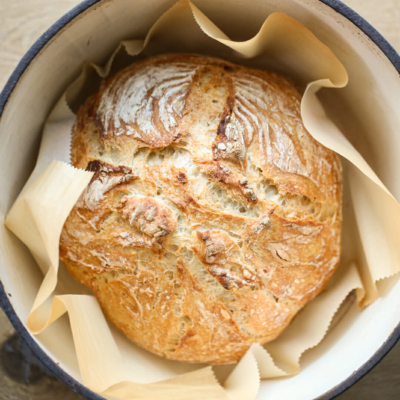
I just made a batch of these, they’re amazing! Just for anyone wondering, they made an amazing loaf of bread and sub rolls as well! Thanks for the recipe! Pretty much fool proof!
Just a head’s up on making these ahead of time. I’ve used this method a couple times and it works great to cut down on prep time the day you actually need them. Once I shape the dough and put it in the pan, I cover with saran wrap and place in the fridge. They will rise a bit overnight, but I still do a full second rise when I’m ready to bake them. I turn on the oven for about 1 minute to get a little warmth in there, then turn it off, remove the plastic wrap from the pans and place them in the oven to rise for 20 minutes. I take them out around the 20 minute mark so that I can start preheating the oven while they complete the last 10 minutes of rising.
This has been a lifesaver to be able to prep everything the day before, during my son’s naptime, and not have to stress about making rolls in the morning for a gathering at lunchtime!
Thanks for this tip! Totally doing this this week!
So, let me tell you about these rolls. They really are the World’s Best Dinner Rolls. It is a very forgiving recipe too. I was making them yesterday and someone was talking to me. Obviously, I can’t talk and cook at the same time because I forgot to put the salt in! Oh, what to do. I got the dough back out of the bowl it was rising in and worked in the salt. I had no idea whether that would work or not, but I didn’t want to give up on them just yet. Also, I had to substitute the whole milk as I didn’t have any. They turned out so very perfect and delicious despite all I had to do to them. That’s why I say it is a very forgiving recipe. I think I need to add I’ve made these rolls for several years and they are always perfect.
These were very delicious, thanks! I did actually use 1% milk, because that’s all I had, and they still turned out lovely! What exactly would have been the difference?
Can these be baked in anything other that a glass baking dish?
You can bake them in anything you like 🙂
can these be baked in anything other than a glass baking dish?
Yep!! I baked 4 dozen in disposable aluminum pans and they came out beautifully!
Made these tonight (1/2’d the recipe). I’ve made rolls maybe twice before in my entire life. These turned out soooo good!! This recipe is a keeper!
I made these today, and they were amazing!!! Thanks, and Happy Thanksgiving!! 🙂